If you are not sure if your email settings are working or not, you can send a test email via the PowerShell command.
Open PowerShell: command
note: From email is an email with an issue or one you trying to set up and To email can be any email address where you can check to see if you get the test email.
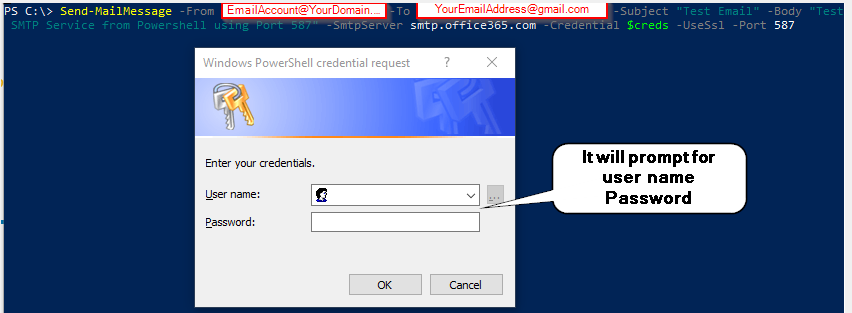
Send-MailMessage -From EmailAccount@YourDomain.com -To YourEmailAddress@gmail.com -Subject “Test Email” -Body “Test SMTP Service from Powershell using Port 587” -SmtpServer smtp.office365.com -Credential $creds -UseSsl -Port 587
It will prompt you to enter your username and password
If everything goes well, you will not see anything, otherwise, it will give you an error message
If you have a typo or forget to put -From or -To you might get errors, something like this:
Send-MailMessage : A positional parameter cannot be found that accepts argument
How to setup Hyper-V on a Windows server 2019. It’s a very easy process for basic setup, it can be very complicated if you want to do isolation, VLAN, and NIC teaming. This post will start basic, Hyper-V host running Windows server 2019, it can be a standard or datacenter if you want to run many VMs and some advanced features. Let’s get started
Once you have windows server 2019 install and updated, we can install Hyper-V a couple of ways via GUI or PowerShell
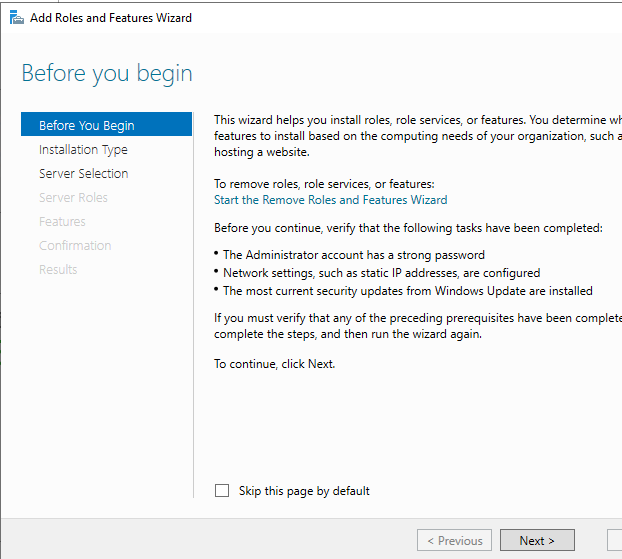
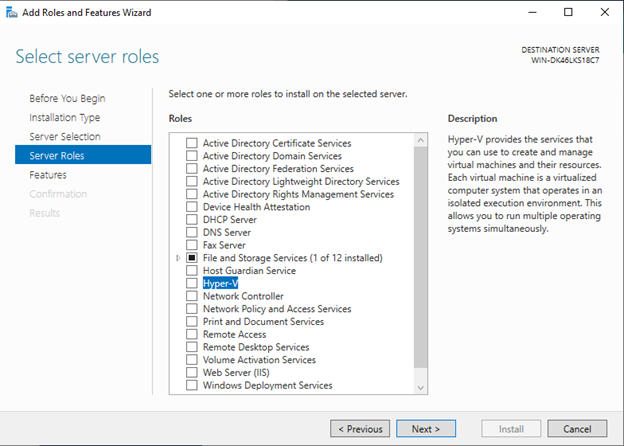
open up Server Manager, then click Manage>Add Roles and Feature
Click Next:
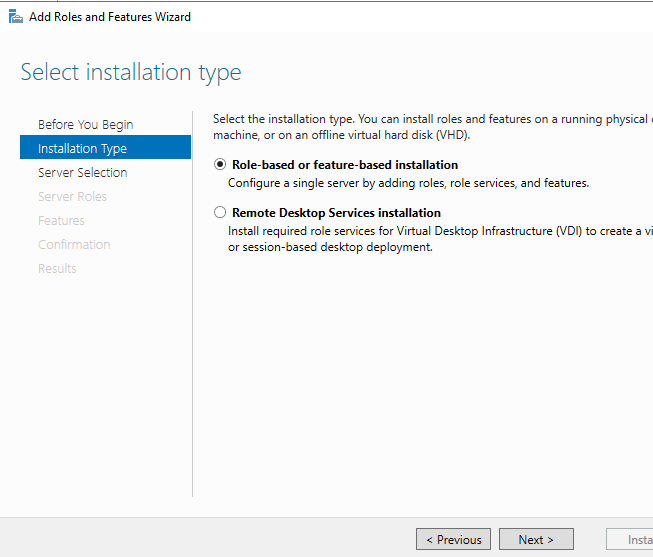
Select Role-based, then click Next
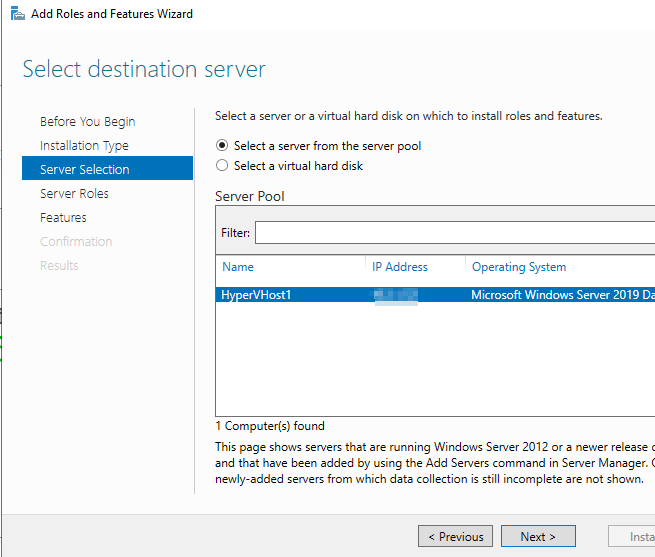
The select server you want to install Hyper-V, click Next
Then select the Hyper-V check box.
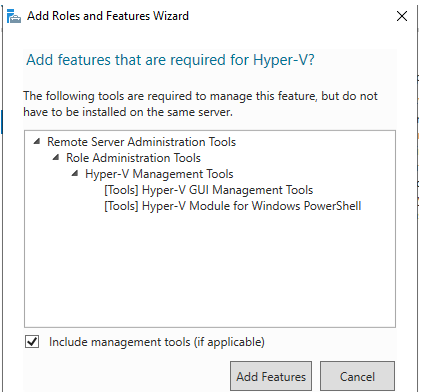
You will get an option to include management tools, which most likely you want so click add features
Then click Next
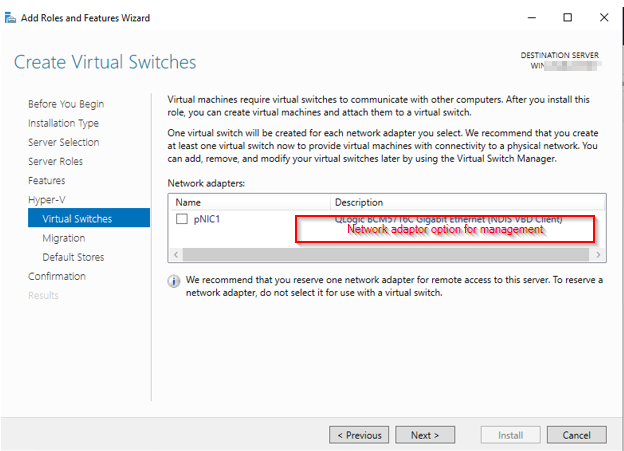
If you only have one Network card then select the box to share with Hyper-V host/VM’s traffic, otherwise leave it unchecked.
Then you should see confirm installation, if everything is good, click Install, otherwise, click previous to make a change or click Cancel to exit out without making changes.
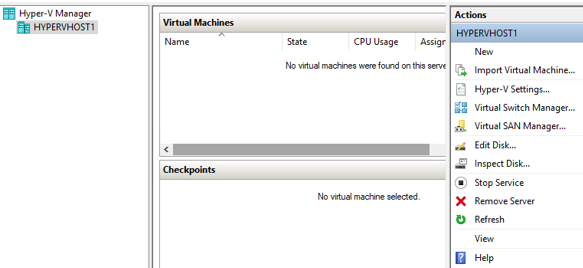
Once the installation is complete, the server needs to restart for Hyper-V settings to apply
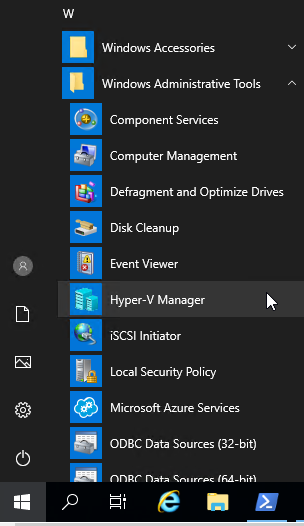
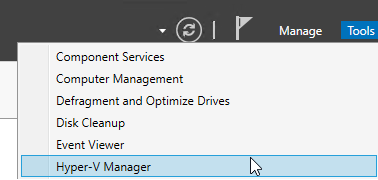
You will find Hyper-V Manager under Start>Windows Administrative Tools
Or from the server manager under Tools>Hyper-V Manager
Remote Desktop is very common still for many companies remote users to use, not all users needed since they most likely use VPN to get access to apps or just using the cloud-based. PowerShell is a new way to make changes to your remote computer lot easier than opening GUI and waiting for it to load and make changes. If you are admin of the network, it’s very easy to make changes and get the status of remote computer settings. Here in this post will do the Remote Desktop enable using PowerShell, let’s get started it
Computer or server must meet the following requirements:
The WinRM service should be started
You must have administrator permissions on the remote device
Firewall rule should be set to allow RDP connection default port 3389 if you have changed the default port make sure to add to your firewall rule
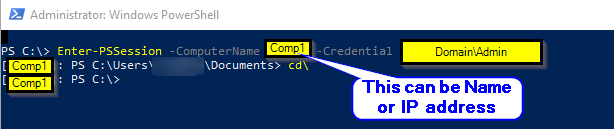
To start the session from your Windows 10 computer or
Windows server, open PowerShell with
Administrator
Command: Enter-PSSession -ComputerName YourRemoteComputerName or IP address -Credential domain\administrator
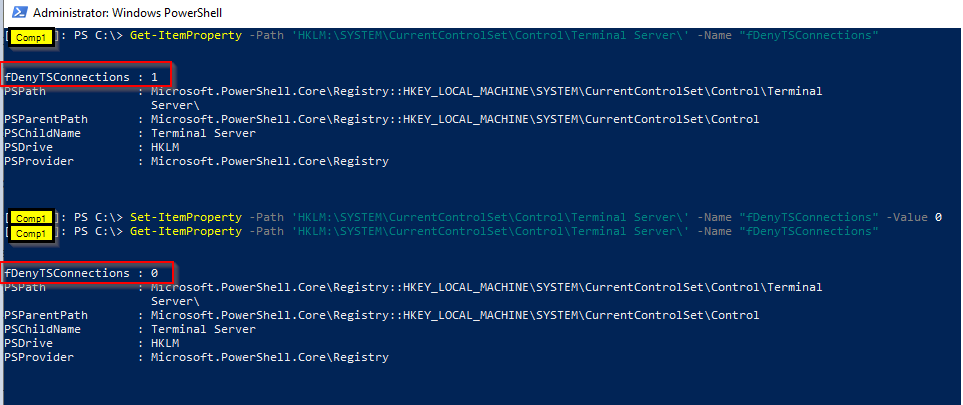
Once you are connected to a remote computer or server, you can run the following command to get current status:
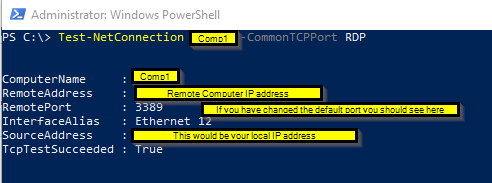
You should also make sure that you have only secured RDP authentication (NLA – Network Level Authentication) to check run the command: you should see 1
Test-NetConnection ComputerName or IP address -CommonTCPPort RDP
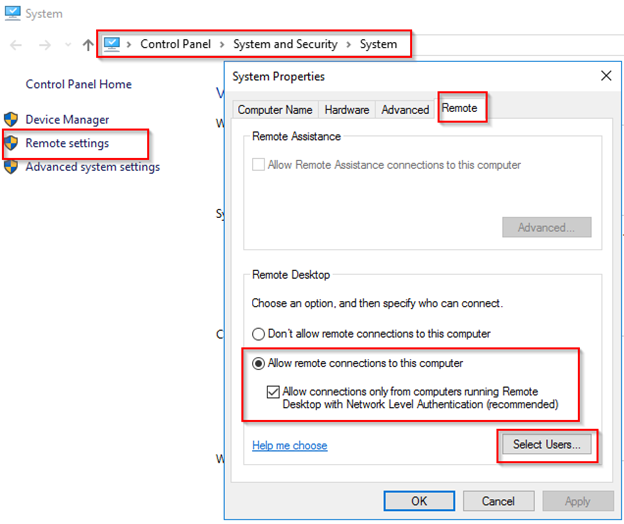
That’s it for now, here is a screenshot of the GUI look like after you have enabled the RDP
Note: if the user whom RDP into this remote computer is not admin user you need to add them to a remote desktop group, if you want to do via PowerShell you can check this post out: How to add a local user to windows 10 via PowerShell
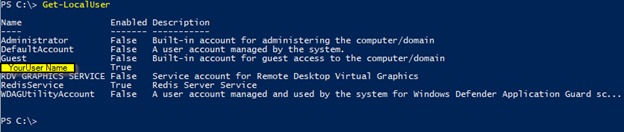
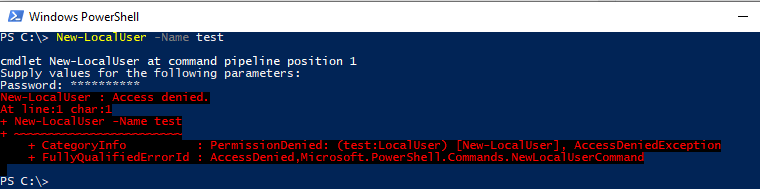
PowerShell is very common to use these days as more and more software doing automation. Many times it’s harder to find Graphical User Interface (GUI) to add a user or find other settings. In this post, I am adding a local user via PowerShell and adding a user to a local group. PowerShell has built-in help and examples too, so if you want to know more about the command just type Get-Help then Name of command and it will give more info about it. Let’s get started exploring the options starting with viewing current users.
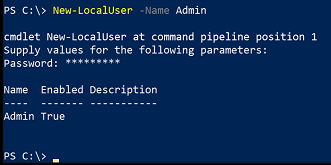
There are many more options available using PowerShell now, if you get an error make sure to read it and see where the error is, it will give you clue and also some commands require Admin right you will get an error like Access denied