Managing contacts are getting easier and it could also get confusing since there are many options to sync your contact with so many accounts types. I am going to show you some options that might help you decide and manage contacts on your Android phone. Make sure you have a good backup of your contact is a key because when you switch to a new phone/device or lose a phone/device and set up a new phone/device you will need to sync back your contacts. How do you know which contacts are sync to which accounts?
How to see options to manage your contacts?
Open Contact app
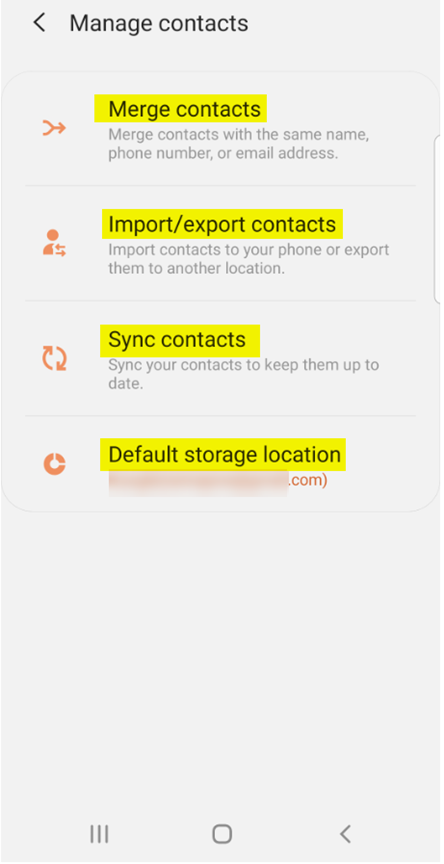
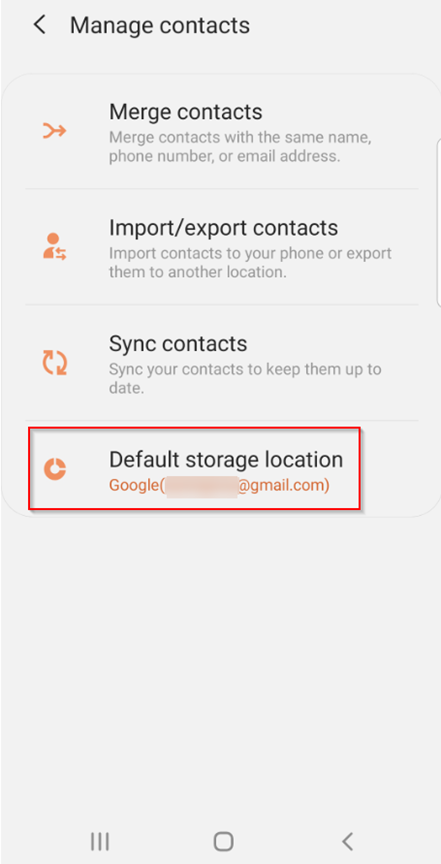
Then click on Menu and select Manage Contacts
- Merge contacts
- Able to help you find duplicate contacts, you might see 3 options: Number, Email, or Name
- Import/export contacts
- Allows you to Import contacts from one location to another
- Allows you to Export contacts from one location to another
- Sync contacts
- This normally happens automatic, unless you have turned off
- Default storage location
- This is where your contact gets saved when you create a new contact by default unless you choose to save to another location
- You might have different accounts one for personal another for Work contacts
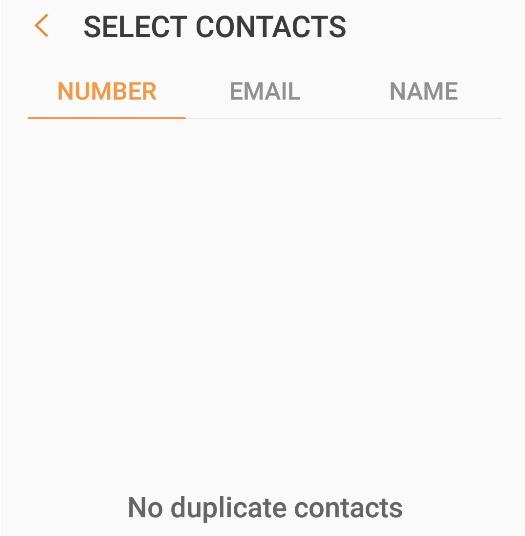
How to merge contacts?
Sometimes you might have more than one contact with the same phone number, email or name.
When you click on the Menu>Manage Contacts>Merge contacts
Merge contacts
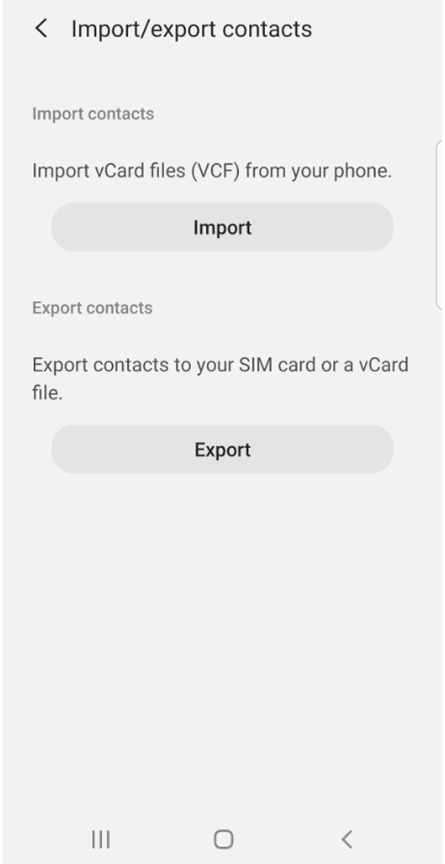
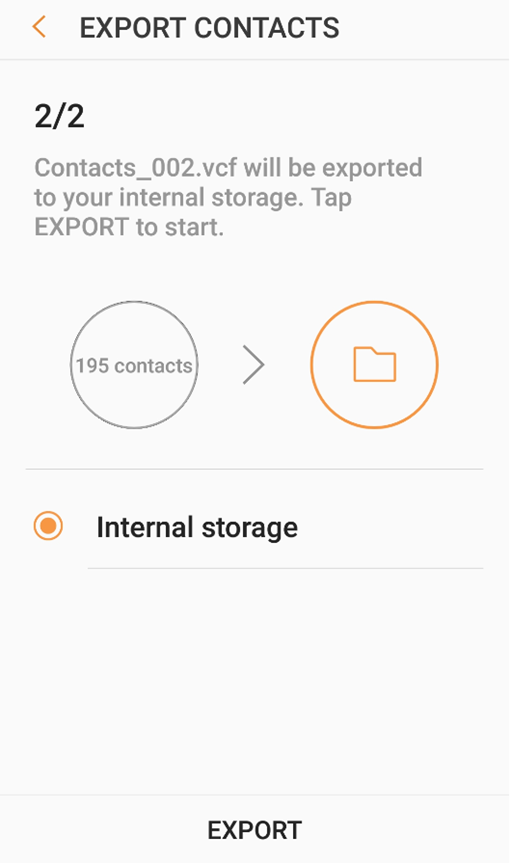
How to exporting Contacts:
Open Contact app
Then click on Menu and select Manage Contacts
Select the option Import/export contacts>click on Export
Select where you want to export to, based on storage location you may have one or more options
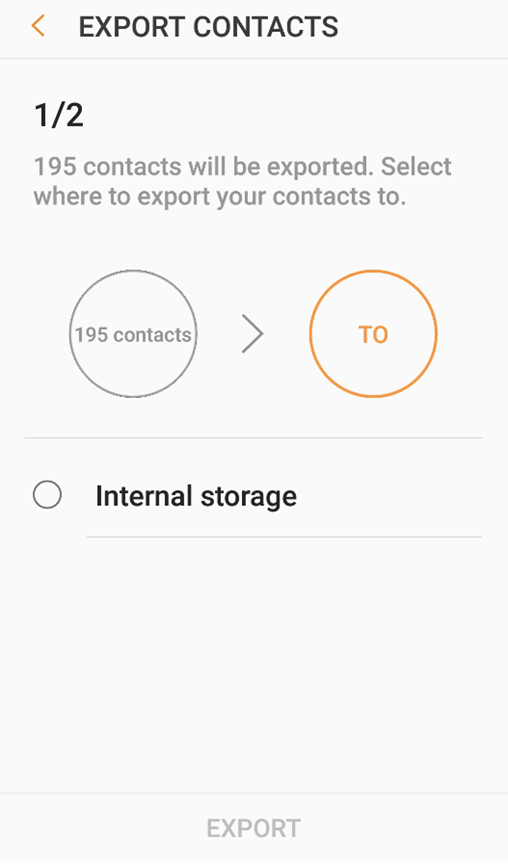
Once you have made your selection, you can click on the Export to start exporting
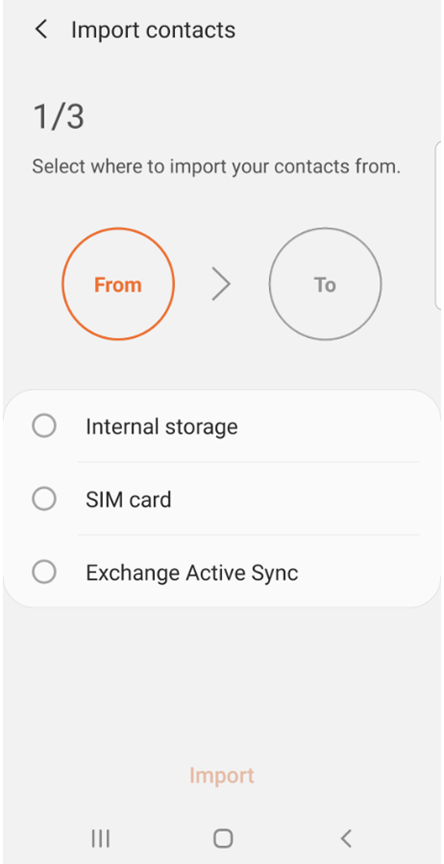
How to Import Contacts:
Open Contact app
Then click on Menu and select Manage Contacts
Select the option Import/export contacts

Select the location you want the contacts import from, this maybe different for you based on how many account you have on your phone
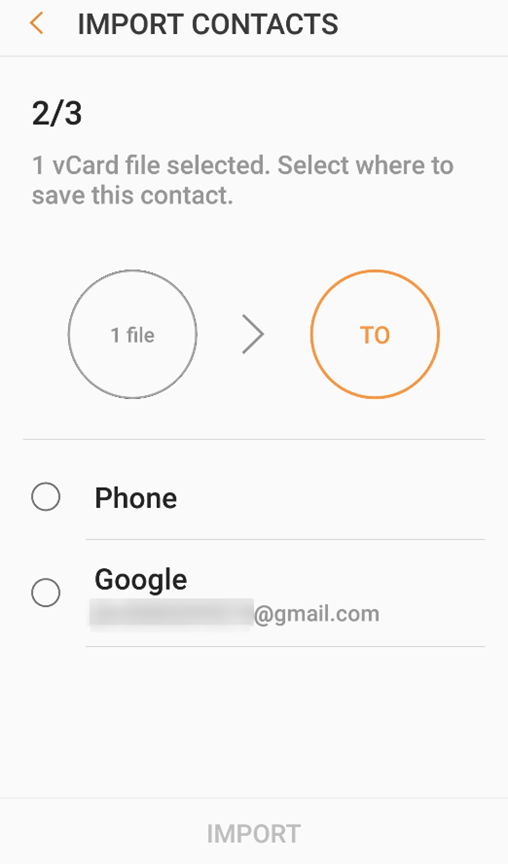
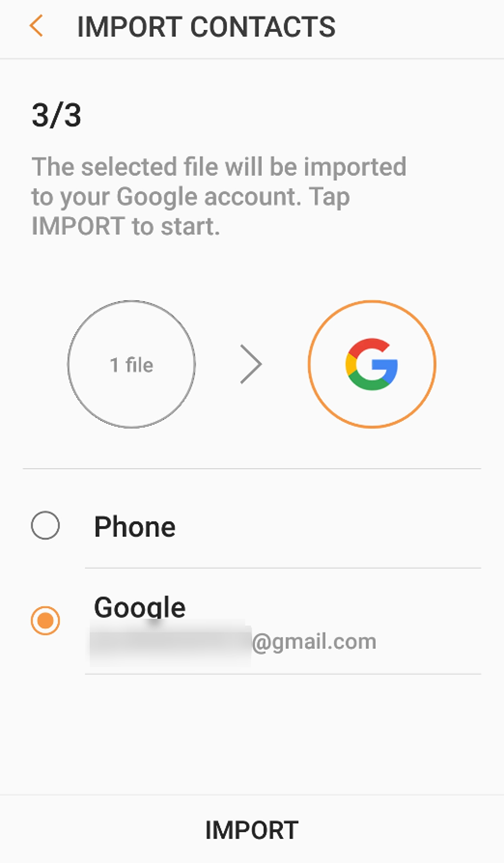
Then select where you want to import to, again this might be different based on accounts you have on your phone.
Once you made your selection, you can click on the Import to start the import process.
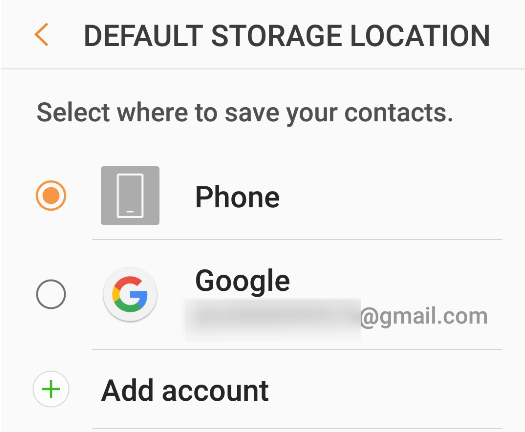
How to change the Default Location to save contact:
Open Contact app>Click Manage Contacts>Click on the Default storage location
You may see more or less options based on accounts you have on your phone.
That’s it, hope this helps out some people