How to fix boot partition free space in Ubuntu

/boot full

Here is how to free up space in the boot partition in Ubuntu, which may cause issues when trying to update or install a new application. Make sure you have a good backup and be careful running some commands, just double check typo before executing it.

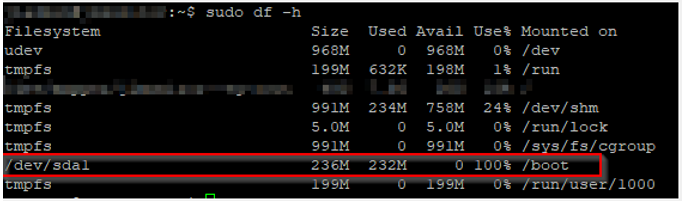
To see If you are running out of boot partition space, run the following command:
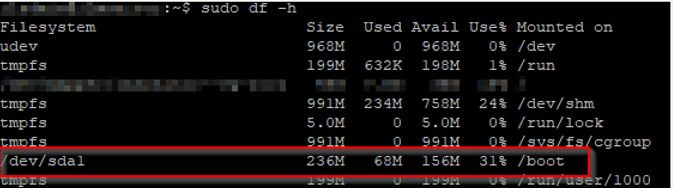
command: sudo df -h

You will see how much space is in use, in this screenshot, its /boot is 100% used

/boot 100 used

You can try the following command which may clean automatically for you some unused packages.

command: sudo apt autoremove

If the above command gives you an error, then continue do following steps

find your currently active boot image by running the following command:

Command:  sudo uname -r

Output may look something like this: 4.15.0-143-generic

To list all images except for active:

Command: sudo dpkg –list ‘linux-image*’|awk ‘{ if ($1==”ii”) print $2}’|grep -v `uname -r`

Output:

linux-image-4.15.0-151-generic
linux-image-4.15.0-156-generic
linux-image-4.15.0-158-generic

To list of images:

sudo dpkg -l | grep linux-image

To remove unused images:

The numbers are based on the output command above, so if your version numbers are different, make sure you change them to match your output.

Command: sudo rm -rf /boot/*-4.15.0-{151,156,158}-*

If you run df -h command to see how much space is in use, you will it went down from 100% to 31%:

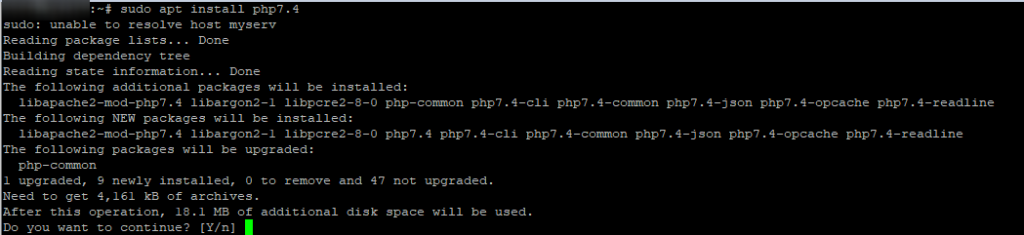
Now that you have some free space, let’s do some clean-up. If you try to clean up using apt autoremove, you may still get errors like these:

fix broken packages
some packages are broken

To Fix broken packages

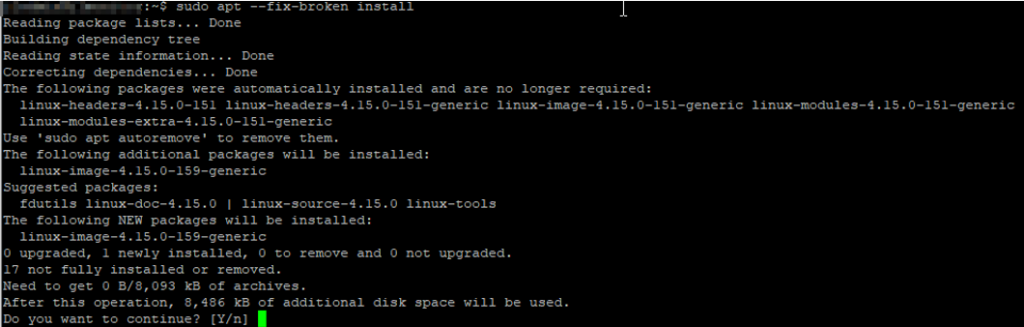
You will need to fix the broken packages before you can do any other clean up, run the following command:

Command: sudo apt –fix-broken install

fixing broken packages

Now that broken packages are fixed, then re-run the autoremove command you will be able to free up disk space:
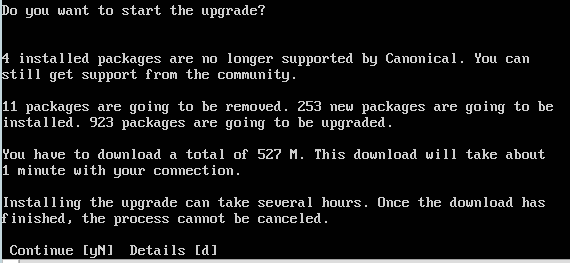
free disk space from unused packages
Freeing up disk space from unused packages

Update your system

Then re-check for any updates and install it to secure your system:

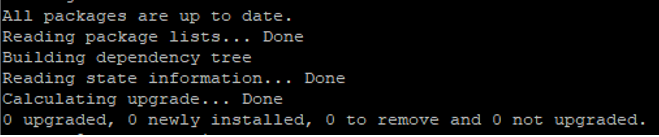
Command: sudo apt update && sudo apt upgrade

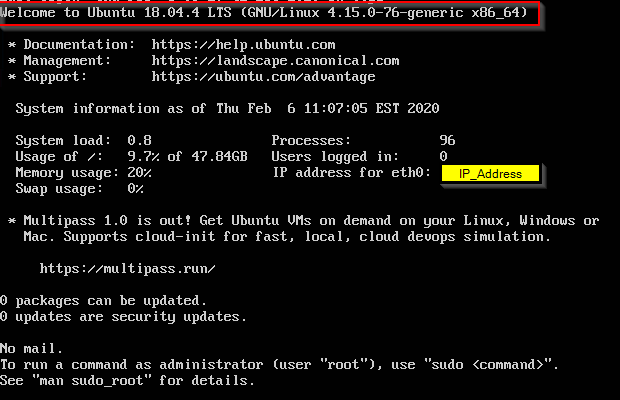
You want to see: All packages are up to date

That’s it, hope this helped you out


How to upgrade to PHP 7.4 on Ubuntu

You should upgrade your PHP for your server to version 7.4 or higher for security reasons. You can find PHP version info from here: https://www.php.net/supported-versions.php. Here I am doing an upgrade from PHP version 7.2 to 7.4 on my Ubuntu server, before you do any changes, make sure you have a good backup of your server/application which may be running on your server.

To see current version:

command: php -version
output: PHP 7.2.24-0ubuntu0.18.04.7 and some other details of your server

First, make sure your server is up to date by running the following commands:
Command: apt update
Command: apt-upgrade

Then add repository to install PHP:

Command: add-apt-repository ppa:ondrej/php
Command: apt update

You will get message like this to continue or cancel:

To install PHP7.4

Command: apt install php7.4

To see the version you can re-run the command:

Command: php -version
Output: PHP 7.4.14 with some other info

Now you have the PHP 7.4 on your server you can update your application to take effect of newer version of PHP. Here is example of web server apache

Command: sudo a2enmod php7.4

Considering dependency mpm_prefork for php7.4:
Considering conflict mpm_event for mpm_prefork:
ERROR: Module mpm_event is enabled – cannot proceed due to conflicts. It needs to be disabled first!
Considering conflict mpm_worker for mpm_prefork:
ERROR: Could not enable dependency mpm_prefork for php7.4, aborting

To fix:

Command: sudo a2dismod mpm_event

Module mpm_event disabled.
To activate the new configuration, you need to run:
systemctl restart apache2

Before you restart, you will need to activate PHP7.4, otherwise you will get this error:

Command: sudo systemctl restart apache2

Install PHP 7.4 Extensions

Installing PHP extensions are simple with the following syntax.
Command: sudo apt install php7.4-extension_name

Here are some commonly used php-extensions:

php7.4-common php7.4-mysql php7.4-xml php7.4-xmlrpc php7.4-curl php7.4-gd php7.4-imagick php7.4-cli php7.4-dev php7.4-imap php7.4-mbstring php7.4-opcache php7.4-soap php7.4-zip php7.4-intl

For PHP 7.4 with Apache the php.ini location will be in following directory.
sudo nano /etc/php/7.4/apache2/php.ini

For PHP 7.4 FPM with Nginx the php.ini location will be in following directory.
sudo nano /etc/php/7.4/fpm/php.ini

To search with nano editor: F6 or CTR+W and update the following values for better performance.

upload_max_filesize = 32M 
post_max_size = 48M 
memory_limit = 256M 
max_execution_time = 600 
max_input_vars = 3000 
max_input_time = 1000

For web server to take effect restart the service:
Command: sudo systemctl restart apache2

Finally doing clean up of old stuff no longer needed:

Command: apt autoremove

That’s should it, if you have other applications you just have to update that, some may automatically be done, no other action needed. You should test everything to make sure all functioning well.


How to upgrade Ubuntu 16.04 to 18.04

It’s always best to stay up to date with technologies that you are using these days, due to lots of data getting hacked because they are not updated.  I had written a post earlier on how to upgrade Ubuntu 14.04 to 16.04, the process is the same. Make sure you have a good backup and your backup is tested to be sure data you are backup are good. If you have an option you can do an upgrade on a test server and work out any issues, that way when you do upgrade on the production system it goes smooth.

Check list before starting upgrade process

  • Data backed up and verified, which includes configs, PHP, Databases, etc…
  • Make sure your application supports newer packages versions
  • List of application/services so it can be tested after the upgrade
  • Direct access to the server, remote session will give you an error
  • Stopping application/services, not required but if dealing with a database it’s safer
  • Double-check storage space for an upgrade to download/install, you will need about 10GB

To get list of packages:

dpkg -l | grep php | tee packages.txt

Current supported Ubuntu version: https://wiki.ubuntu.com/Releases

Login to the server directly to do the upgrade, also before the upgrade make sure you are up to date and don’t have any issues with your server or resources.

You can run following commands to check for any updates:

sudo apt update
sudo apt upgrade
sudo apt dist-upgrade

To start the upgrade process

Run the following command it will go through a check of currently installed packages and give you the option to check and make sure you are ok to start to upgrade.  You should check and make sure your application support new version, so it does not break your application after the upgrade. You can press d to get detailed list, when done press q and it will bring you back to option to Continue or N to cancel. Press y and Enter when you ready

sudo do-release-upgrade

If you have apache installed you will get this prompt, which you can select option best fit your needs.

If you get option for sshd_config, select keep the local version currently installed

It will scan for any obsolete software and will give you option to remove it

Once that done, then it will ask to restart the server press y and Enter

Once the server comes back you should see Ubuntu 18.04.x

Total size was about 10.5 GB and it took about 2 hours, yours may be different based on server resources, an application installed, etc…

common issues and solutions:

Very common if you are using web server you might have issue with PHP:
To check PHP version: php -v

Re-enable PHP, if upgrade from older version:

sudo a2enmod php7.2
sudo service apache2 restart

To install full PHP packages you can run following command:

sudo apt install php php-cgi libapache2-mod-php php-common php-pear php-mbstring

If you run the upgrade via SSH session you will get this message, which is not recommended:

Find all PHP version installed on your system:

dpkg -l | grep ‘\(php\)’
or
php -i | grep ‘php.ini’
or
php -i | grep ‘Configuration File’

Find all mysql version installed:

dpkg -l | grep ‘(mysql)’

How to remove old PHP version:

Before running this command, make sure you have backup of your php.ini or any custom changes did. This command will wipe out everything
Sudo apt purge php5*


How to install Ubuntu 18.04 Desktop

How to install Ubuntu 18.04 Desktop fresh using Hyper-V manager on Windows 10 Pro to Quick Create. There are many ways to install it, this process is very simple, you could do manual, which requires you to download the Ubuntu 18.04 image, then go through the process of installation. This will give you options to use your Ubuntu virtual desktop and get a feel of Linux system, when not in use, turn it off, so it goes not take resources of your system.

Open your Hyper-V Manger

Right click on Hyper-V host and choose Quick Create …

Then you will get option to select the Operating system, choose Ubuntu 18.04 LTS, and click Craete Virtual Machine. If you want to rename your VM, you could click on More options or you can rename later.

Then it will go through downloading the Ubuntu 18.04 LTS image, depending on your internet speed it may take awhile.

Then it will go through the automatic process of creating VM:

  • Verifying image
  • Extracting disk from an image archive
  • Creating a Hard drive
  • Virtual machine create successfully

Then you should see option to connect to your new Ubuntu 18.04 Desktop, click Connect

Click on Power button or Start to turn on your Ubuntu 18.04 server

You should see starting and then Welcome screen. Select your Language then click Continue

Select Keyboard layout, then click Continue

Select your Timezone, then click Continue

Fill in the login info, this would be admin account to login to your server, then click Continue

Then it will go through the System configuration automatically

Then you should see login screen enter your user/password created earlier

You should see your New Ubuntu 18.04 Desktop, it gives you few tips on What’s new in Ubuntu, go though and start using your Ubuntu Virtual desktop.

You can start using your Ubuntu 18.04 virtual desktop, see tips and tricks of common things you may find helpful, if this is your first time use of Ubuntu system.

Tips and Tricks:

Remove icon from favorites

Just right click icon you want to remove and choose Remove from Favorites

Opened applications

You will see little dot next to the application, you tell you that application is open.

More than one Application open

You will see more than one little dots, if you click on it, it will give you thumb nail view of and you will be able to switch it or close the application.

To see all opened Applications

Click on the Activities and it will give you thumbnail view of all opened applications, you can switch to it, or close it by click on X.

To see Applications

You can click on 9 dotted icon bottom left hand side, you will see all application or Frequent used

  • Software – where you can install new applications
  • Software & Updates – Where you can install updates and third-part software options
  • Startup Application – gives you list of application at start of your Ubuntu system
  • Settings – list of all settings like control panel
  • Files – your documents or personal files
  • Rhythmbox – is default music player

Shutdown Ubuntu Virtual Machine

Click on the Arrow on top left, you will see Power icon, if you want to just lock it, click on Lock icon.

When you click on Power icon it will give you option to Restart/Power off or cancel

Change User info

If you need to change user name or any setting, click on the Arrow next to your user name it will give you option to make changes

Change default applications

Click on Settings>Default Applications>Then change it to what you like


Nagios network monitor upgrade to Version 4.4.3

Nagios is a great open source network monitor released new version 4.4.3 last month.  It’s a great free tool, you can customize to fit your network and monitor live.  Know the issues before your user’s reports to you, you can see the history of your network health, so you know your network is stable or find out if you are having some issues in some part of your network.  So keeping up with the newest version to monitor your network is very important.  Let’s get started first, make sure you have a good backup and check your Nagios config if you have any errors correct it first.  Also, if you are using any plugin make sure they support the new version too.  I am using Ubuntu server and Apache for a web server.

To check the Nagios health:

Command: nagios -v /usr/local/nagios/etc/nagios.cfg

Your path to Nagios might be different and unless you are sudo user you will need to use sudo command.  You may have some warning of deprecated, you can update it and fix it before the update something like this:

WARNING: The retry_check_interval attribute is deprecated and will be removed in future versions. Please use retry_interva                l instead.

If everything looks good, then next download new version of Nagios.  You can download the Nagios core from https://www.nagios.org/downloads

at download page choose Nagios Core, then new version: 4.4.3

Update process:

  1. Extract: tar –zxvf nagios-4.4.3.tar.gz
  2. switch to the directory: cd nagios-4.4.3/
  3. Stop Nagios service: service nagios stop
  4. Run command to check: ./configure –with-command-group=nagios
  5. If everything is fine:  make all
  6. Then install it: make install

Check Nagios confignagios  -v / usr/local/nagios/etc/nagios.cfg

If any errors found then fix it and re-run the check config until no errors found, then start Nagios service: service nagios start

You might need to restart the apache2 service or whatever your web server is:  service apache2 restart

That’s it

Resources:

Nagios Core Manuals