How to map a network drive via Group Policy

Map network drive via GP

Map a network drive via group policy is a much easier and faster process than manually or logon scripts. user does not have to wait for the logon script to load or if the network path changes it automatically updates. It makes admin and user’s life much better and makes changes to the network without having to update each user. It should plan out the process, users, or groups it’s going to apply this network drive.

This is my process for this post

  1. File server: FileServ1
  2. Share Name: Accounting
  3. Drive Letter: S
  4. Group that’s applying to: Accounting
  5. how-to-delete-policy

Create a new GPO

Start>Windows Administrative Tools>Group Policy Management

or from Server Manager: Tools>Group Policy Management

Right-click on your OU (Organization Unit) where you want to create and link your Group Policy

Select Create a GPO in this domain, and Link it here …

You will see New GPO, name it whatever you want, something that makes sense, I am going to call it Accounting Network Drive

Configure GPO

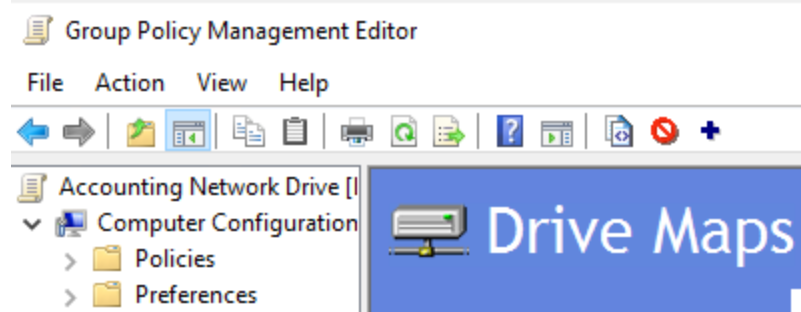
Right-click on the Group Policy Object and select Edit

Expand User Configuration>Preferences>Windows Settings
Then right-click on Drive Maps and select New>Mapped Drive

Filling the details

You can see there are many options to select from

Based on select above you will see other options

How to Delete policy

First unlink from OU that’s linked

Then Delete from Group Policy Objects:

If you try to delete while still linked GPO, you will get this message, which also works fine too

That’s it, hope this help others


How to update Microsoft Azure Active Directory Connect

Upgrade-Azure-Active-Directory-Connect

If you have your AD sync to Microsoft Azure and have installed the Active Directory connect, you may need to update, and here is how to do that

To see the status of sync, you can log in to the Microsoft admin portal at https://admin.microsoft.com

on the home page, you should see Sync Status, click on the Sync staus to get to the details page

You should see something like this: Click on Microsoft Download Center or this link: https://www.microsoft.com/en-us/download/details.aspx?id=47594

It will bring you to the Download page, read the requirements, and download to your software

When you run the setup you may get an error message if you don’t have the TLS enabled
https://docs.microsoft.com/en-us/azure/active-directory/hybrid/reference-connect-tls-enforcement

PowerShell command to enable TLS 1.2: got it from the link above, copy from Microsoft so you don’t have typo or if you know how to enable yourself do so

New-Item 'HKLM:SOFTWAREWOW6432NodeMicrosoft.NETFrameworkv4.0.30319' -Force | Out-Null

New-ItemProperty -path 'HKLM:SOFTWAREWOW6432NodeMicrosoft.NETFrameworkv4.0.30319' -name 'SystemDefaultTlsVersions' -value '1' -PropertyType 'DWord' -Force | Out-Null

New-ItemProperty -path 'HKLM:SOFTWAREWOW6432NodeMicrosoft.NETFrameworkv4.0.30319' -name 'SchUseStrongCrypto' -value '1' -PropertyType 'DWord' -Force | Out-Null

New-Item 'HKLM:SOFTWAREMicrosoft.NETFrameworkv4.0.30319' -Force | Out-Null

New-ItemProperty -path 'HKLM:SOFTWAREMicrosoft.NETFrameworkv4.0.30319' -name 'SystemDefaultTlsVersions' -value '1' -PropertyType 'DWord' -Force | Out-Null

New-ItemProperty -path 'HKLM:SOFTWAREMicrosoft.NETFrameworkv4.0.30319' -name 'SchUseStrongCrypto' -value '1' -PropertyType 'DWord' -Force | Out-Null

New-Item 'HKLM:SYSTEMCurrentControlSetControlSecurityProvidersSCHANNELProtocolsTLS 1.2Server' -Force | Out-Null
New-ItemProperty -path 'HKLM:SYSTEMCurrentControlSetControlSecurityProvidersSCHANNELProtocolsTLS 1.2Server' -name 'Enabled' -value '1' -PropertyType 'DWord' -Force | Out-Null
New-ItemProperty -path 'HKLM:SYSTEMCurrentControlSetControlSecurityProvidersSCHANNELProtocolsTLS 1.2Server' -name 'DisabledByDefault' -value 0 -PropertyType 'DWord' -Force | Out-Null
New-Item 'HKLM:SYSTEMCurrentControlSetControlSecurityProvidersSCHANNELProtocolsTLS 1.2Client' -Force | Out-Null

New-ItemProperty -path 'HKLM:SYSTEMCurrentControlSetControlSecurityProvidersSCHANNELProtocolsTLS 1.2Client' -name 'Enabled' -value '1' -PropertyType 'DWord' -Force | Out-Null
New-ItemProperty -path 'HKLM:SYSTEMCurrentControlSetControlSecurityProvidersSCHANNELProtocolsTLS 1.2Client' -name 'DisabledByDefault' -value 0 -PropertyType 'DWord' -Force | Out-Null
	Write-Host 'TLS 1.2 has been enabled.'

Then re-run the AD Connect setup:

Note, if you have a big network, this may take some time, so do off-hours, because it will stop the sync of your AD until the upgrade is completed

You should see the upgrade process and synchronization

Then it will ask you for admin credentials:

If everything goes well you should see, Ready to configure, click Upgrade

Then, the configuration complete

now you can check the status on the admin page

That’s it, hope this helps someone


Setup Hyper-V on a Windows server 2019

How to setup Hyper-V on a Windows server 2019. It’s a very easy process for basic setup, it can be very complicated if you want to do isolation, VLAN, and NIC teaming. This post will start basic, Hyper-V host running Windows server 2019, it can be a standard or datacenter if you want to run many VMs and some advanced features. Let’s get started

Once you have windows server 2019 install and updated, we can install Hyper-V a couple of ways via GUI or PowerShell

Option 1: GUI

Option 2: using Powershell

Install Hyper-V using Server Manager:

open up Server Manager, then click Manage>Add Roles and Feature

Click Next:

Select Role-based, then click Next

The select server you want to install Hyper-V, click Next

Then select the Hyper-V check box.

You will get an option to include management tools, which most likely you want so click add features

Then click Next

If you only have one Network card then select the box to share with Hyper-V host/VM’s traffic, otherwise leave it unchecked.

Then you should see confirm installation, if everything is good, click Install, otherwise, click previous to make a change or click Cancel to exit out without making changes.

Once the installation is complete, the server needs to restart for Hyper-V settings to apply

You will find Hyper-V Manager under Start>Windows Administrative Tools

Or from the server manager under Tools>Hyper-V Manager

You should something like this:

Installing Hyper-V via PowerShell

Open PowerShell with Administrator rights

PS > Install-WindowsFeature -Name Hyper-V -IncludeManagementTools

Success Restart Needed Exit Code      Feature Result

——- ————– ———      ————–

True    Yes            SuccessRest… {Hyper-V Module for Windows PowerShell, Hy…

WARNING: You must restart this server to finish the installation process.

To verify Hyper-V installed:

Command: Get-WindowsFeature -Name *Hyper-V*

That’s all for Hyper-V installation, next need to setup networking, then start installing VM’s on it.


How to migrate from FRS to DFSR on Windows server 2019

How to migrate from FRS (File Replication Service) to DFSR (Distributed File System Replication) on Windows server 2019? Microsoft has introduced later in Windows server 2008, if you are adding Domain controller Windows server 2019, you will get an error and you must migrate from FRS to DFSR. When the DFSR migration process starts it copies the contents of SYSVOL to a parallel folder called SYSVOL_DFSR, and then it gets shares out in migration phases. Please make sure your current domain is in good health status and has good backup.

  • Make sure you have free space on the drive where SYSVOL exists (normally on C drive) on your domain controller
    • free space should be current SYSVOL folder, plus a 10% or more
  • Make sure you have Admin rights to all of your domains
  • Make sure the Active Directory replication is working and healthy
    • To check the replication status: PS C:\Windows\system32> repadmin /ReplSum
  • Maike sure the SYSVOL is shared on DC
    • To check share: PS C:\Windows\system32> net share
    • To test all connectivities : Dcdiag /e /test:sysvolcheck /test:advertising

Start of migration

First, we need to make sure all domain controllers are in Prepared State, you check by running the following command:
dfsrmig /getmigrationstate

PS C:\Windows\system32> Dfsrmig /getmigrationstate
All domain controllers have migrated successfully to the Global state (‘Start’).
Migration has reached a consistent state on all domain controllers.
Succeeded.

Then start setting each state and wait between states until “Migration has reached a consistent state on all domain controllers” time it takes could all depends on how long it takes to sync, most common network should not take more than 15 minutes, but a larger network or custom sync duration this could take longer.

First state

PS C:\Windows\system32> Dfsrmig /setglobalstate 1
Current DFSR global state: ‘Start
New DFSR global state: ‘Prepared

Migration will proceed to ‘Prepared’ state. DFSR service will copy the contents of SYSVOL to SYSVOL_DFSR folder.

If any domain controller is unable to start migration, try manual polling. Or run with option /CreateGlobalObjects. Migration can start anytime between 15 minutes to 1 hour.

Succeeded.

PS C:\Windows\system32> Dfsrmig /getmigrationstate
All domain controllers have migrated successfully to the Global state (‘Prepared’). Migration has reached a consistent state on all domain controllers.

Succeeded.

Second state

PS C:\Windows\system32> Dfsrmig /setglobalstate 2
Current DFSR global state: ‘Prepared
New DFSR global state: ‘Redirected

Migration will proceed to ‘Redirected’ state. The SYSVOL share will be changed to SYSVOL_DFSR folder, which is replicated using DFSR.

Succeeded.

PS C:\Windows\system32> Dfsrmig /getmigrationstate
All domain controllers have migrated successfully to the Global state (‘Redirected’). Migration has reached a consistent state on all domain controllers.

Succeeded.

Last state

PS C:\Windows\system32> Dfsrmig /setglobalstate 3
Current DFSR global state: ‘Redirected
New DFSR global state: ‘Eliminated

Migration will proceed to ‘Eliminated’ state. It is not possible to revert this step.

If any read-only domain controller is stuck in the ‘Eliminating’ state for too long run with option /DeleteRoNtfrsMember.

Succeeded.

PS C:\Windows\system32> Dfsrmig /getmigrationstate
All domain controllers have migrated successfully to the Global state (‘Eliminated’). Migration has reached a consistent state on all domain controllers.

Succeeded.

That’s it your migration is completed, you can check replication and domain controller windows folder you should see something similar as screenshot below:

on DC C:\Windows\SYSVOL_DFSR
on DC C:\Windows\SYSVOL_DFSR\ you should see domain and sysvol
on DC C:\Windows\SYSVOL_DFSR\domain you should see Policies, scrips, GPS’s, etc..
on DC C:\Windows\SYSVOL_DFSR\sysvol you should see your domain(s)

Possible issues/solutions:

If you get permission denied you need to make sure your command prompt is open with Administrator

If dfsr fails to migrate check this link:

https://docs.microsoft.com/en-us/troubleshoot/windows-server/group-policy/dfsr-sysvol-fails-migrate-replicate