PowerShell is very common to use these days as more and more software doing automation. Many times it’s harder to find Graphical User Interface (GUI) to add a user or find other settings. In this post, I am adding a local user via PowerShell and adding a user to a local group. PowerShell has built-in help and examples too, so if you want to know more about the command just type Get-Help then Name of command and it will give more info about it. Let’s get started exploring the options starting with viewing current users.
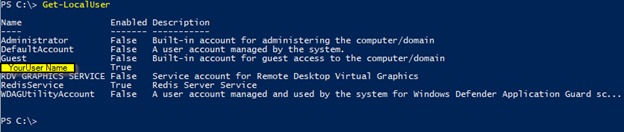
To see current local users:
PS C:\> Get-LocalUser
To see Local Groups:
PS C:\> Get-LocalGroup

To see Local Groups Members:
PS C:\> Get-LocalGroupMember -Group Administrators
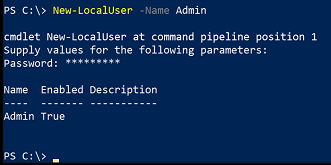
Adding a new user:
PS C:\>New-LocalUser –Name WhatEverName
When you hit Enter it will give you the option to put the password
Add user to Local Admin Group:
My example user name is: Admin replace that with your user name
PS C:\> add-LocalGroupMember -Group “Administrators” -Member “Admin”
To add more users to a Local admin group:
PS C:\> Add-LocalGroupMember -Group “Administrators” -Member “User1”, “User2”, etc…
To add a domain user to Local Administrator Group:
PS C:\> Add-LocalGroupMember -Group “Administrators” -Member YourDomainName\UserName
To remove a local user:
Make sure you have at least one user account and it’s a member of LocalAdmin group
PS C:\> Remove-LocalUser -Name WhatEverNameYouWantToRemove
To Remove a domain user from Local Administrator Group:
PS C:\> Remove-LocalGroupMember -Group “Administrators” -Member YourDomainName\UserName
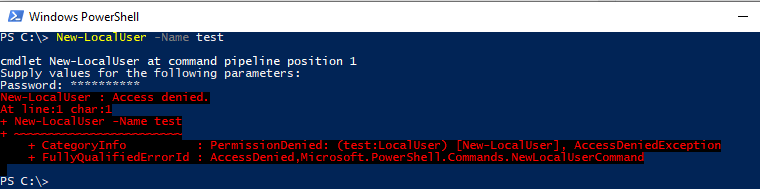
There are many more options available using PowerShell now, if you get an error make sure to read it and see where the error is, it will give you clue and also some commands require Admin right you will get an error like Access denied