osTicket is one of the great open source support system, very easy to install and use. I have noted the whole process, short version, and detailed version. What you will need from start to finish. This installation is fresh, without any add-ons or any customization osTicket version 1.10.1. I have written this installation based on Ubuntu 16.04 with Apache as a web server, it may work just fine with other versions of Ubuntu servers or similar to other flavors of Linux systems. Assuming you have your web server and domain up and running without any issues. So, let’s get started
What you will need
- Server requirements: You can get up to date from official docs from osTicket very well documented
- PHP 5.6 (or better I am going to be using PHP7.0)
- MySQL 5.0 (or better)
- 2GB memory recommended 4GB or more
- Access to web/database server via SSH
- Access to site file via (FTP, SFT, GUI, SSH, etc. …)
Getting server ready to install osTicket:
Installing requirements, you may need to run add this to repository void error, log in to your web server via SSH
Commands:
sudo apt-add-repository ppa:ondrej/php
sudo apt-get install php7.0-gd php7.0-imap php7.0-xml php7.0-mbstring php7.0-intl php–apcu
Downloading osTicket:
https://osticket.com/download/
Once you have downloaded then extract it or upload it to your web server common location: /var/www/
Then set the permission:
commands: make sure to change /var/www/ to your path
sudo chown -R www-data:www-data /var/www/
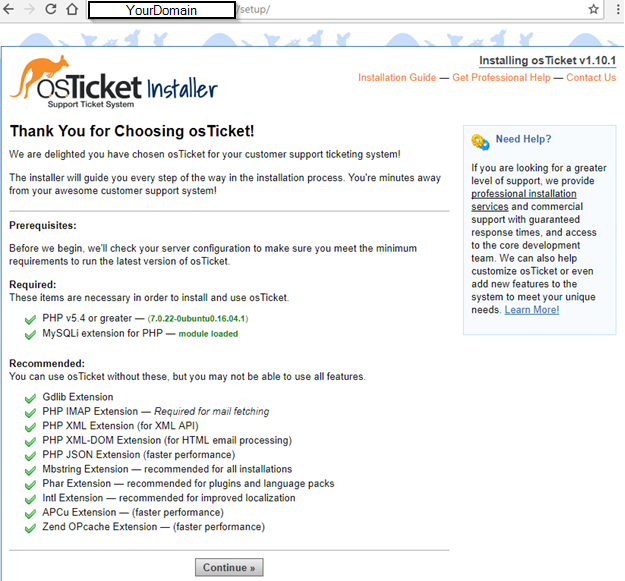
Click Continue once you have fixed any issues, please correct it before going forward
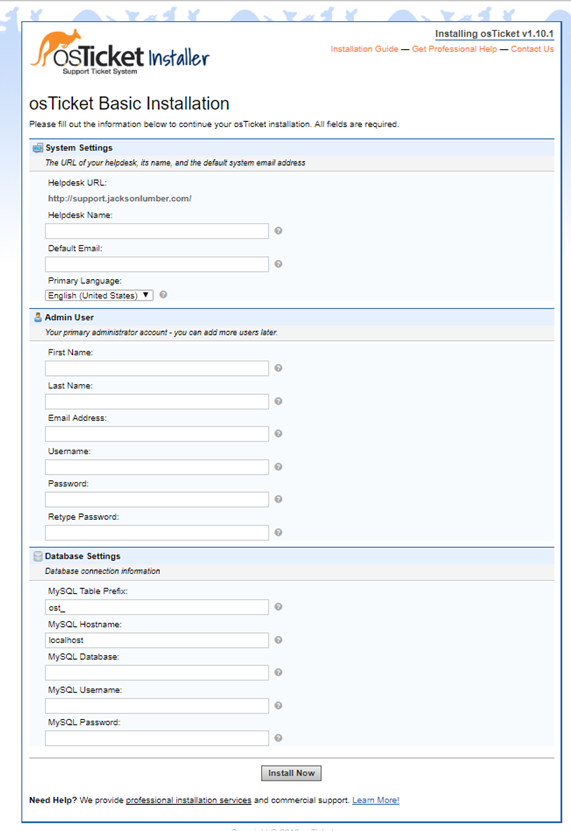
Setup osTicket Database and give full permission using whichever tool you are comfortable with it, then fill in details and click Install now
if everything went well you should see Congratulation, then just change the permission of your config file
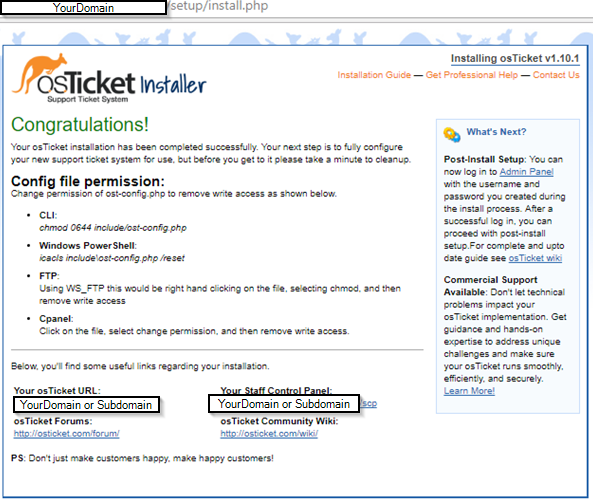
You should be able to login to your osTicket support system with the information you used earlier, see my notes, where I have put in some common issues you may encounter when installing.
Notes and common errors/solution:
You may need to do these if you get errors or other settings changes
If you have not copied the ost-sampleconfig.php to include/ost-config.php
then you will get the following message
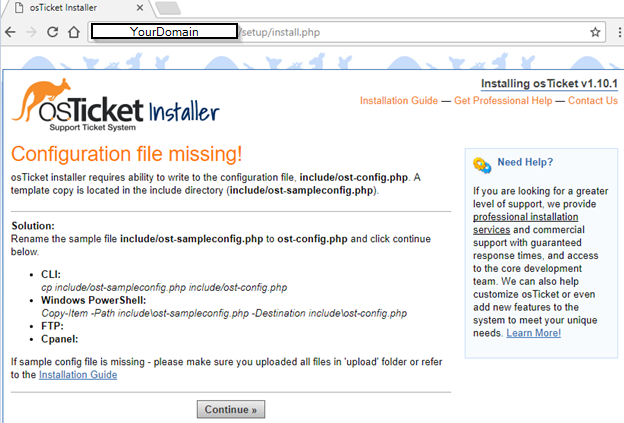
You will also need to make sure that ost-config.php has correct permission, otherwise, you will get this message:
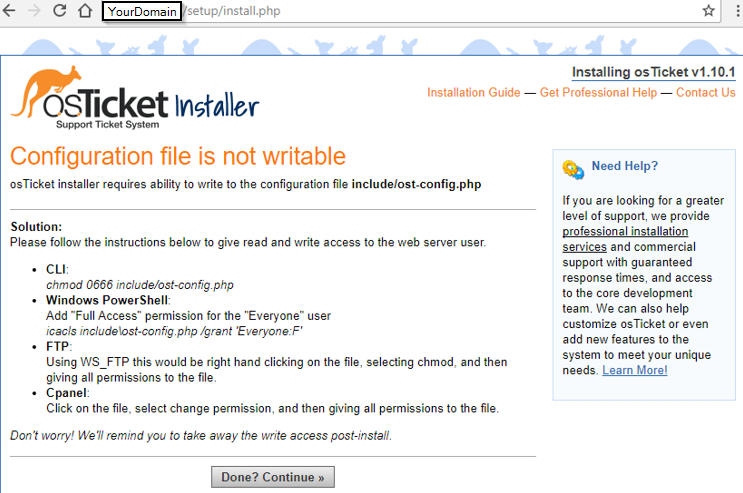
if you have already installed the PHP IMAP extension and still gives you an error, take a look at your php.ini file and enable it by uncommenting : /etc/php/php.ini:
;extension=imap.so
to
extension=imap.so
You may need to restart the web service after making changes to take effect:
sudo systemctl restart apache2
error: Valid CSRF Token Required OsTicket:
then need to edit file class.ostsession.php round line 191
catch (DoesNotExist $e) {
$this->data = new SessionData([‘session_id’ => $id]);
$this->data->session_data = “”;
error: Php 7.2 compatibility issue (not recommended to use this version of PHP on osTicket 1.10.1 or 1.10.4, it should support on new version 1.11)
then need to edit file class.ostsession.php round line 197
if(!is_string($this->data->session_data)) { $this->data->session_data = strval($this->data->session_data);
}
These commands to install PHP version 7.0 extensions manually one at a time:
Sudo apt-get install php7.0-gd
Sudo apt-get install php7.0-imap
Sudo apt-get install php7.0-xml
Sudo apt-get install php7.0-mbstring
Sudo apt-get install php7.0-intl
Sudo apt-get install php-apcu
Make sure to protect your ost-config after the installation by changing the permission:
sudo chmod 0644 /var/www/include/ost-config.php