The procedure below outlines how to bypass the Out-of-the-Box-Experience (OOBE) setup for Windows 11 without an internet connection, but keep in mind that some features and functionalities may require an internet connection to fully utilize the operating system. The Microsoft Account requirement in Windows 11 is implemented for various reasons, such as improved security, synchronization of settings across devices, and access to Microsoft services. If you don’t have a Microsoft Account and wish to use Windows 11, I recommend creating one. It’s a straightforward process, and it will enable you to access the full features and benefits of the operating system.
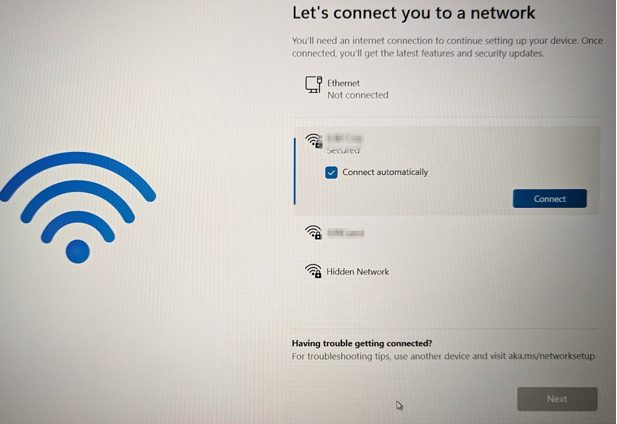
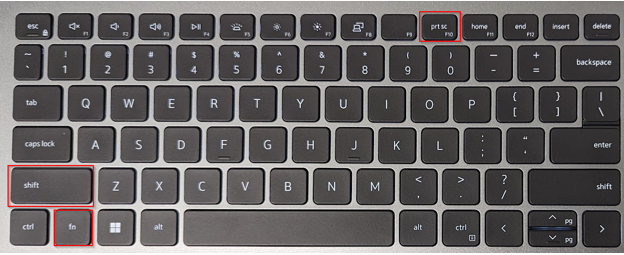
If you want to continue with the process, go for it, here is what you will see: Let’s connect you to a network and Next is grayed out. At this screen press Shift + F10 Keys on your keyboard
You will get a black command window: Type oobe\bypassnro command and press Enter.
Note: The command is a single phrase without spaces.
If the command worked your computer will restart
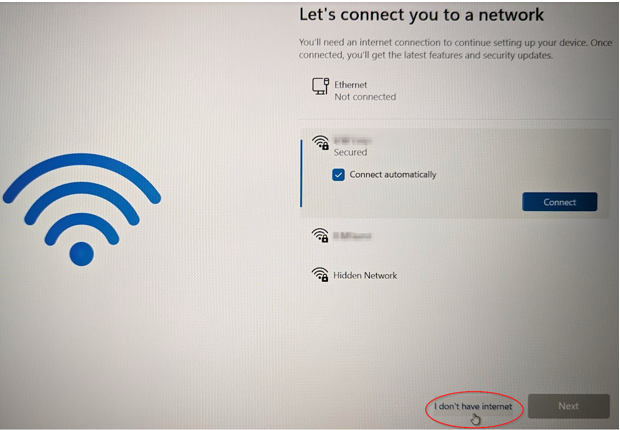
Once your computer comes back to setup screen you will get options to select “I don’t have internet”
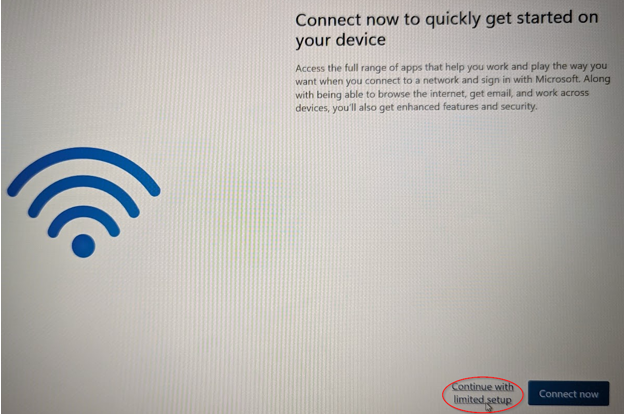
Click “Continue with limited setup”
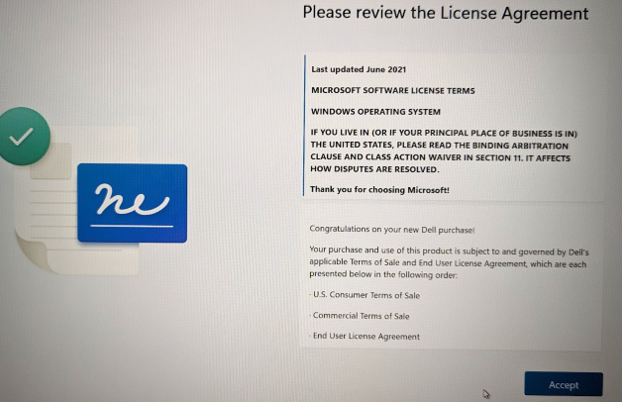
Now you can finish setting up your computer as normal by accepting License Agreement.
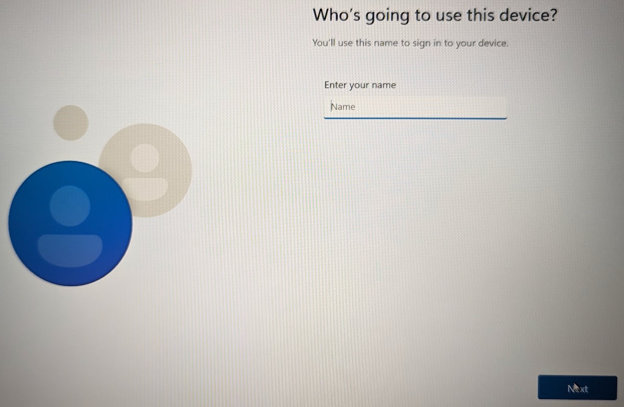
Enter the name of the individual who will be using the computer
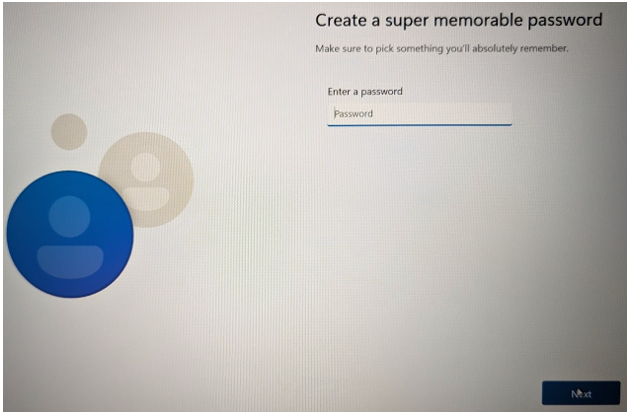
Enter a password
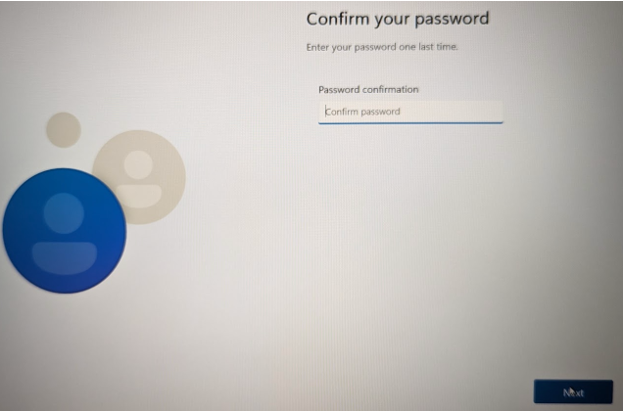
Confirm password
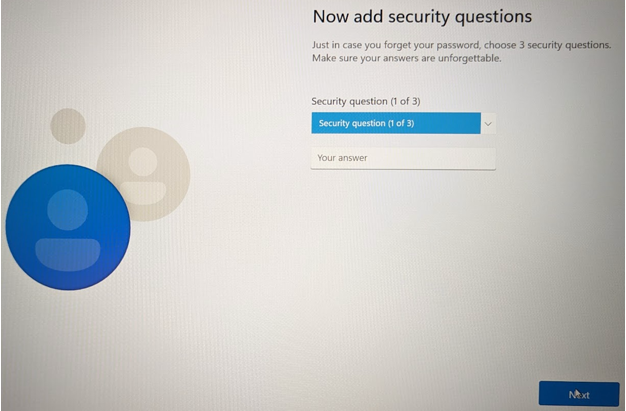
Please provide the necessary security information and answer any additional questions as required.
Common issues/solutions: When you press Shift + F10 nothing happens, it may be due to your keyboard having an Fn key, which you will need to press too.
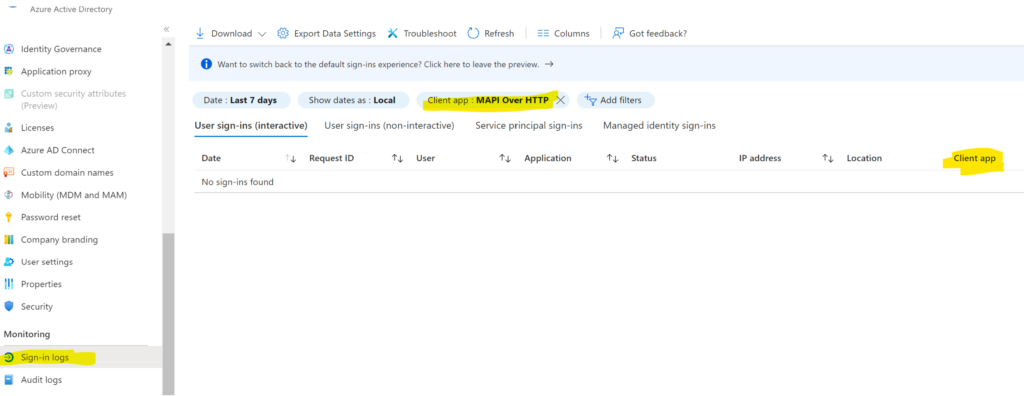
You can run the report for the sign-in log to see if any device or user using basic protocols
If you don’t see Client app, you can click on Columns to get options.
If you don’t see the Client app, you can add the filters.
Click on Add filters>Client app
Click Apply
Once you add the Client app
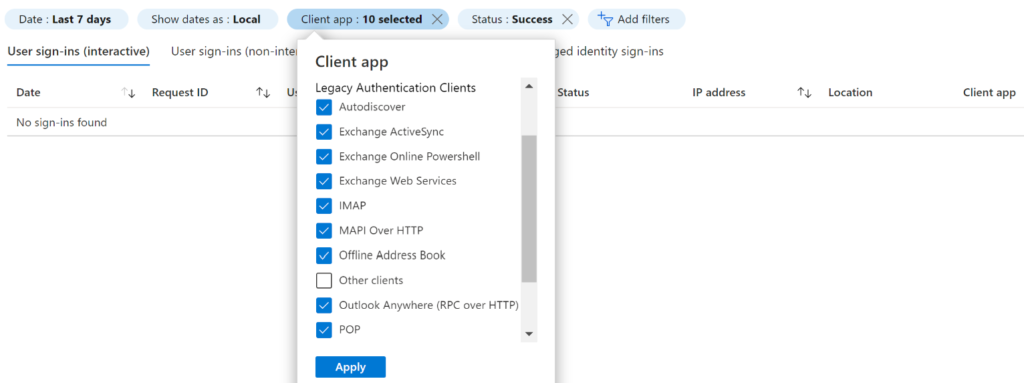
Then Click on the Client app to select the MAPI Over HTTP
Click Apply
You should see if anything using the basic protocols, if you see none that means you are using newer protocols, also make sure to select the Date last 7 days or longer, in case some device or user sign-in once in a while.
If you want to select other protocols you can, just to make sure no one is using it
That’s it, hope it helps some people out there
If you are using osTicket or EWS service you can find a link to one of my posts to update the protocol to Auth2.0:
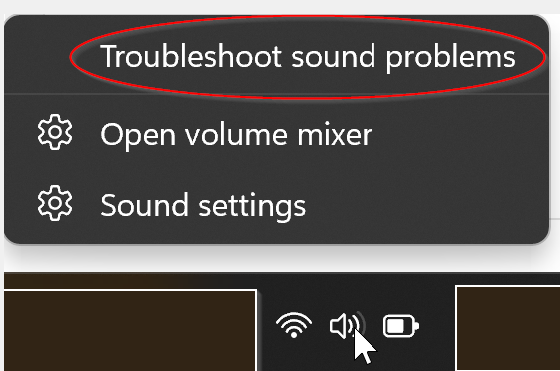
Playing sound is common, it should just work, but sometimes the software or driver causes conflicts which causes the sound to stop working. Windows 10 or 11 you will be able to fix the issue by going into troubleshooting sound, it will walk you through step by step.
To open the troubleshooter, you can right-click on the Sound icon in the bottom right corner
Select Troubleshoot sound problems
It will find all your hardware info, you can select the one you are having issues with and see if it fixes it for you.
In case the troubleshooter does not work you can do manual changes to your sound to get it working.
Open Control Panel\Hardware and Sound
Then click on Sound>Select the Speakers>Properties>Advanced tab
at the bottom you will see Signal Enhancements, un-check “Enable audio enhancements“
That’s all, there are so many other options based on your hardware or selections, so pay attention to them and see which works for you.
Upgrading from basic authentication to OAuth on osTicket is a must if you are using Microsoft 365 since Microsoft 365 has a hard cut-off on basic authentication by end of 2022. Here are steps to configure step by step, if you are using multiple departments, this work for that too. You must be using osTicket v1.17 or higher, you can download it from here https://osticket.com/download, also you have to be an admin or have rights to create app registration, and give API permissions. This post covers everything from Creating App registration to, adding plugins, configuring, and Fetching emails automatically. Official documentation can find it here that also covers Google OAuth2 Guide
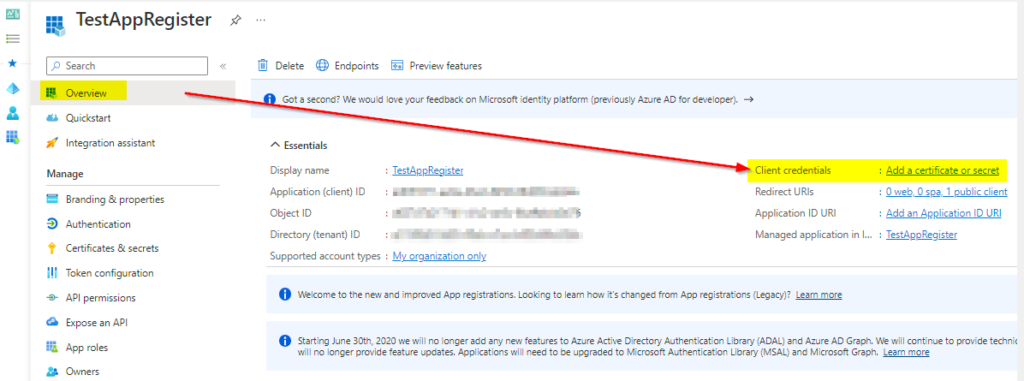
For your osTicket application, you will need the following info, which you can find, under Overview of your application, you need this info to configure OAuth.
Application ID
Directory (tenant ID)
Endpoints: authorize and token: Overview>Endpoints
If you have selected the multi-tenant option, your Endpoints URL will be generic, like these: https://login.microsoftonline.com/organizations/oauth2/v2.0/authorize https://login.microsoftonline.com/organizations/oauth2/v2.0/token
Value of secrets from one of the steps below
Create an app registration
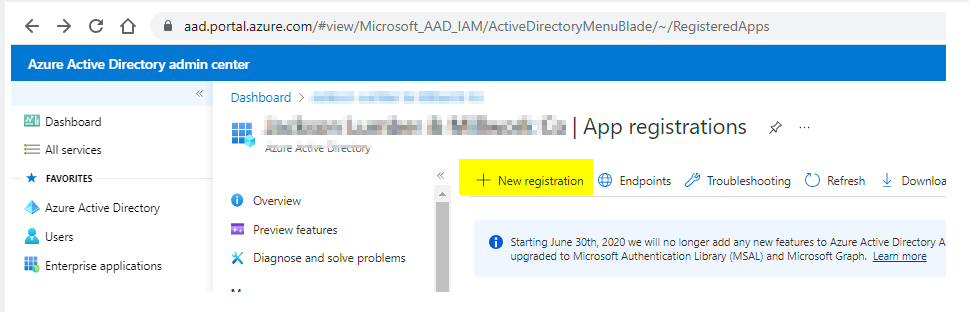
You need to log in to your Azure portal: Go to Azure Active Directory>App registrations
Next, click on New registration
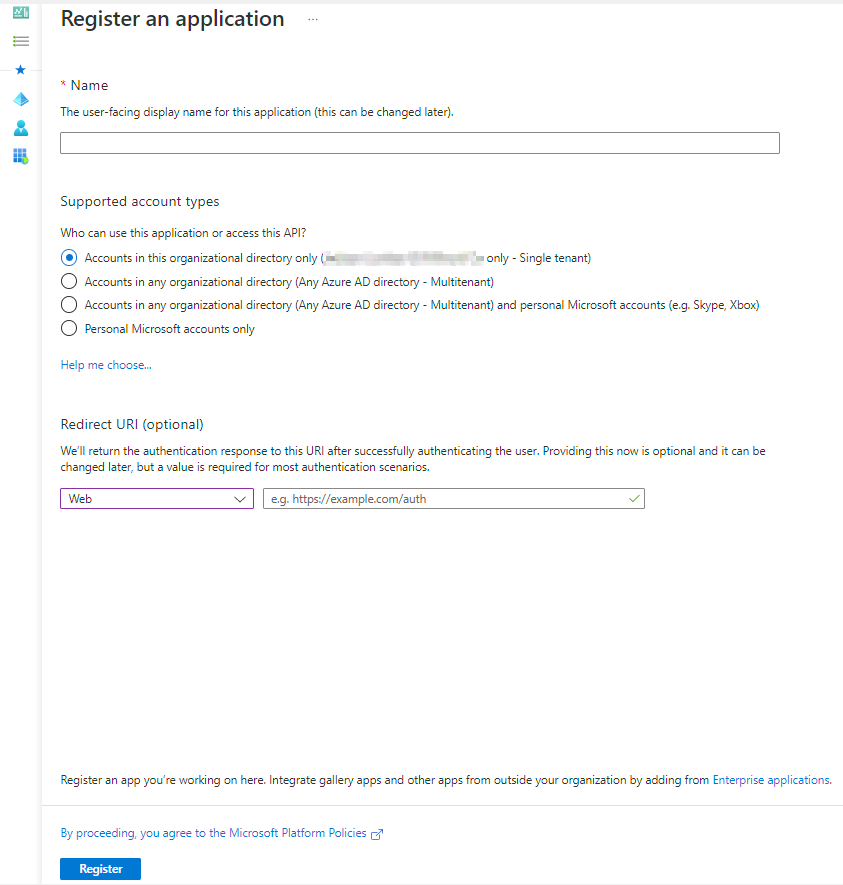
Next, fill in the info
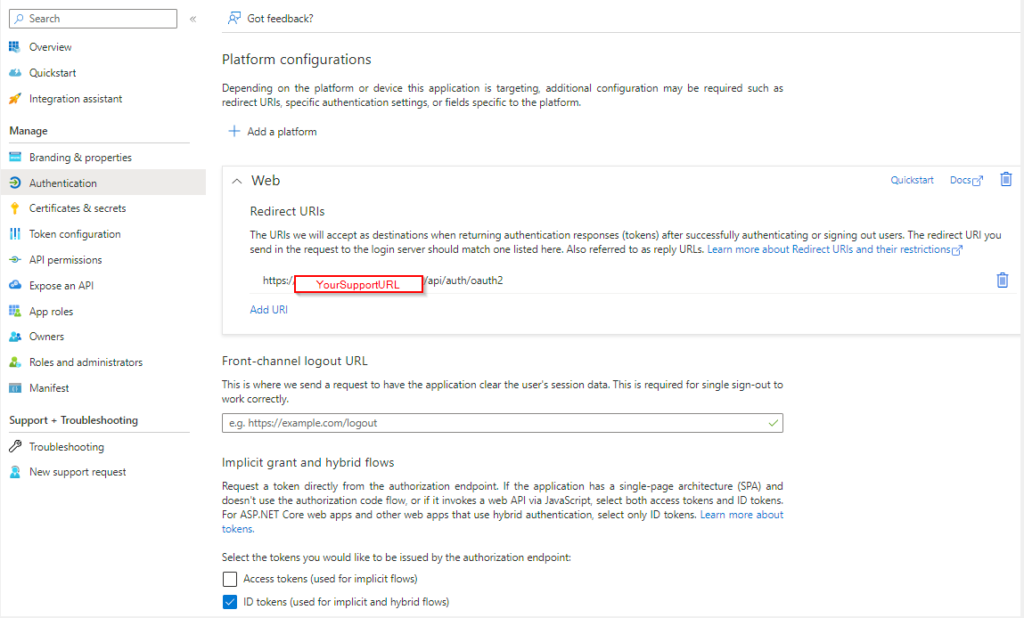
This is where you choose your access options, based on the selection, the next screen will have different options, for us, we choose a Single tenant and Redirect URL: Web
The redirect URL should be: https://YourSupportTicketURL.tld/api/auth/oauth2
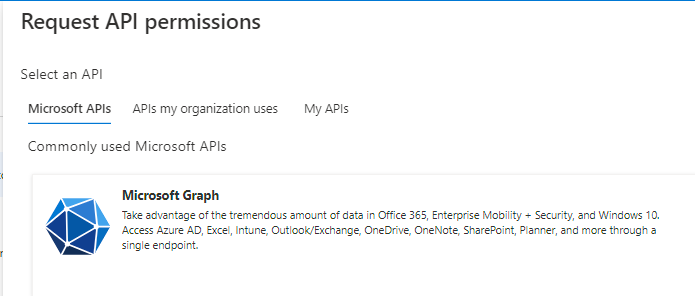
Next, add API permission YourApp>API permissions>Add a permission
Select Microsoft Graph
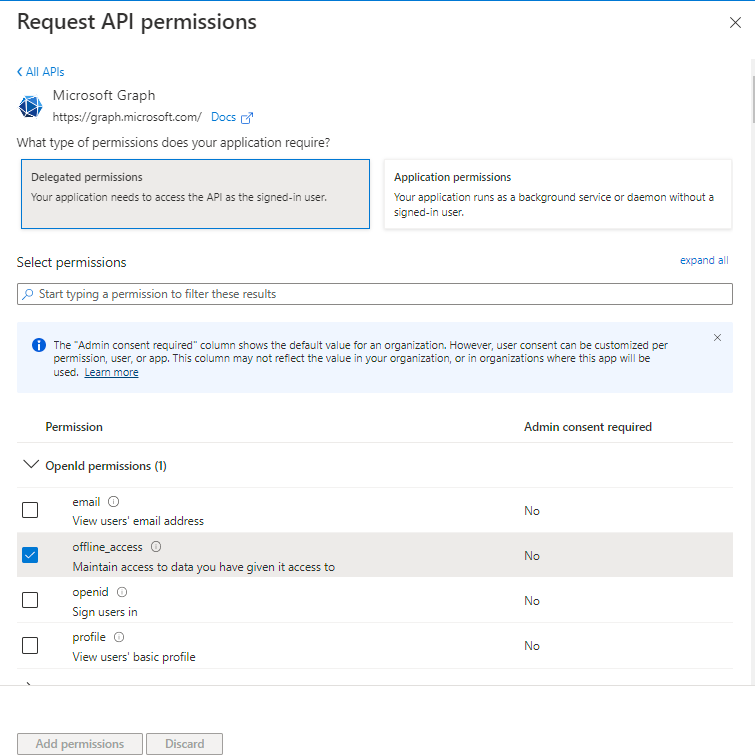
Next, select Delegated permissions
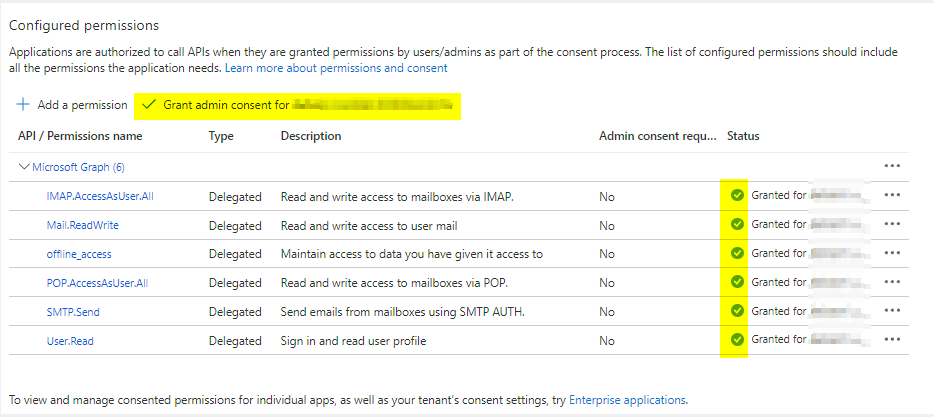
Then add the following permissions: you can search or scroll to select these, then click add permissions
IMAP.AccessAsUser.All
Mail.ReadWrite
offline_access
POP.AccessAsUser.All
SMTP.Send
User.Read
Once you have added all permission, you have to give admin consent by clicking on Grant admin consent for Name of your Business
You should see Status with Green checks, for all permissions.
Give Implicit grant and hybrid flows under Authentication Check box for ID tokens (used for implicit and hybrid flows)
To be able to allow user consent
You need to be assigned roles to support address as an Application Administrator
To view and manage consented permissions for individual apps, as well as your tenant’s consent settings, need to go to Enterprise applications.
Add your Support email/user, if you have more than one department, you can add them here
Then click on each support email/user and assigned roles
Add assignments>Seach for Application administrator, then click add
Note: you need to do this for each support email address If you are using multiple departments setup.
Now to create client credentials, click on Overview>Add a certificate or secret
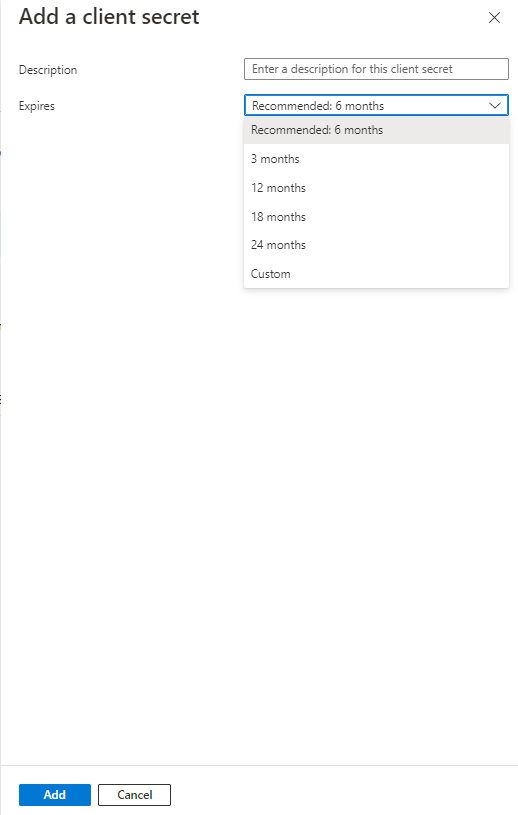
Click on the Clent secrets>New client secret
Enter the name, this could be anything and select the time when it Expires, then click on Add
Before you click out of this screen make sure to copy the value of your secret ID, which you will need for your app. Once you leave this screen, you will not be able to get this value back, so you may need to create a new one in case you have not copied it or you need to change it. Note: You never want to show your Value to anyone, I am showing Value here for the test, which I have already deleted
Install OAuth plugin
If you have not downloaded it, you can go to https://osticket.com/download
Select Plugins>choose v1.17, you should see Oauth2
Install the OAuth plugin by uploading it to your installation/include/plugins
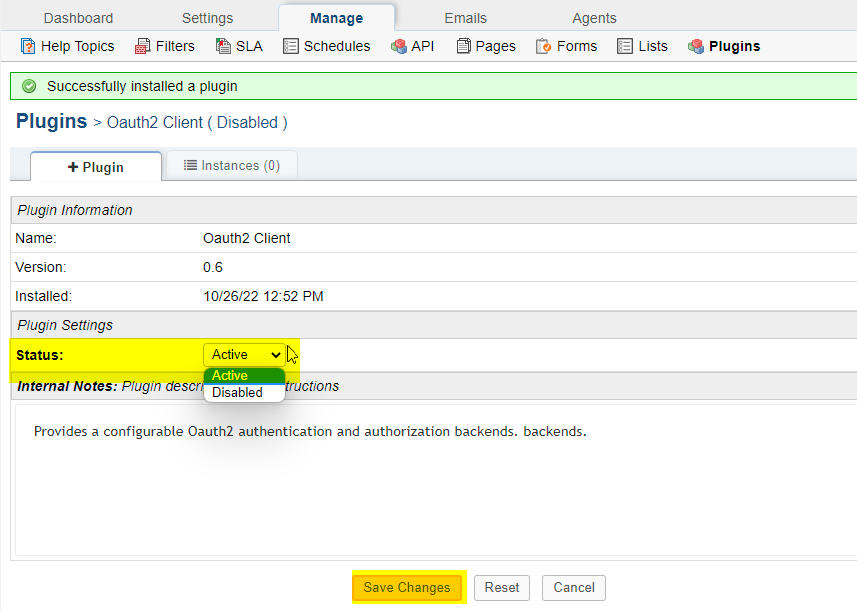
Click Add New Plugin
Click Install
and activate it, do NOT configure it here, go to the next step
To configure OAuth on osTicket
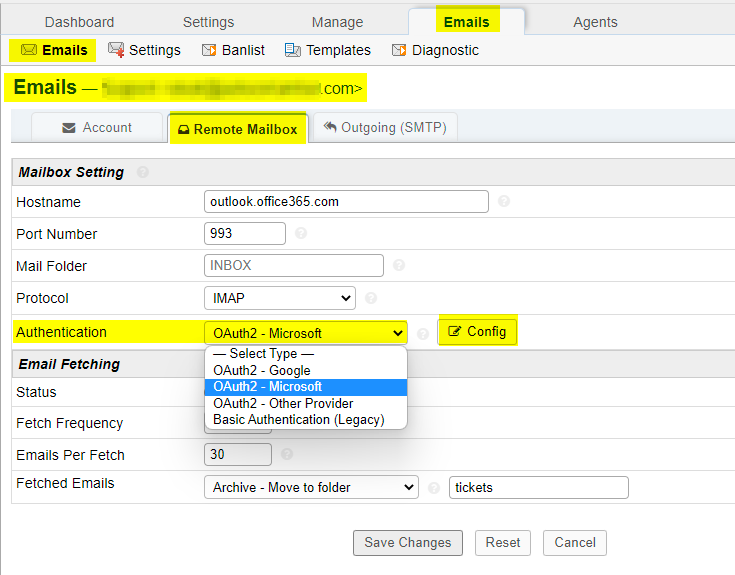
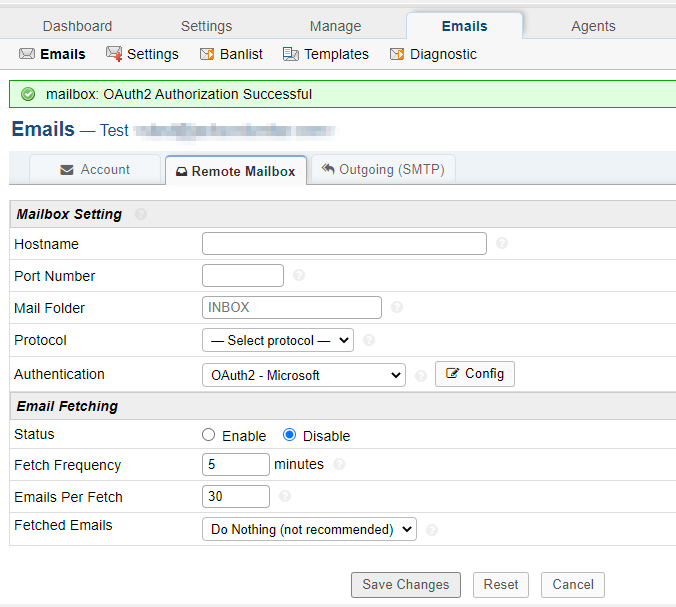
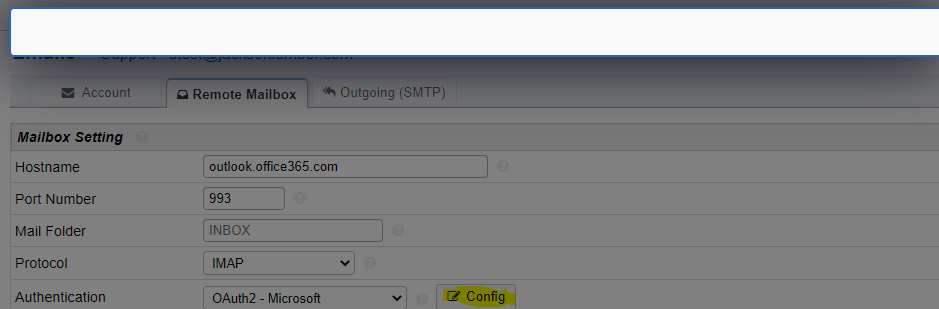
Now go to Emails>Select your support email address>Remote Mailbox>Select OAuth2 – Microsoft under Authentication
Fill in the details, once you click on Submit, it’s going to redirect you to the login page of MS365 https://login.microsoftonline.com :
That’s all, hope this helps someone out there who is going through these changes in technologies
Issues and Solutions:
Error: Unable to update an email address or blank windows or sping circle
Solution:
Try these
Make sure you clear your cache on your browser
Make sure your rewrite is enabled: To enable rewrite on Ubuntu: sudo a2enmod rewrite
You might need to edit apache2.conf file: sudo nano /etc/apache2/apache2.conf change from AllowOverride none to AllowOverride all under: < Directory /var/www/>
You might need to delete the email and re-add it, If you have only one email address, you will not be able to delete it, so you need to make another email address as default
To change click on Settings>Change Default System Email address to something else, then you can change it back, once you add your original support address. Note: Don’t forget to change your default MTA back, otherwise it will be set to PHP mail:
Outgoing Email: Default email only applies to outgoing emails without SMTP settings.
Default MTA:
Error: array ( ‘code’ => ‘MailboxNotEnabledForRESTAPI’, ‘message’ => ‘The mailbox is either inactive, soft-deleted, or is hosted on-premise.’, )
Solution: check the user consent and API permission, also make sure they have admin consent
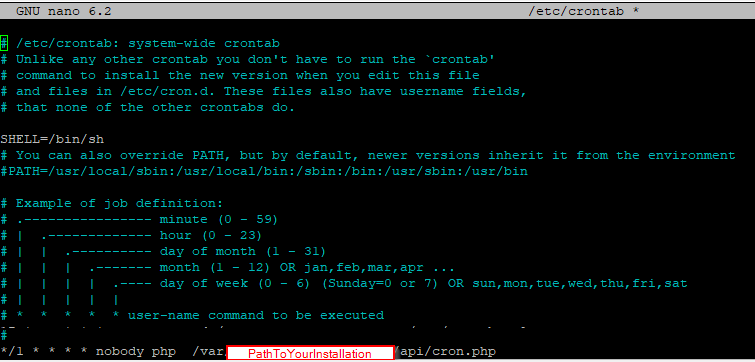
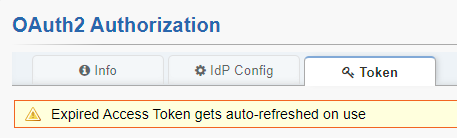
Error: Expired Access Token
Solution: need to setup a scheduled task to fetch the email: #Fetch-emails Link to the official documentation:
Upgrading from basic authentication to OAuth is a little harder for many small businesses to configure on the Azure portal. Here are the steps I have done to get our EWS service to get it working. You must have admin rights to do the following.
Create an app registration
You need to log in to your Azure portal: Go to Azure Active Directory>App registrations
Next, click on New registration
Next, fill in the info
This is where you choose your access options, based on the selection, the next screen will have different options, for us, we choose Single tenant and Redirect URI option for Public client/native, if you don’t have a URL you can leave it blank
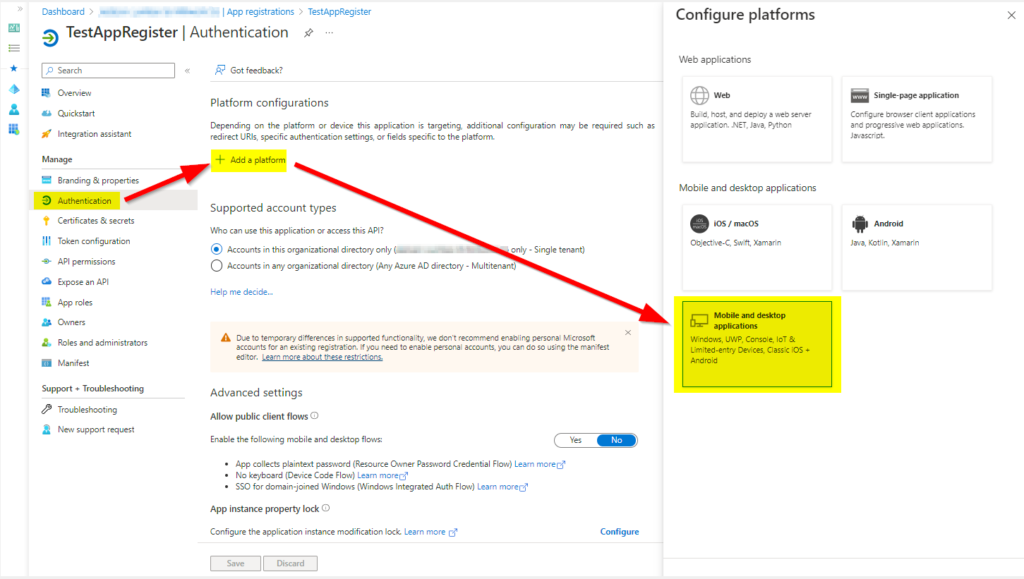
In case you need to add or change the Authentication platform, you can click on Authentication>Add a platform>Select one that works with your Business needs
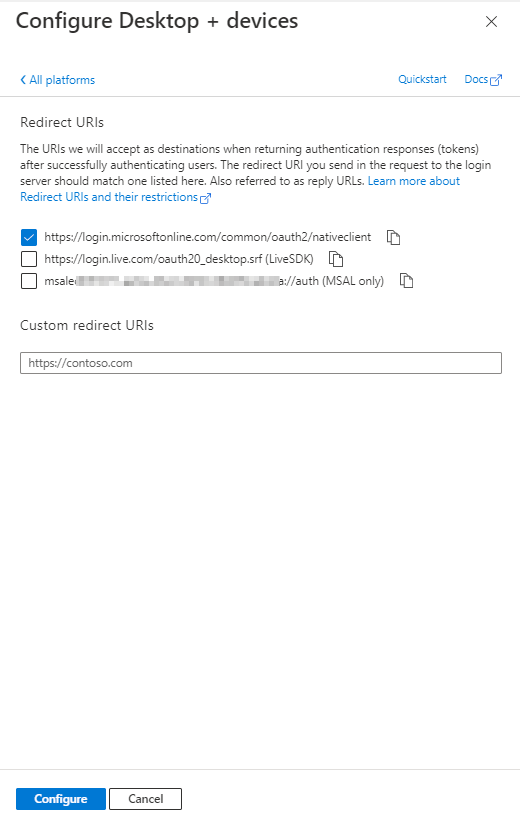
Based on your selection, you will need to select the URL option, or your custom URL
Then give API permission
This can be many permissions or just a few, also based on the type of application, you may get different options
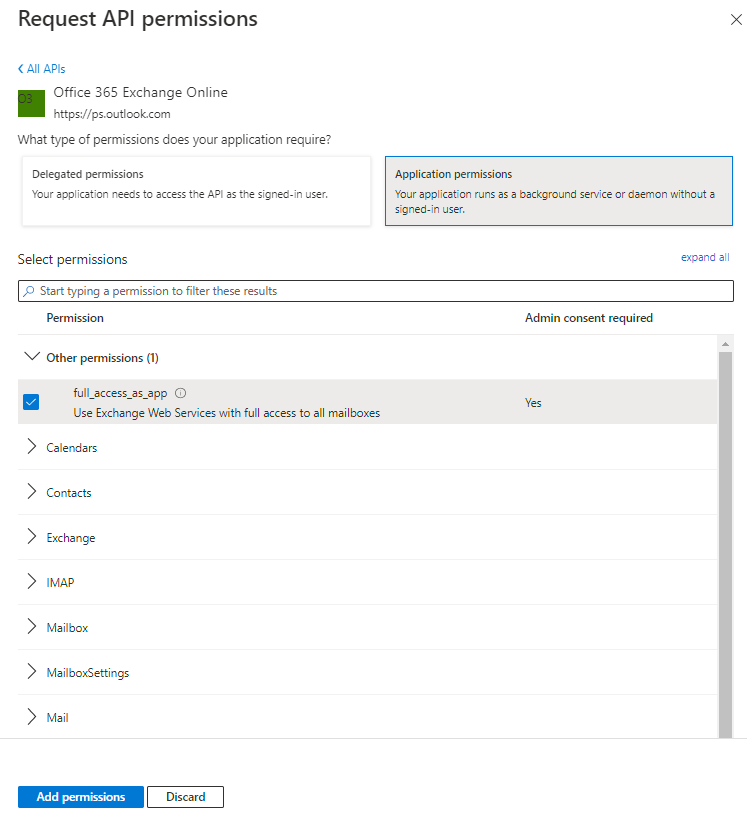
Us, we are using EWS service, so we needed office 365 Exchange Online
Then you need to select the type of permission, we are using application permissions
The only thing we can get it working was by giving full_access_as_app
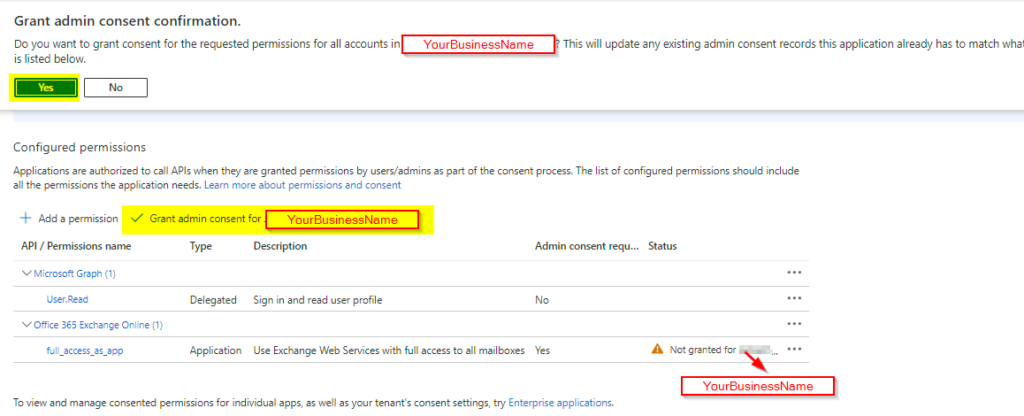
You need to give admin consent to your application, so once you have all permission added, click on Grant admin consent
To create client credentials, click on Overview>Add a certificate or secret
Click on the Clent secrets>New client secret
Enter the name, this could be anything and select the time when it Expires, then click on Add
Before you click out of this screen make sure to copy the value of your secret ID, which you will need for your app. Once you leave this screen, you will not be able to get this value back, so you may need to create a new one in case you have not copied it or you need to change it.
For your application, you will need the following info, which you can find it, here
Application ID
Directory (tenant ID)
Endpoints: authorize and token
If you have selected the multi-tenant option, your Endpoints URL will be generic, like these: https://login.microsoftonline.com/organizations/oauth2/v2.0/authorize https://login.microsoftonline.com/organizations/oauth2/v2.0/token
Value of secrets from the step above
That’s all, hope this helps someone out there who is going through these changes in technologies