Having the right time on your network is very critical to have all your network devices function correctly. Also best for troubleshooting issues to see a pattern, otherwise you will have some devices reporting a few minutes or even hours off from real-time. These days most if not all of the networks are in virtual environments (for some it’s called cloud). Windows Hyper-V’s recommendation is to turn off time sync for all VMs and let the PDC role holder go out to the internet and get time from a reliable source, then have your local device sync up to PDC. The Second option for a smaller network synchronizes your Hyper-V hosts’ hardware clock to the NTP authority. This guide is to have your Windows primary domain controller configuration of NTP (Network Time Protocol) point to the reliable source, so your local devices also get the correct time. Let’s get started
Login to your Primary Domain Controller:
Open CMD console with Admin rights:
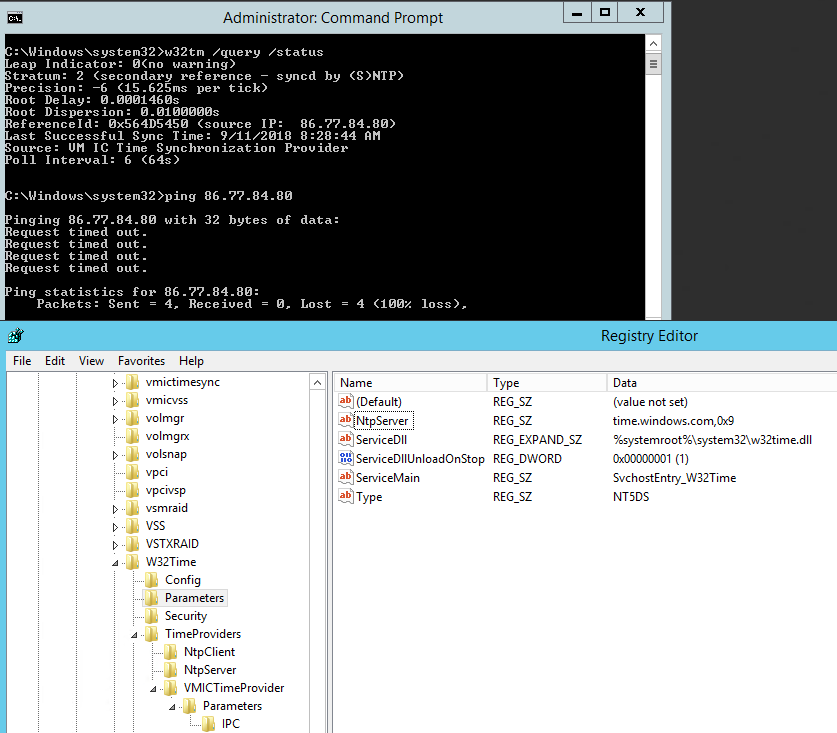
First, check the current status:
W32tm /query /status
Or check the NTP server in use
net time
To see the current time server source:
w32tm /query /source
Then, check the current configuration:
w32tm /query /configuration
Once you have verified status and configuration, then stop the NTP service:
net stop w32time
Find your time zone NTP server from https://www.ntppool.org/en/
Example of NorthAmerican time zone setting few servers:
w32tm /config /syncfromflags:manual /manualpeerlist:”0.pool.ntp.org 1.pool.ntp.org 2.pool.ntp.org3.pool.ntp.org”
Or you could you w32tm /config /syncfromflags:manual /manualpeerlist:pool.ntp.org and it will find the closest server automatically
To make your DC reliable time source:
w32tm /config /reliable:yes
net start w32time
To verify you can run check current configuration comment:
w32tm /query /configuration
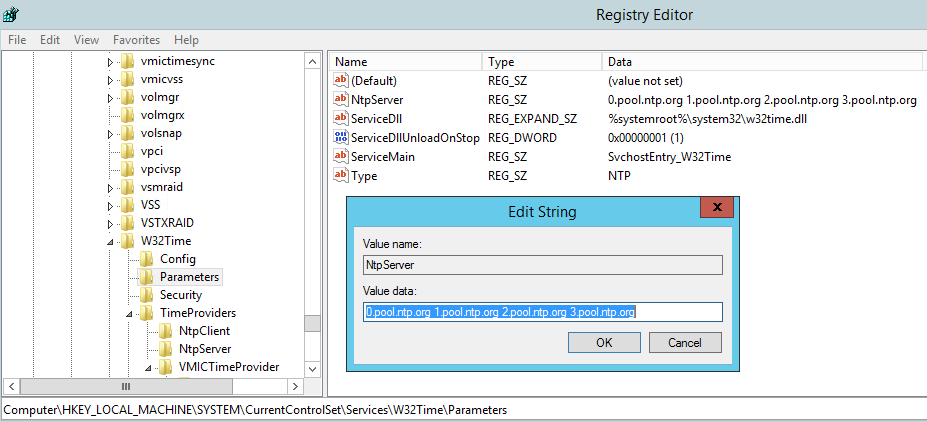
Or registry check you should see the same:
That should be it, verify your network firewalls allowing the NTP protocol across the network.
check more info from Microsoft for Windows server NTP
common issues and solutions:
If you see the source as “Free-running System Clock”, which means your system does not have a time server set

You may get: Local CMOS Clock if it’s not updated yet

Once you have configured correctly you should see something like this:

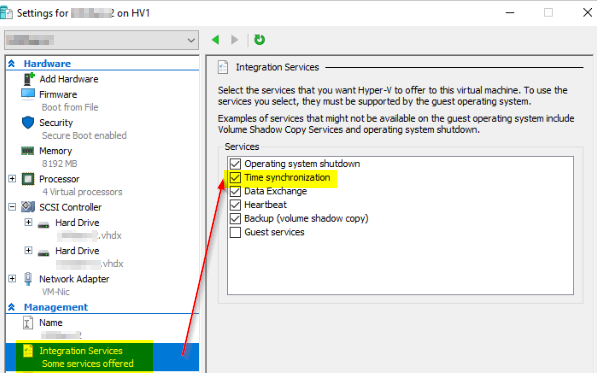
If you see this message in your VM: Integration Services “Time synchronization” is on