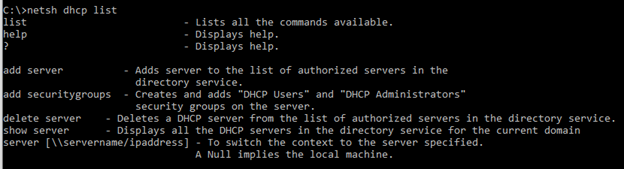
It’s very easy to forget old server entries and it may cause an issue in your network. Sometimes system/network admin wait for approval process or schedule to clean up or just simply don’t know how to. Whatever your reason is, this should be done to keep your network healthy from any unknown issues. Here are some ways to clean up, I have listed PowerShell, Netsh and via GUI.
Via PowerShell:
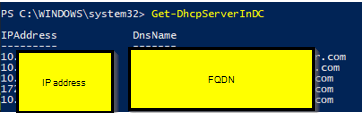
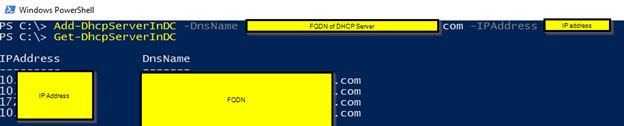
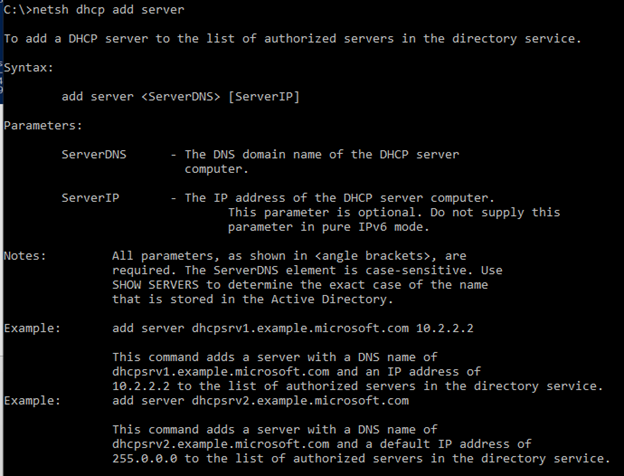
To see list of all DHCP server run PowerShell command:
PS C:\>Get-DhcpServerInDC
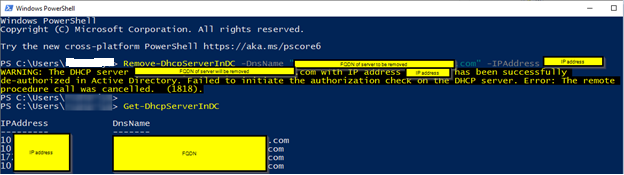
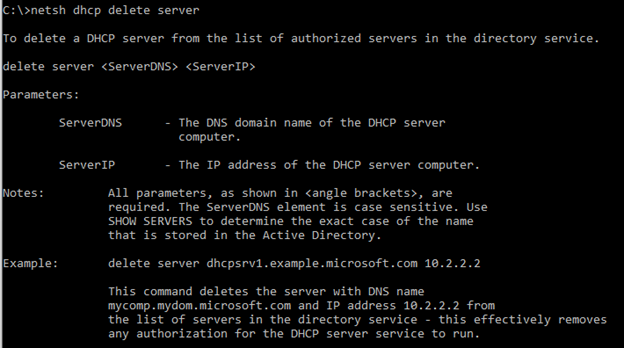
To remove it:
You have to be domain or enterprise admin to remove it otherwise, you will get error
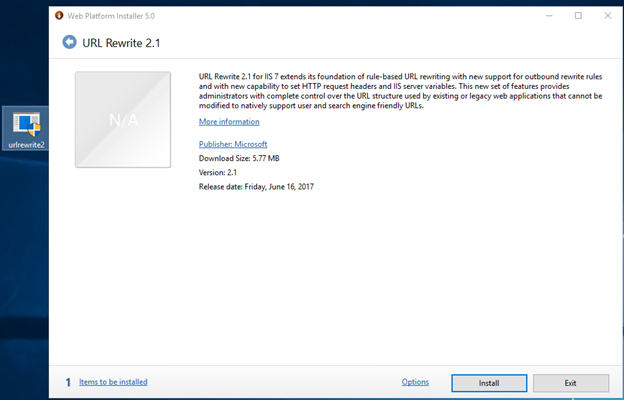
Redirect are very common for web servers for most if not all websites these days. This post I am using the URL Rewrite, if your server does not have already you need to download URL Rewrite extension which works With IIS 7, IIS 7.5, IIS 8, IIS 8.5, IIS 10. Note. If you already have the URL Rewrite you can skip to the section Adding Redirect Rule
If you already have the Web Platform Installer, you can double click and find it there, under your web server>Sites>Select site>on the right-side panel you will see Management section
To start the installation double click on the URL Rewrite and click Install
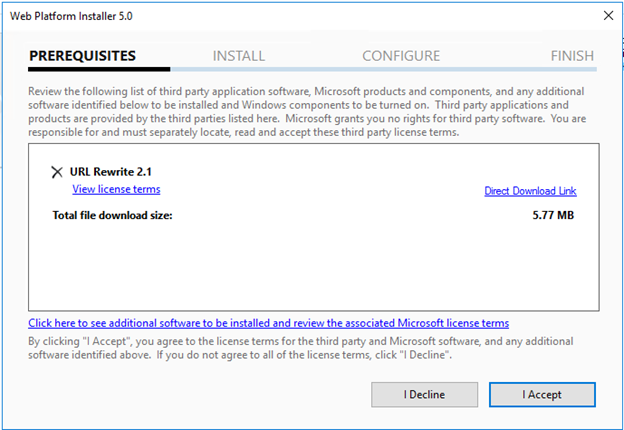
Read the terms then click on I Accept
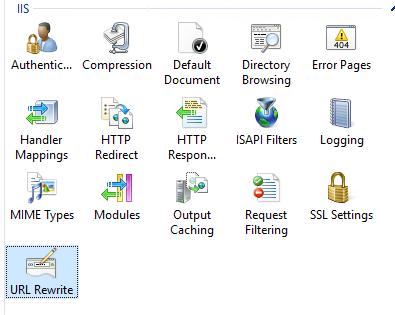
If everything goes well you should see, successfully installed, click Finish you should see the URL Rewrite, if you don’t close the IIS Manager and re-open it.
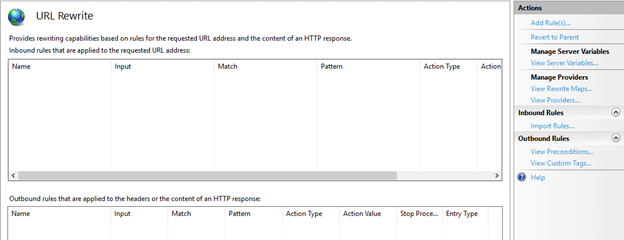
Adding Redirect Rule:
Double click on the URL Rewrite for the site you want to redirect
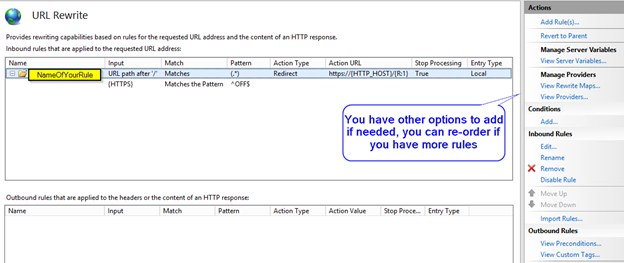
Add your rules here, which fits your needs you may need more than one rules
I am going to create a rule to redirect HTTP to HTTPS:
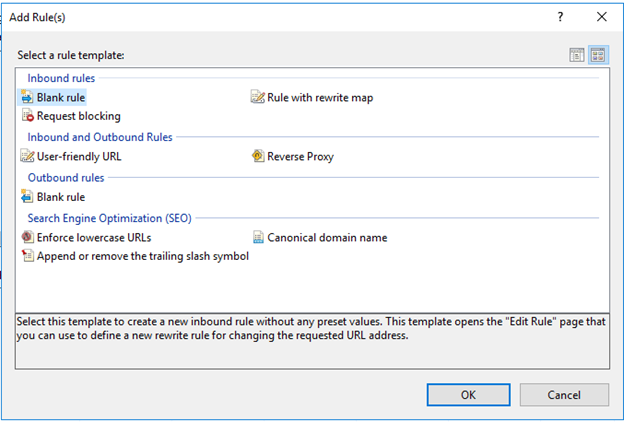
Click Add Rules(s) Then click on Blank rule (for Inbound rules)
Fill in the Name and other options shown in the screenshot, then expand the Conditions and click Add
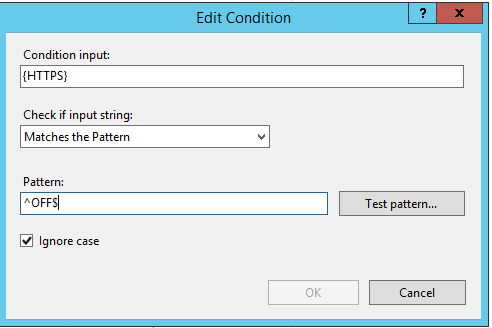
This condition will check if user type’s https, then this rule will be ignored, so it avoids the loop
Nothing set on the server variables, unless you needed in some special case, you can add it, Next, we want to set up the redirect https://{HTTP_HOST}/{R:1}
Your Rule should look something like this if you open your web.config file: <rewrite> <rules> <rule name=”http to https redirect” stopProcessing=”true”> <match url=”(.*)” /> <conditions logicalGrouping=”MatchAny”> <add input=”{HTTPS}” pattern=”^OFF$” /> </conditions> <action type=”Redirect” url=”https://{HTTP_HOST}/{R:1}” /> </rule> </rules> </rewrite>
If you have
issues make sure to check following:
Make sure your webserver firewall ports 80 and 443 are opened
You may need to restart the IIS service for rule to take effect, also make your local cache is cleared for your browser.
Double-check the pattern of your rule make sure it’s correctly typed, not a typo
Microsoft had announced Windows Admin Center (formerly Project Honolulu) back on April 12, 2018, and it’s been increasing use of Windows Admin Center to manage local and remote servers. It’s used by many IT admins since it’s very lightweight and it can be installed on Windows 10 client machine (need admin rights to manage servers). Microsoft has been adding many features on every new updates, it also have Extensions supports, so more products can be intergraded, at the moment more Preview. If you are using Microsoft Azure, this would be great tool going forward to use instead of using 3rd party systems. Once you have installed Windows Admin Center on your Windows 10 Client machine or on Windows server 2016 there are no agents need on target system. It uses Microsoft Edge (Windows 10, version 1709 or later) or Google Chrome browser. It can manage Windows server 2008 R2, 2012, 2012 R2, 2016, and manage hyper-converged clusters, only requirements are windows management framework 5.1
It’s similar
to Remote Server Administration Tools
(RSAT), Microsoft Management Console (MMC) and other tools. This does not replace but it give more options
in central modern management and it’s free.
1. Double click the setup to start the install, accept the terms and click Next
2. Click Next
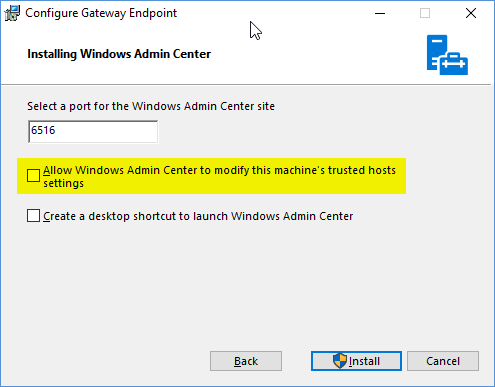
3. Click Install (if you want or need to change port you can and also if you want to create desktop shortcut select box)
4. If everything goes well you should see following screen, and ready to be used.
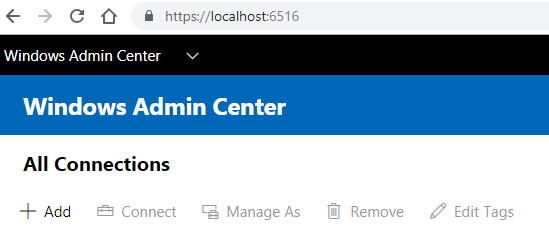
Go to URL:6516 or whatever ports you had set on step 3 and start adding servers.
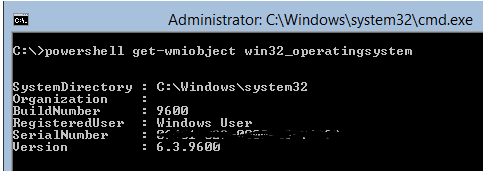
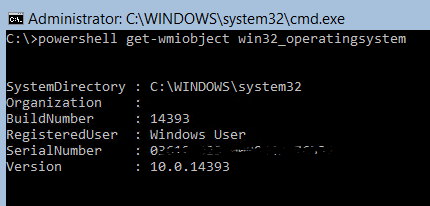
You will see Tools based on your server or PC hardware/software capabilities, here is compare tools between Windows server 2016 vs. Windows 10 Pro
That’s it, enjoy it
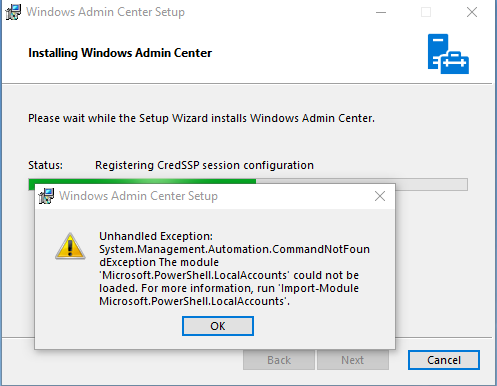
If you have issues as I did, here are some options to fix
If you get an error: Microsoft.PowerShell.LocalAccounts
Run this on powershell with admin rights: [Environment]::SetEnvironmentVariable(“PSModulePath”,”%SystemRoot%\system32\WindowsPowerShell\v1.0\Modules;” + ([Environment]::GetEnvironmentVariable(“PSModulePath”,”User”)),”User”)
Also, you may need to re-run the install again to uncheck the “Allow Windows Admin Center to modify this machine’s trusted hosts settings” Modifying TrustedHosts is required in a workgroup environment, or when using local administrator credentials in a domain. You need to configure TrustedHosts manually.
How to upgrade your Windows 2012 Hyper-V core to Microsoft Hyper-V Server 2016. Make sure you have a good backup and if you have any running VM’s it must be turned off to void any issues with the upgrade process. Download the ISO from the Microsoft website, you will need an account to download the ISO Microsoft Hyper-V Server 2016. Login to your current Windows 2012 core server and create a Directory in C drive called ISO and navigate to it. Attach as ISO you just downloaded or copy the extracted the ISO content drive.
Creating ISO directory:
C:\>mkdir ISO
Navigating to ISO directory:
C:\>cd ISO
Running the command to start the installation of Microsoft Hyper-V Server 2016