How to map a network drive via Group Policy

Map network drive via GP

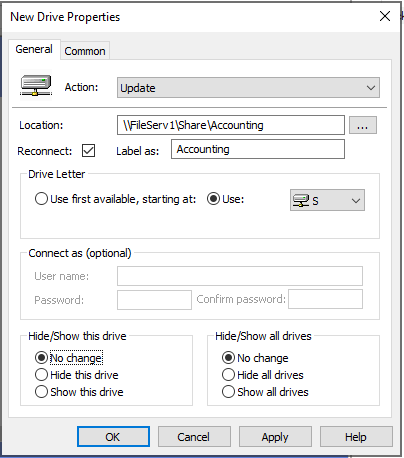
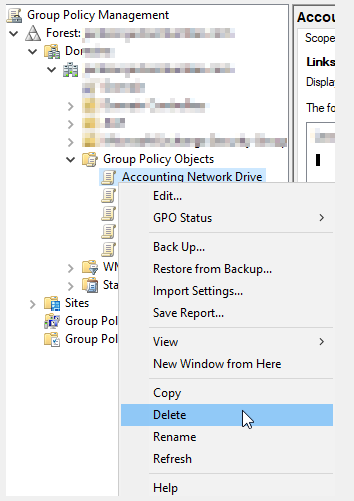
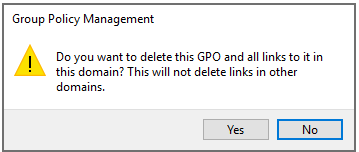
Map a network drive via group policy is a much easier and faster process than manually or logon scripts. user does not have to wait for the logon script to load or if the network path changes it automatically updates. It makes admin and user’s life much better and makes changes to the network without having to update each user. It should plan out the process, users, or groups it’s going to apply this network drive.

This is my process for this post

  1. File server: FileServ1
  2. Share Name: Accounting
  3. Drive Letter: S
  4. Group that’s applying to: Accounting
  5. how-to-delete-policy

Create a new GPO

Start>Windows Administrative Tools>Group Policy Management

or from Server Manager: Tools>Group Policy Management

Right-click on your OU (Organization Unit) where you want to create and link your Group Policy

Select Create a GPO in this domain, and Link it here …

You will see New GPO, name it whatever you want, something that makes sense, I am going to call it Accounting Network Drive

Configure GPO

Right-click on the Group Policy Object and select Edit

Expand User Configuration>Preferences>Windows Settings
Then right-click on Drive Maps and select New>Mapped Drive

Filling the details

You can see there are many options to select from

Based on select above you will see other options

How to Delete policy

First unlink from OU that’s linked

Then Delete from Group Policy Objects:

If you try to delete while still linked GPO, you will get this message, which also works fine too

That’s it, hope this help others


How to update Microsoft Azure Active Directory Connect

Upgrade-Azure-Active-Directory-Connect

If you have your AD sync to Microsoft Azure and have installed the Active Directory connect, you may need to update, and here is how to do that

To see the status of sync, you can log in to the Microsoft admin portal at https://admin.microsoft.com

on the home page, you should see Sync Status, click on the Sync staus to get to the details page

You should see something like this: Click on Microsoft Download Center or this link: https://www.microsoft.com/en-us/download/details.aspx?id=47594

It will bring you to the Download page, read the requirements, and download to your software

When you run the setup you may get an error message if you don’t have the TLS enabled
https://docs.microsoft.com/en-us/azure/active-directory/hybrid/reference-connect-tls-enforcement

PowerShell command to enable TLS 1.2: got it from the link above, copy from Microsoft so you don’t have typo or if you know how to enable yourself do so

New-Item 'HKLM:SOFTWAREWOW6432NodeMicrosoft.NETFrameworkv4.0.30319' -Force | Out-Null

New-ItemProperty -path 'HKLM:SOFTWAREWOW6432NodeMicrosoft.NETFrameworkv4.0.30319' -name 'SystemDefaultTlsVersions' -value '1' -PropertyType 'DWord' -Force | Out-Null

New-ItemProperty -path 'HKLM:SOFTWAREWOW6432NodeMicrosoft.NETFrameworkv4.0.30319' -name 'SchUseStrongCrypto' -value '1' -PropertyType 'DWord' -Force | Out-Null

New-Item 'HKLM:SOFTWAREMicrosoft.NETFrameworkv4.0.30319' -Force | Out-Null

New-ItemProperty -path 'HKLM:SOFTWAREMicrosoft.NETFrameworkv4.0.30319' -name 'SystemDefaultTlsVersions' -value '1' -PropertyType 'DWord' -Force | Out-Null

New-ItemProperty -path 'HKLM:SOFTWAREMicrosoft.NETFrameworkv4.0.30319' -name 'SchUseStrongCrypto' -value '1' -PropertyType 'DWord' -Force | Out-Null

New-Item 'HKLM:SYSTEMCurrentControlSetControlSecurityProvidersSCHANNELProtocolsTLS 1.2Server' -Force | Out-Null
New-ItemProperty -path 'HKLM:SYSTEMCurrentControlSetControlSecurityProvidersSCHANNELProtocolsTLS 1.2Server' -name 'Enabled' -value '1' -PropertyType 'DWord' -Force | Out-Null
New-ItemProperty -path 'HKLM:SYSTEMCurrentControlSetControlSecurityProvidersSCHANNELProtocolsTLS 1.2Server' -name 'DisabledByDefault' -value 0 -PropertyType 'DWord' -Force | Out-Null
New-Item 'HKLM:SYSTEMCurrentControlSetControlSecurityProvidersSCHANNELProtocolsTLS 1.2Client' -Force | Out-Null

New-ItemProperty -path 'HKLM:SYSTEMCurrentControlSetControlSecurityProvidersSCHANNELProtocolsTLS 1.2Client' -name 'Enabled' -value '1' -PropertyType 'DWord' -Force | Out-Null
New-ItemProperty -path 'HKLM:SYSTEMCurrentControlSetControlSecurityProvidersSCHANNELProtocolsTLS 1.2Client' -name 'DisabledByDefault' -value 0 -PropertyType 'DWord' -Force | Out-Null
	Write-Host 'TLS 1.2 has been enabled.'

Then re-run the AD Connect setup:

Note, if you have a big network, this may take some time, so do off-hours, because it will stop the sync of your AD until the upgrade is completed

You should see the upgrade process and synchronization

Then it will ask you for admin credentials:

If everything goes well you should see, Ready to configure, click Upgrade

Then, the configuration complete

now you can check the status on the admin page

That’s it, hope this helps someone


How to Compact Virtual Hard Disk

These days most of us using virtual storage drives for a server, most of the time these virtual storage disks are configured dynamically, so it grows as we use it, but does not shrink when you delete data unless you do compact. If you are using Hyper-V servers, it’s very easy to do, other hypervisors also offer similar compacting, you may just have to look around.

Here is screenshot of before compacting drive:

To compact in Microsoft Hyper-V hypervisor:

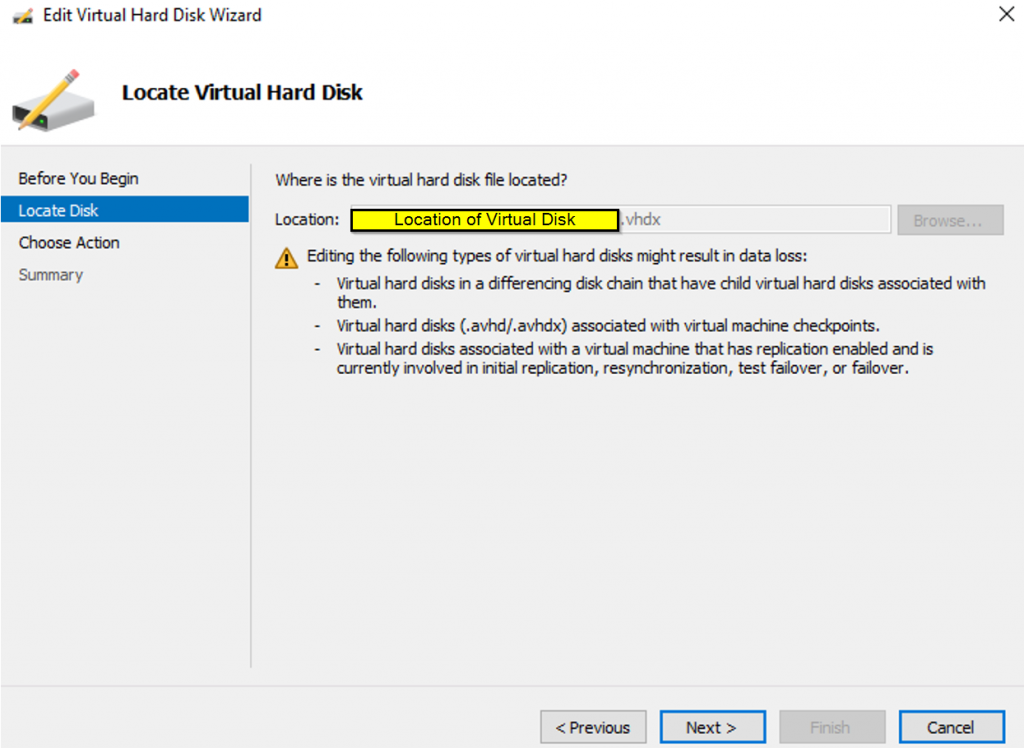
Open the Hyper-V Manager
Select the VM
Right-click on VM, click Settings
Select the Hard Drive that you want to compact, then click Edit
It will give you the location of the Disk and warning, please make sure you have a good backup, just in case something goes wrong
Click Next

If you only see Expand option, that means your VM is running, you can’t Compact
Click Next

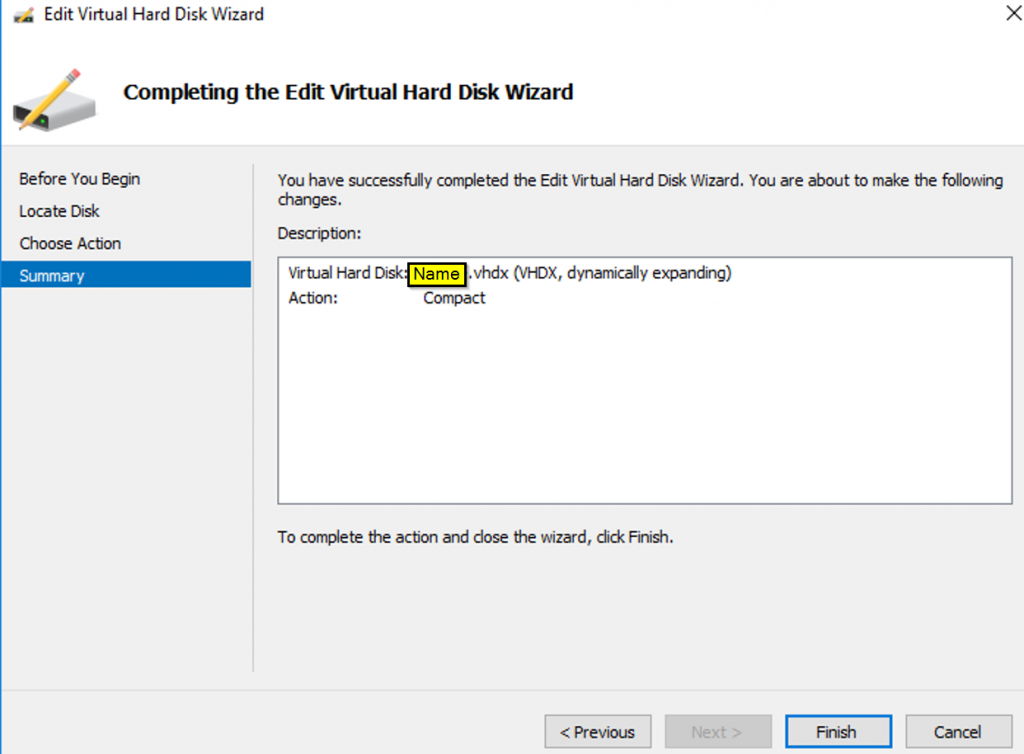
Summary of Disk, click Finish and it will start compacting, time it takes to compact are depends on speed of drive and how much data you have deleted.

This is what it looks like after compacting, the size will vary depends on how much of your data being deleted.

After Compacting:

That’s it, if you don’t get the drive space back, make sure to do the Drive Optimization first then re-do the compacting

To drive Optimize:

Login into server and right click on the drive select Properties

Click on Tools tab
Click on Optimize

Then select the drive if you have more then one and click on Optimize


How to delete Active Directory user with privilege issue

There may be a number of reasons you can’t delete some users from Active Directory, one of them could be domain admin or enterprise admin privileges. Another could be some objects are still in use or not sync up with an exchange, they both have some many references, so can’t delete active directory user with exchange ActiveSync

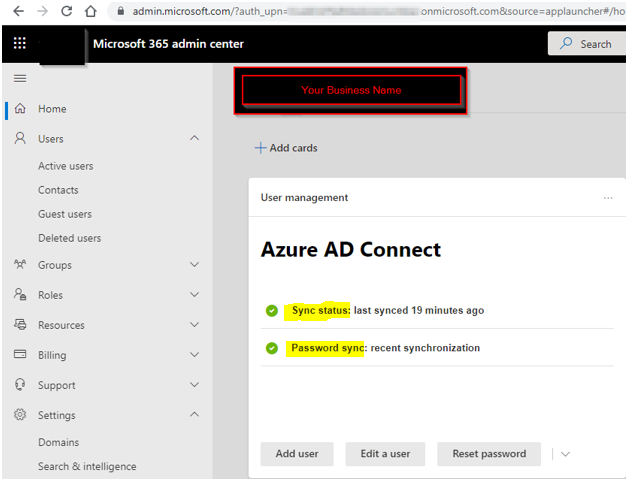
I had come across one after migration to Office 365, some user account that may have old Exchange attributes that cannot be deleted and you will have to manually give your self full access. here is how to delete those account that has privilege issues.

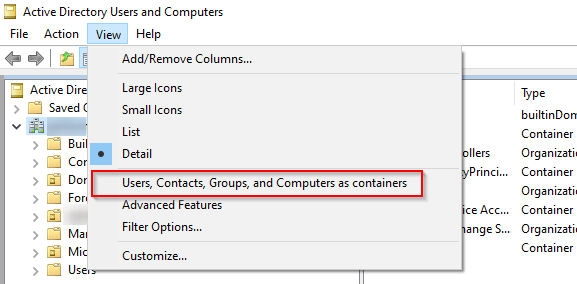
First you need to change the view to: use the “view -> users, Contacts, Groups, and Computers as containers”

Then go to the user you are having issue deleting, give you self full permission to object then you should be able to delete it


How to Uninstall Windows Defender from Windows Server 2016

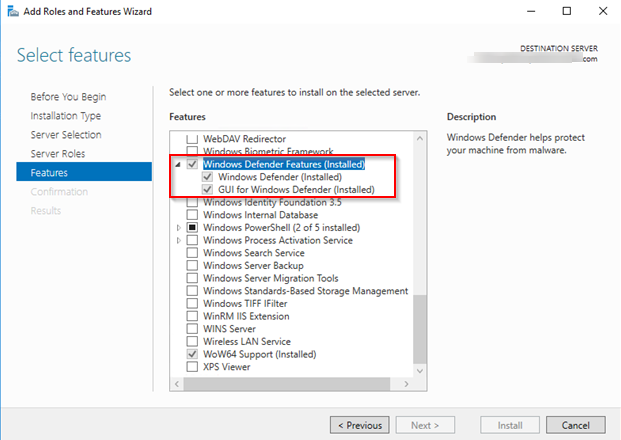
Most servers have 3rd party Antivirus solution, so you don’t need or want Windows Defender on your server. Here is how to uninstall it, so you can free up the resources of your server. You can remove via server manager or using PowerShell.

You can run this command to check if Windows Defender is running:

sc query Windefend

SERVICE_NAME: Windefend
        TYPE : 10  WIN32_OWN_PROCESS
        STATE : 4  RUNNING
                                (STOPPABLE, NOT_PAUSABLE, ACCEPTS_SHUTDOWN)
        WIN32_EXIT_CODE    : 0  (0x0)
        SERVICE_EXIT_CODE  : 0  (0x0)
        CHECKPOINT         : 0x0
        WAIT_HINT          : 0x0

If you get this message, which means Windows Defender is not running your system:

[SC] EnumQueryServicesStatus:OpenService FAILED 1060:
The specified service does not exist as an installed service.

or check via GUI: from Windows server manager

Remove just Windows Defender GUI:

Run PowerShell in Administrator, which will remove GUI only:

Uninstall-WindowsFeature -Name Windows-Defender-GUI

To completely remove Windows Defender

Uninstall-WindowsFeature -Name Windows-Defender

Then, just restart your server to finish the process

You can check if your Windows Defender is really removed from your server by going back to server manager

You can also check it by going to Settings>Update & Security>Windows Defender

Just in case you need to re-install Windows Defender back:

To install Windows Defender back for whatever reason, just service:

Install-Windows-Feature -Name Windows-Defender

To install Windows Defender with GUI:

Install-WindowsFeature -Name Windows-Defender-GUI

That’s it, hope you find it useful