How to setup OpenSupports Ticket System

OpenSupports is an open source ticket system, very simple to setup and use. Here I will go through setting up step by step. I am assuming you have your server is set up with correct permission. You will need to able to create database and upload installation files to your server. The installation has 7 steps it will go through and check requirements, and settings as it goes to the next step. This one is a very very simple Ticket system.

Server Requirements

PHP 5.6+
MySQL 4.1+
PDO Extension
Apache 2.4+

Installation of OpenSupports

You can start by downloading the OpenSupports ticket system from https://www.opensupports.com/download/

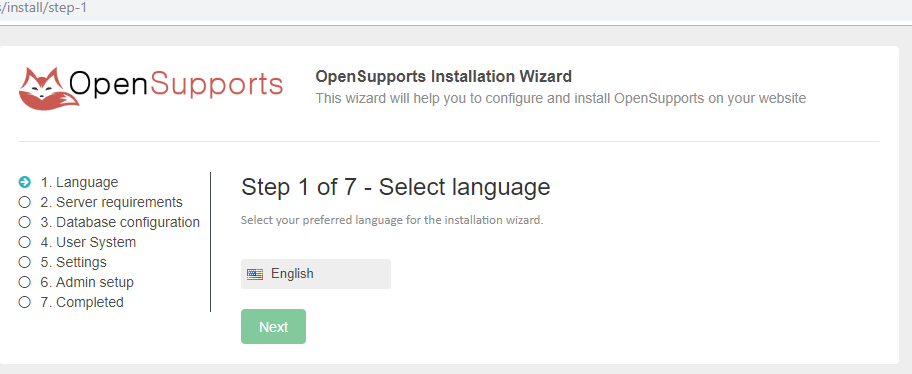
Once you have download the OpenSupports ticket system, then upload to your server and go to URL of your OpenSupports, you should see Step 1 of 7 Select the language and click Next

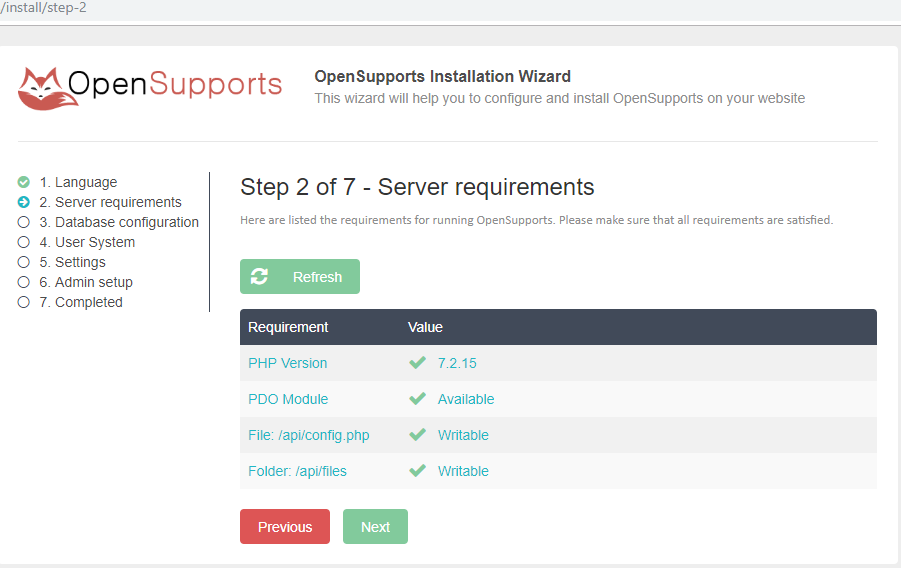
Then it will check for the Server requirements, if you see any error or missing requirement, install it then click Refresh, once all good, then click Next

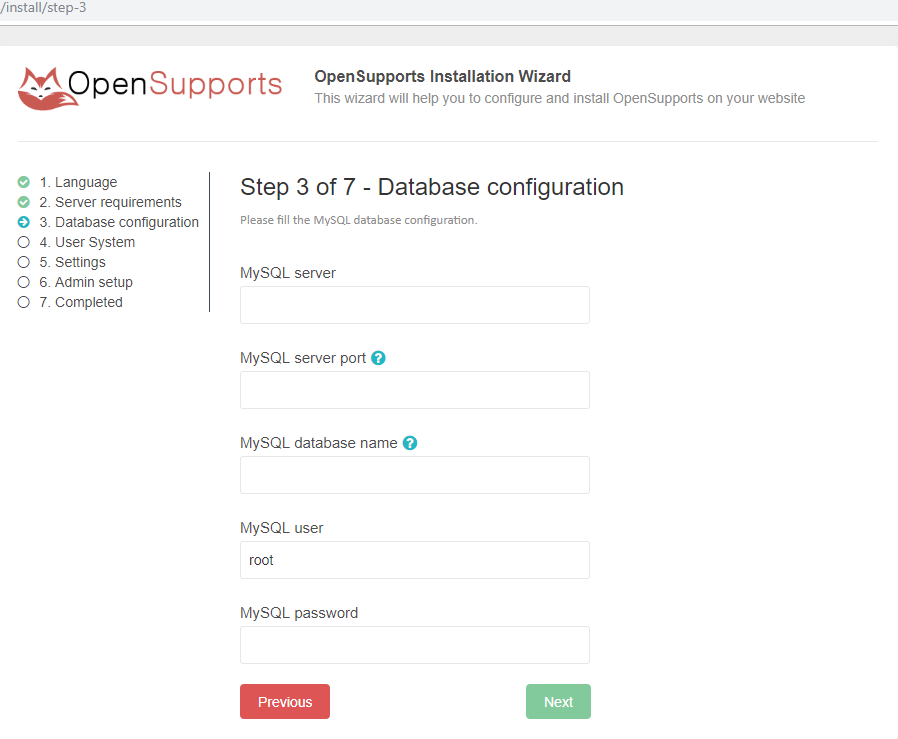
You can fill in MySQL server info, at this point create a database if you have not yet, then fill in info below and click Next

  • MySQL database name: this can be left blank and it will generate automatic
  • MySQL server port (this can be left blank (default port is 3306)
  • MySQL user:
  • MySQL password:

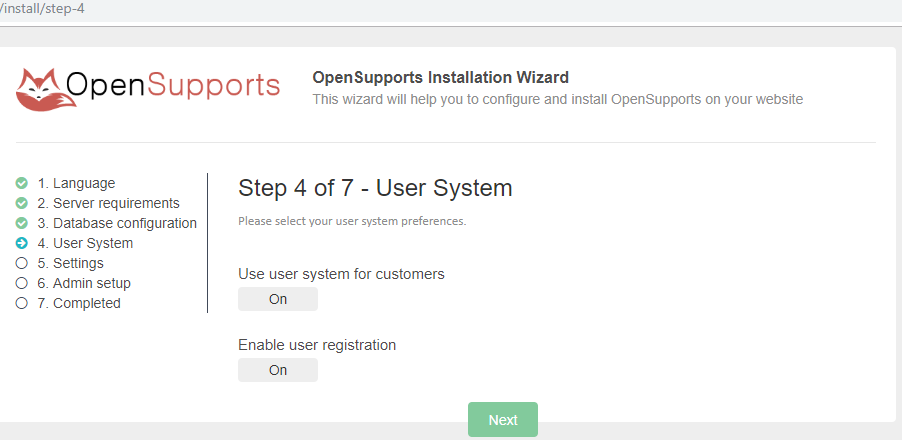
Then select the option if you want your user to access and be able to register it, it’s toggle on/off, make selection, then click Next

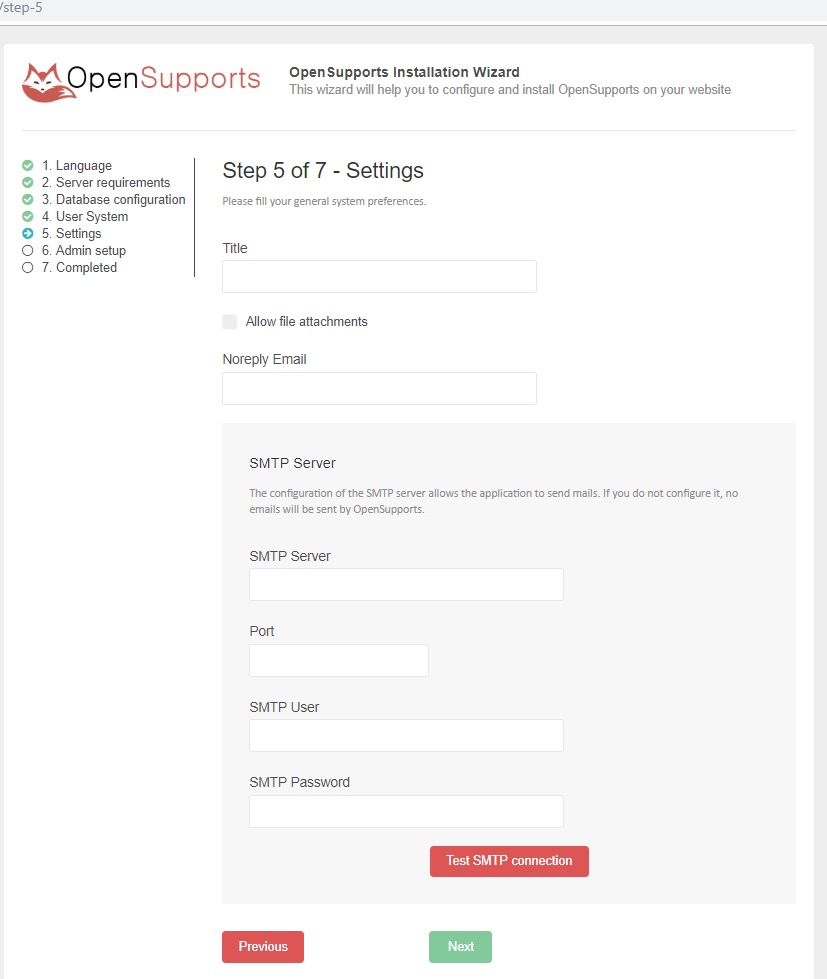
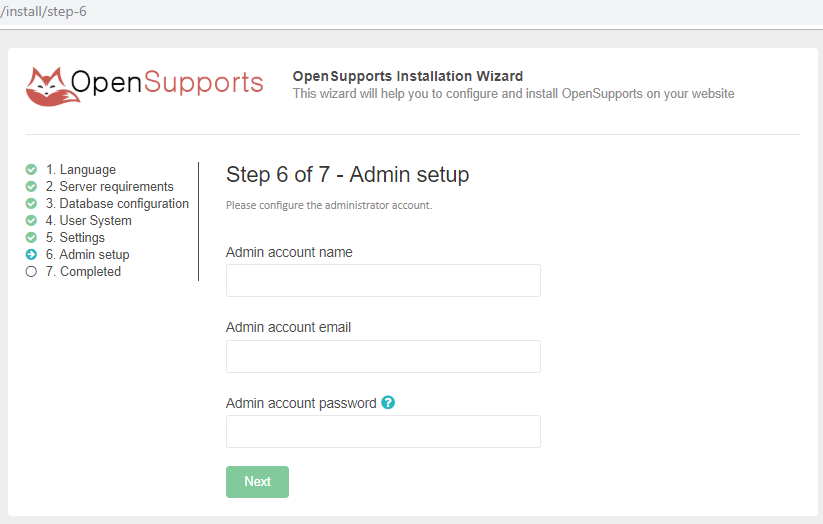
Fill in the name of your ticket system, Check box if you want your user to attach a file to ticket and email server info (option to confirm SMTP connection test, to make sure your email server can communicate), then click Next

Admin account name, email and password, fill in info, make sure it’s strong and keep it safe, you will use this account to make changes to your system. Once you have filled in info, click Next
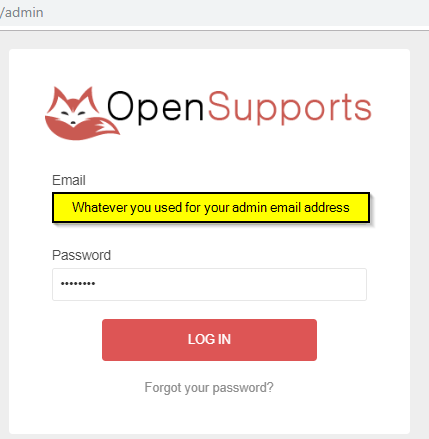
Then it will go through installation and redirect to login page

This is login page where you will enter your admin login info you choose in your last step.
User URL will be yourdomain
Admin URL will be yourdomain/admin

Once you are logged in you will see Dashboard of your new Ticket System, where you can make changes, add user/agents, etc…

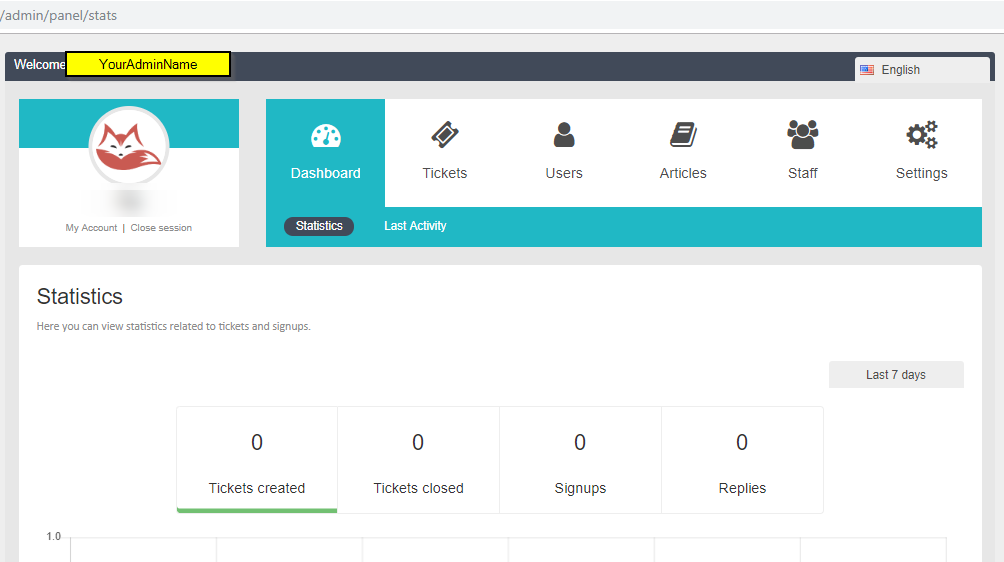
That’s it, very simple ready to use your OpenSupports open source ticket system. If you are looking for more feature you can use another open source ticket system called osTickets, I have written a post on how to install osTicket on Ubuntu, enjoy it


How to Disable Touch Screen

There are cases when you want to disable the touch screen when using some application that may cause issues or just you are not using it. You will need to be an administrator to make changes, otherwise, you will get a message, you don’t have rights. Here is how to do disabled, make sure you have another source of input, like external keyboard/mouse, otherwise you will not be able to use your device.

Open Device Manger by going to control panel or just search for device manager

Then expand the Device Manager>Human Interface Devices>Right click on the HID-compliant touch screen and select Disable device

You will get warning message box: Do you really want to disable it? Click Yes Make sure you have external keyboard or mouse, otherwise you will not be able to use your device at all.

That’s it, if you want to re-enable it, just right click on it and it will give you Enable device option


Install XAMPP on Windows 10

XAMPP is very popular many people use for the building, testing the application on your local system. It includes MariaDB, PHP, Perl, and options for FileZilla, Tomcat, etc… It’s free opensource, very easy to set up and use. It can be installed on Windows, Linux, and OS X. I am using Windows 10 Pro, I will go through the install and list some issues/ how to fix issues. You can use Bitnami Application to install ready-to-use applications. It’s well trusted with over 1 million applications per month, which you can use to install from your local installers, single VMs, multi-tier VMs, container images, or Kubernetes Helm charts.

Installation of XAMPP

You can download: https://www.apachefriends.org/download.html
Once you have downloaded the XAMPP, open the installation to start installing, the default location is C:\xampp noted if you install inside of the Program File you might have an issue with permission

I am going to install on default location c:\xampp, click Next

Then it will ask you which components you want to install, select one you like and then click Next

Then it will give you installation location choice, please choose and then click Next

Then click Next (if you want to learn more about Bitnami, you can have it checked otherwise unchecked)

Ready to Install, click Next

Now, it’s going to install whatever you have selected in above choices of the component, then you will see finished screen. That’s it you can start using it.

First time you will get option to select the Language, select it and click Save In case you need to change after you can go to XAMPP Control Panel>Config>Change Language

Then you should see the XAMPP Control Panel, here you can start using, default requirements web server and database, I am going to use Apache and MySQL. You might see error, ports in use, I will list below on fix.

Common Issues/Fixes

Apache port in use: open Config>Service and Port Settings>Apache
Change ports that are not in use both Main and SSL port

You might also need to change MySQL port, default is 3306

Once you have thing running and see any error, you can check out the logs for Apache and PHP, which will give you more details.


osTicket email settings

How to set up an email on an osTicket ticket system, setting up an email to create tickets and get a response back on a ticket system. It’s very easy to set up and to make the changes in case you need to if your support email changes. Here I will list a few email settings for you and you will get an idea, it’s similar you just have to check your email server requirements. Make sure you have the regular email address for your support email. It does not work with shared or forward.

Common settings::

  • Hostname: your email server FQDN
  • Port number: this can be different based on what your account setting is
  • Mail Box Protocol: this would be combined with the Port number, based on your account
  • Fetch Frequency: this can be whatever you like starting from 1 Minute
  • Email per Fetch: how many emails do you want to pull at once, this can also be from 1 to whatever
  • Fetched Emails: What happens once it creates a ticket, this should be set to move to a folder or delete, if you set it to Do nothing, you will have issues
  • Header Spoofing: some have off and some have it on

Incoming and Outgoing email:

Make sure you have email Fetching enabled for incoming emails, otherwise, by default, it will only pull emails when Agent is logged in to the system

For Outgoing email, make sure to set your support email address default as None: Use the PHP mail function

It’s under Emails>Settings
Make sure your Email Login Information is correct

Gmail settings:

This can be different based on your Gmail account settings, so check your Gmail settings and make sure to have the correct hostname, port, protocol, etc… Header spoofing is not needed.

Authentication “Yes” / MTA set as default SMTP account / PORT – 587

If you are using (G Suite) or 2FA settings you will need to create an app password:

Log in to your Gmail account and access the following link
Go to security and click the app password.
Select the app or Give a custom name that makes sense to you and click generate, now use that app-specific password in your osTicket system.

In some cases, you might need to force to use TLS, in that case, you can use the hostname as: tls://smtp.gmail.com

Exchange

  • Hostname: YourMailServer.domain.com
  • Port Number: 993
  • Mail Box Protocol: IMAP + SSL
  • Fetch Frequency: 1 minute (s)
  • Emails Per Fetch: 30
  • Fetched Emails: Move to folder: TicketsOrWhateverName

Microsoft office 365:

make sure your hostname and ports are correct
Hostname: smtp.office365.com or outlook.office365.com
Ports:587 or 993 or 25

For Synology NAS: You will need to setup Cron Job:
/usr/local/bin/YourPHPVerison /volume1/web/osticket/upload/api/cron.php

Check the logs to find more details of osTicket under /scp/logs.php
Web server, email server, Apache, etc… Many times hostname, ports, or protocol are mixed up or typos could cause the email not to work. You might have firewall issues or IP blocking. Hope this help out someone out there

Also, FYI: Ports information

IMAP uses port 143
But if you use SSL/TLS encrypted IMAP uses port 993

POP uses port 110
But if you use SSL/TLS encrypted POP uses port 995

SMTP uses port 25
But if you use SSL/TLS encrypted SMTP uses port 587 (formerly 465)

.


How to upgrade osTicket to 1.11

update: this version no longer support please use 1.12 or latest

Finally, osTicket v1.11 is released open source ticket system, it has lots of new feature people been waiting for a long time. You can find official documents and a full list of all the features on here. Most important issues people had was PHP version too old in 1.10.4.  The osTicket v1.11 supports PHP version v5.6-v7.2.

How to upgrade from 1.10.4 to 1.11

  1. Make sure you have a good backup of Database and files of osTicket
  2. Then put the system in the offline mode: by going to /scp/settings.php
  3. Download the new version from https://osticket.com/download/ and choose the osTicket Core, v1.11 (Latest Release)
  4. Upload to your server v. 1.11 and replace current files/folders from Upload folder from your downloaded, and exclude the script folder/files
  5. Make sure you have the correct permission, then go to the URL/SCP of the osTicket system and login, you should see osTicket Upgrader, make sure your Prerequisites are all good, if any errors correct it, then click Start Upgrade Now
  6. Then you should see Apply updates to database stream: core, click Upgrade Now
  7. If everything went well you should see Upgrade Completed

  8. Delete the /setup folder and update any customization you may have, test it, then once all is good you can put the system back online

That’s it if you have customized PHP core files, those needs to be re-applied after the upgrade. Also, make sure your plugins are good, if needed upgrade do so, make sure it supports the new version. one more thing, if using Language packs, you can find them at the osTicket website, those do needs to be updated.   You will find many solutions to the problem in a forum where people report and help out each other. Please read your error message and logs of your system web server, PHP, osTicket, it gives many ideas about why things are not working. Many of them due to the PHP version not supported. If you were to get help from the forum, please include your system information, like osTicket, PHP version, web server, and remember forum support is free, so don’t order/demand to fix your issues.  They do offer paid support if you wish to pay for it.  Thank you very much to the osTicket team for their hard work on keeping osTicket System up to date.