New Year Redefine your Tech goals

First of all, Happy new year to all, may this year bring you many joyful moments in your life. Now let’s get back into Tech world, as we all getting more and more attached our self to Technologies, we need to keep it clean as same way we do with our home, office, car, etc… If we don’t digital data will continue filling up your hard drive, phone, tablet, computer, etc… even though storage is getting cheaper and cheaper that does not mean we keep filling up. When we need something, it’s very hard to find and some information might be sitting in unknown places where someone else might have access to it, whom you don’t want to or did not even know about it.

Explore more ways to keep your system up to date, which will keep your data safe. These days most if not all of the tech things we use are cloud-based, which we have no idea who is looking around your data, privacy keeps changes, software keeps getting updated, with added more restrictions to help protect you, but at the end of the day you are the one who needs to a take action. It does not matter what kind of device you are using, they are all digital data and if they are connected to the internet, it can compromise your data, it’s just a matter of time.

To do list:

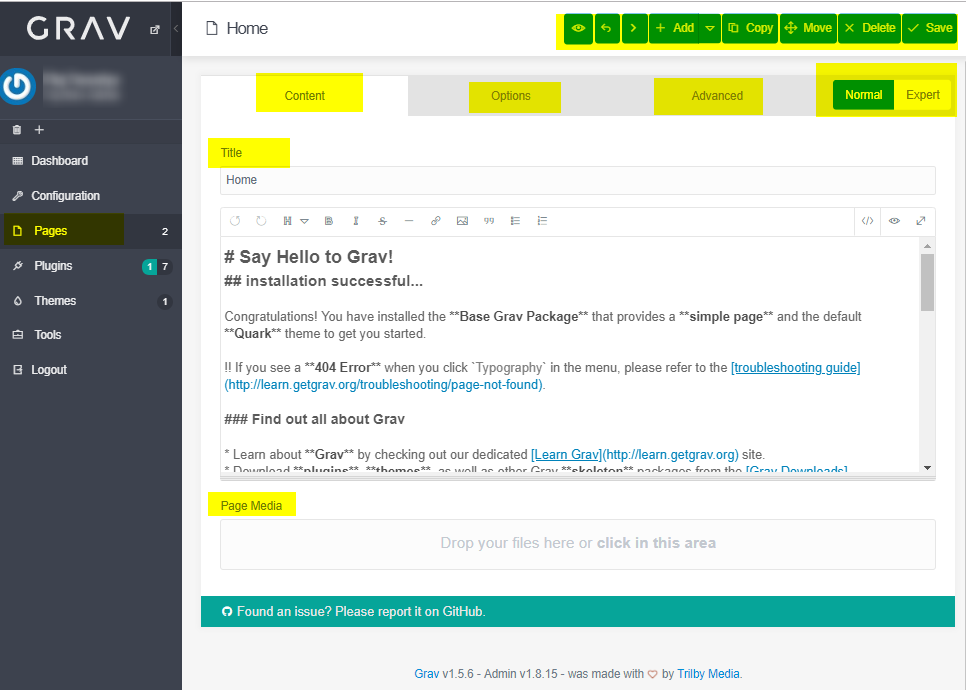
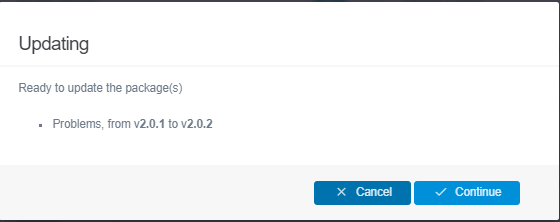
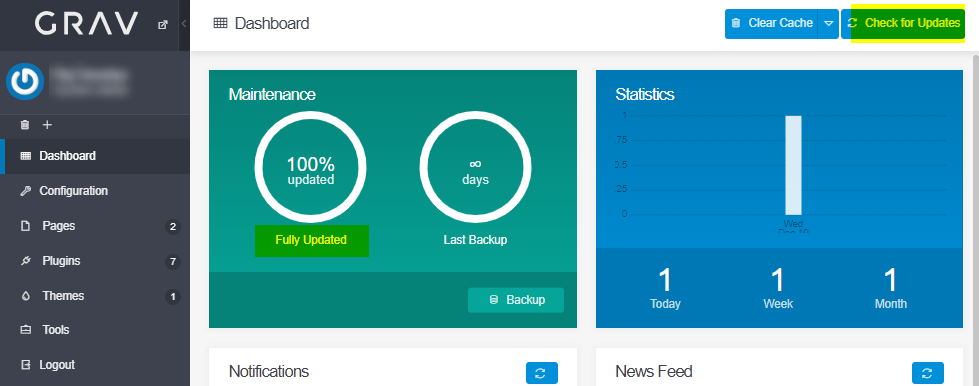
  • Keep your device up to date by checking for updates and check on Tech news that may affect your device
  • Change your password at least twice a year and more complex
  • Keep your eyes on the permission/privacy settings of your device(s)/application(s)
  • Delete old data which no longer needed or outdated (be careful not to get confused with sync vs. backup)
    • Sync – same data on all device, if you are cleaning because your device doesn’t have storage by deleting it will delete on all devices. Some application might have an option on what data to sync.
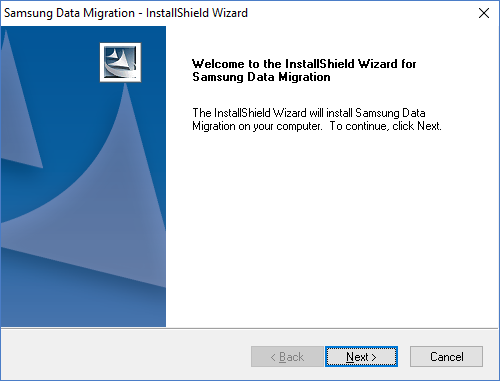
    • Backup- is more of going back in time when your data is backed up. It mostly used when your data get corrupted, virus, or malware (any important data, should be kept 2 or more copies and maybe even offline version)
  • Uninstall any application you don’t use
  • if your device or application supports 2 steps authentication, set it up so it gives you added extra security
  • Last but not least, don’t post your personal data on social media or any public sites or give any personal info over the phone unless you are the person who called to known person or institution

Enjoy your every moment, not a single moment are same. if you had bad moments they gone, but by thinking of bad moments you are loosing current moments and creating similar for future. So enjoy current moment and create new good moments 🙂 for future, stay safe.


Recover failed Synology NAS DS1515

Many people are using NAS from verity of brands and they are very good to keep your data safe.  Number of drives varies from model to model and they have RAID options, but in case one of the hard drive fails, simply just swap with new and you should be able to get back to normal operation, without any downtime.  There are some cases, where your NAS has power issues, where it does not turn on at all or keeps restarting.  You can still recover data, here is example of Synology NAS DS1515+ or may apply to similar model, you may have to recover someday, hope never, but things can go wrong when you least expected.  Here is how to recover back to Normal operation, it’s very easy simple process.

First get a replacement same model of your NAS, then take the failed NAS drives one at a time and put them in the same order to new NAS (assuming hard drives are all normal).  Plugin the Network cable and power cord.  Then turn it on and go to http://find.synology.com/# make sure your NAS and your computer are on same network.

Two options: follow steps based on what you seeing in your situation

Status: Recoverable

Status: Migratable

Steps for Recoverable

  1. Go to: http://find.synology.com/# You should see NAS info and option to connect, status should say Recoverable, Click Connect

2. Then it will redirect to IP_Address_of_Your_NAS:5000, Click Recover

3. It will go through Installing DiskStation Manger and Repair System

4. Once done, it will automatically restart, your browser may not redirect page to your original IP/DNS Name, so open manually or go to: http://find.synology.com/# it should display IP/Host Name info to connect

You should see status ready, click Connect and check the system health

It should be back to Normal

Everything should be back to where you had left of defective or failed unit.  You can open the Log Center and should be able to see all the logs from past, when you had issues.

Quick Installation Guide from Synology: https://global.download.synology.com/download/Document/HIG/DiskStation/15-year/DS1515+/Syno_QIG_DS1515+_enu.pdf

Steps for Migratable


Go to: http://find.synology.com/# You should see NAS info, If you see Migratable message that means your DiskStation firmware is not same and it need to be updated

Click connect and accept the agreement

You will see Status amber blinking and all hard drive lights are green

You can mouse your mouse over the Device Info to see status then Click Install

Select the Migration: Keep my data and most of the settings (unless you want to just keep data and reset the configuration then choose “Reinstalltion”)
Then click on the Right arrow and click Install

Once finished installation of the DiskStation it will need to restart which it will, once it finish restarting, if your browser does not refresh you may need to go back to to: http://find.synology.com/#

You should see status Ready, click Connect

If you are using Active Backup for Business you will need to re-activated and may want to check other utilities you maybe using.


Windows Admin Center to manage Local and Remote server

Microsoft had announced Windows Admin Center (formerly Project Honolulu) back on April 12, 2018, and it’s been increasing use of Windows Admin Center to manage local and remote servers.  It’s used by many IT admins since it’s very lightweight and it can be installed on Windows 10 client machine (need admin rights to manage servers).  Microsoft has been adding many features on every new updates, it also have Extensions supports, so more products can be intergraded, at the moment more Preview.  If you are using Microsoft Azure, this would be great tool going forward to use instead of using 3rd party systems.  Once you have installed Windows Admin Center on your Windows 10 Client machine or on Windows server 2016 there are no agents need on target system. It uses Microsoft Edge (Windows 10, version 1709 or later) or Google Chrome browser.  It can manage Windows server 2008 R2, 2012, 2012 R2, 2016, and manage hyper-converged clusters, only requirements are windows management framework 5.1

It’s similar to Remote Server Administration Tools (RSAT), Microsoft Management Console (MMC) and other tools.  This does not replace but it give more options in central modern management and it’s free.

To get started first download the Windows Admin Center: http://aka.ms/WACDownload


1. Double click the setup to start the install, accept the terms and click Next

2. Click Next

3. Click Install (if you want or need to change port you can and also if you want to create desktop shortcut select box)

4. If everything goes well you should see following screen, and ready to be used.

Go to URL:6516 or whatever ports you had set on step 3 and start adding servers.

You will see Tools based on your server or PC hardware/software capabilities, here is compare tools between Windows server 2016 vs. Windows 10 Pro

That’s it, enjoy it


If you have issues as I did, here are some options to fix

If you get an error: Microsoft.PowerShell.LocalAccounts

Run this on powershell with admin rights:
[Environment]::SetEnvironmentVariable(“PSModulePath”,”%SystemRoot%\system32\WindowsPowerShell\v1.0\Modules;” + ([Environment]::GetEnvironmentVariable(“PSModulePath”,”User”)),”User”)


Also, you may need to re-run the install again to uncheck the “Allow Windows Admin Center to modify this machine’s trusted hosts settings” Modifying TrustedHosts is required in a workgroup environment, or when using local administrator credentials in a domain. You need to configure TrustedHosts manually.


Common FaQ’s: https://docs.microsoft.com/en-us/windows-server/manage/windows-admin-center/use/troubleshooting

For more information: https://www.microsoft.com/en-us/cloud-platform/windows-admin-center


Install open source flat-file CMS Grav on Ubuntu

Grav is open source flat-file CMS which means without any needs of the database.  It only has two requirements web server like Apache, Nginx, IIS, etc … and PHP 5.6.3 or higher.  It uses Markdown for formatting syntax and it automatically converts to HTML.  It also has a Normal or Expert mode for editing content.  I am installing this on Ubuntu 16.04, but it should work just fine with other versions of Ubuntu as long as you meet the server/PHP requirement.  Also, Grav have two options when you download Grav core or Grav Core + admin plugin, I am using installing with Admin plugin to get more options.

Installation is very easy, once you have the web server of your choice and PHP version meets the requirement.

Download the Grav from https://getgrav.org/downloads and extract it then upload it to your web server

Then just go to your Domain URL and you should see the following screen, where you fill in your admin information and click Create User

If everything goes well it should bring you to Dashboard screen, this is your admin screen, where you will be able to add, delete, and make changes to your Grav CMS.  Also before you do anything click Backup and it will automatically back up for you.

This is default home page of Grav after fresh installation

If you want to edit your page to your Grav CMS login to admin (YourDomain/admin)
To edit Home Page, click on Pages>click Home

Now you should be to edit Content and click on the other tabs to see more options, Advance and Mode type Normal/Expert.

After the installing you may need to upgrade, just click on the Update on your dashboard and click continue

Back to your dashboard you should see fully updated, otherwise click check for updates

That’s it, enjoy it


How to Clone old drive to Samsung solid state drive

When you replace your old spinning drive with any solid state drive will double your computer speed.  There are many solid state drive vendors and versions of the drives, some are more reliable than others.  I had written one post for SanDisk SSD drive and this one I am writing about the Samsung SSD software, much easier to use.  I have been using Samsung drive for a long time and it’s the one I feel more reliable, that does not mean other vendors is not, you can use any vendors you like and I am sure they all have some kind of cloning software included or have to find something else.  Cloning software saves you time and keeps all your data/software installed as if nothing changed to your computer system, but you will see the speed increase for sure.  You will be thinking after why I have not done this upgrade before.  Let’s get started.

What you will need:
Tool to open your Laptop/Desktop to replace a hard drive
USB to SATA cable (unless you have the second slot to put new drive)
SSD drive same size or whatever your data total size is plus future free size to store more data

Download the cloning software: Data Migration Software at https://www.samsung.com/semiconductor/minisite/ssd/download/tools/

Once downloaded, double click to start the installation, then choose the Language then click Next

Click Next

Read the Agreement, Accept and click the Next

Then Click Install

Then click Finish

Then open the Samsung Data Migration software, you may have a shortcut on your desktop or you will find it in the program list.  If for some reason you have an older version you may get update option, if you get that screen then do the Update by click on Update 

It should go through same installation process as above, once updated it may open Samsung Data Migration software, if not open it manually to start the clone process.

At this point you can plugin your new drive, if you have not done yet.  You should see your current drive and new Samsung SSD Drive on bottom, make sure it’s the right drive, you may have to click on refresh to see.  If you don’t see the drive then you may have to install the driver.

Once is confirmed that’s the right drive and everything else is closed, Click Start and you will get Warning screen asking Would you like to start cloning? Click Yes


The time it takes to cloning may vary base on data type, size of data and speed of your current drive, for me, it took about 1 hour.  Make sure you don’t stop the process and if it’s laptop make sure to have your power cord is plugged in.

Click Close

Then you will get an option to Exit or Shut Down, Click ShutDown and remove an old drive and put the new drive in.

That’s it, once the computer comes back you will see much faster.  No more waiting and now you can be happier 🙂