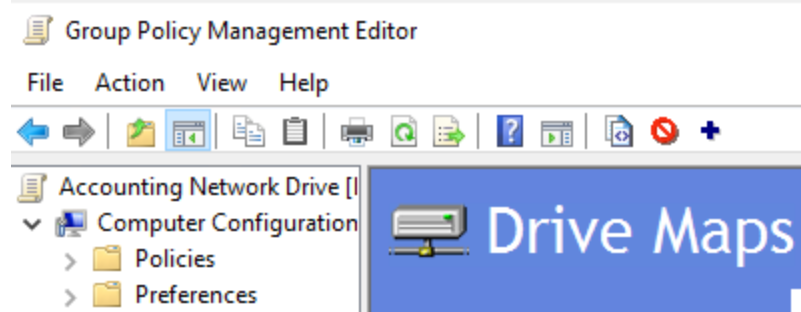
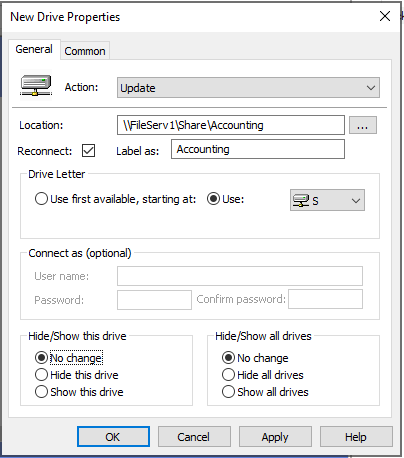
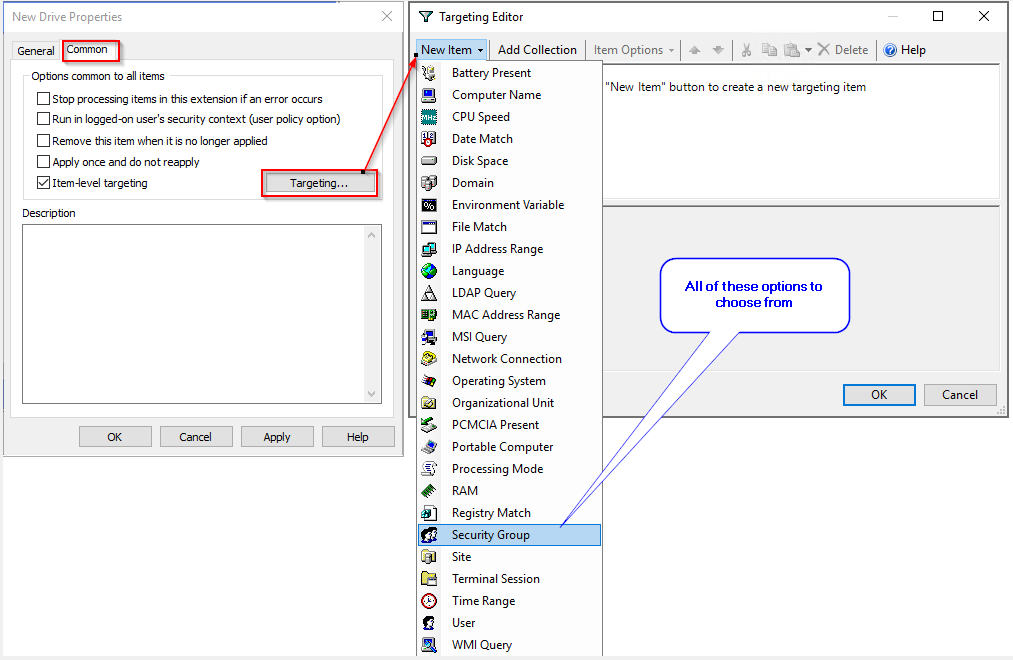
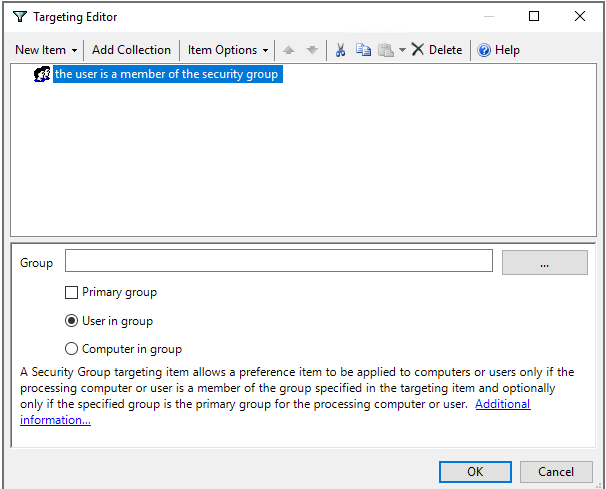
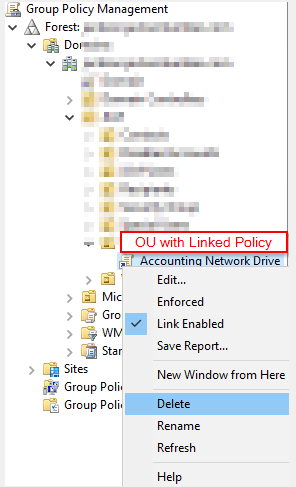
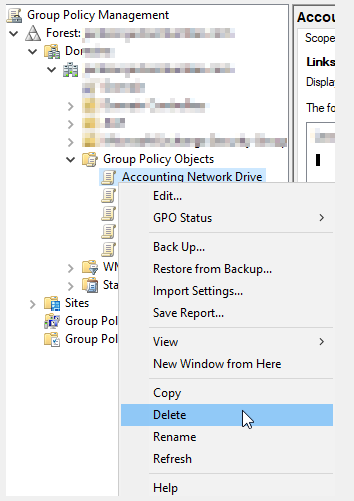
Map a network drive via group policy is a much easier and faster process than manually or logon scripts. user does not have to wait for the logon script to load or if the network path changes it automatically updates. It makes admin and user’s life much better and makes changes to the network without having to update each user. It should plan out the process, users, or groups it’s going to apply this network drive.
One of the very common communication is via emails, they do fill up our Inboxes and some of us don’t have time to clean up, which you can do it automatically or manually. Just carefully when setting automatically to delete, because we as human beings forget and take automation as a privilege, and sometimes it deletes some things we want to keep as history. Here is how to clean up your old email manually or automatically.
First, Sign-in to your Office 365 by going to https://outlook.office.com Once you have signed in go to Gear Icon at the top left then go all the way to the bottom, select View all Outlook settings
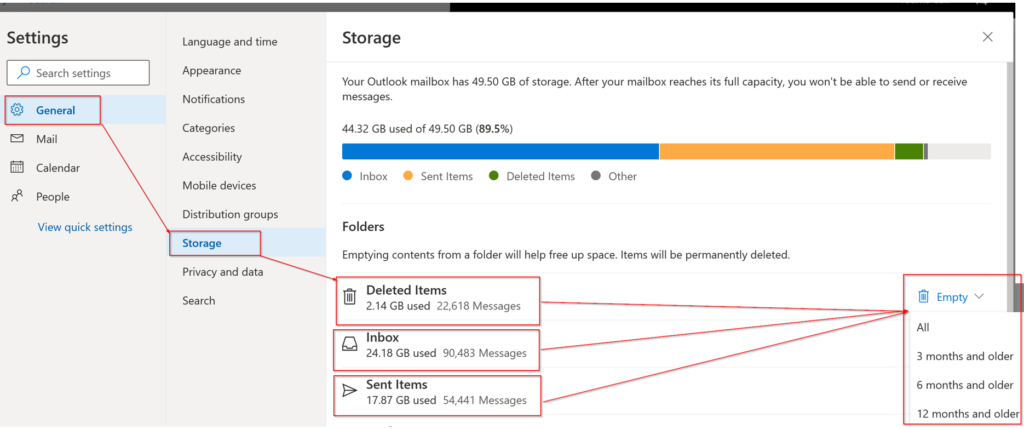
You will see another pop-up window
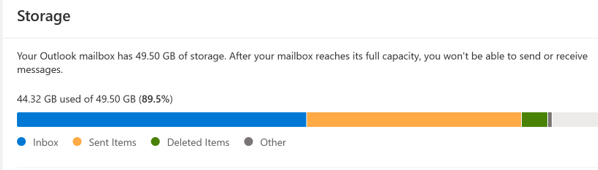
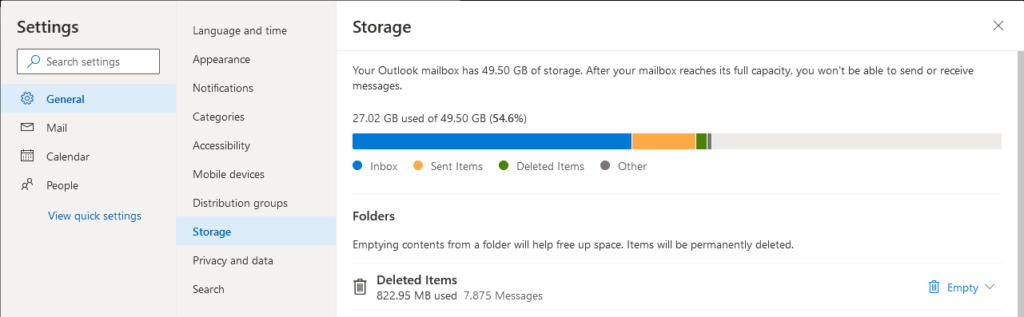
Go to Settings>General>Storage>Then select the folder you want to clean up old emails
Then on the right side, you will have an option to choose from, All, 3 months and older, or 6months and older, or 12 months and older
As, soon as you select the option, it will start deleting your old emails
Note: Items will be permanently deleted
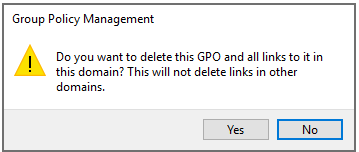
After you delete your old email, you will see, the overall size will decrease, in this example, I have deleted Sent Items
That’s it, if you want to set up an automatic rule to delete, you can follow the steps below
Automatically via a set of rule
Once you have signed in go to Gear Icon at the top left then go all the way to the bottom, select View all Outlook settings
You will see another pop-up window
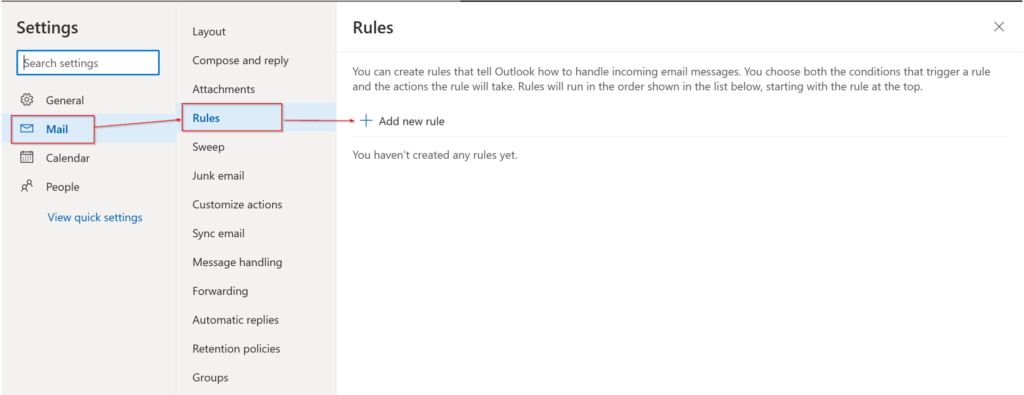
Go to Settings>Mail>Rules>Then click Add New Rule
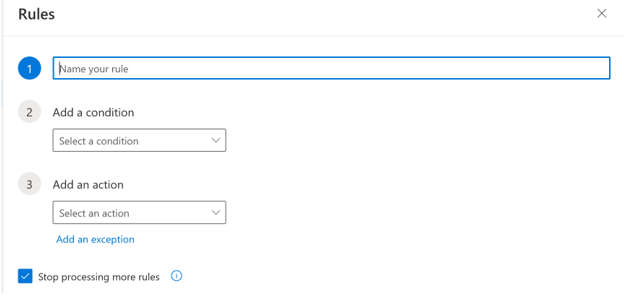
Name your rule, something like “clean up old email 12 Monthsand older” or something that makes sense to you.
Now add a condition
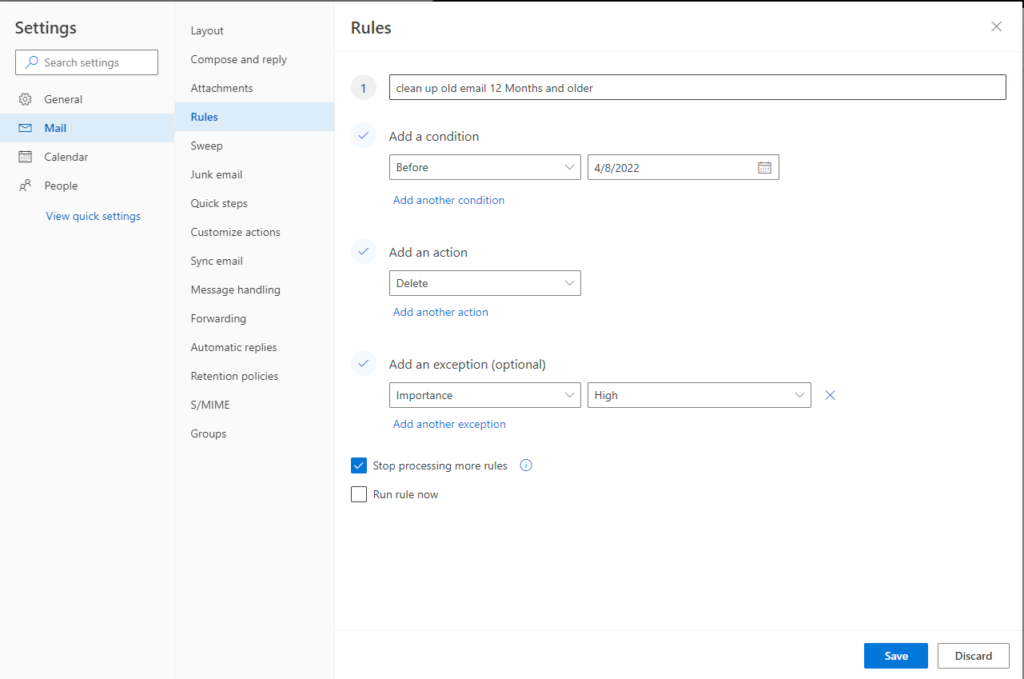
There are so many options, select whatever you like, I am selecting “Before 4/8/2022”
Note: you will need to just update the date in the rule later on.
Then select the Action, you want to do, I am selecting “Delete“
You can get your emails back from Deleted Items unless the default email deleted policy will clean up have permanently deleted, which most cases 30, 60, or 90 days from the date it was deleted
Also, added an exception so I can keep Importance with “High” or whatever you like.
Once you are happy with everything click Save
That’s it, don’t forget, if you set to delete or whatever condition you have selected, it will automatically do just that, in case later in time you might be wondering what’s happening to my old emails
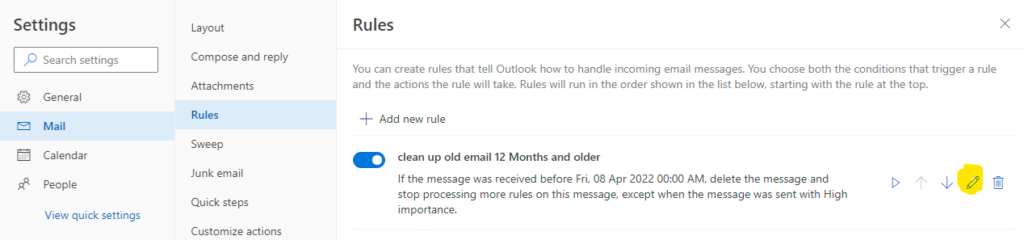
To change the Date or Turn off the rule, just go to Mail>Rules and click on the pencil icon to change or the Toggle button to turn off.
Double-check all selections before running, because there are no ways to stop, once it started the action you have selected in the rule. If you are unsurely tested on some test account(s).
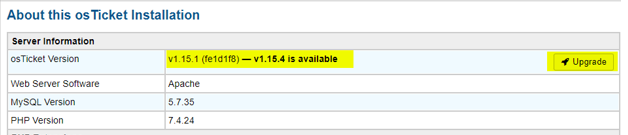
osTicket v1.15.4 is released on October 7, 2021, its open-source ticket system. You can find full release notes at https://github.com/osTicket/osTicket/releases. For osTicket version v1.15.4 PHP version PHP 7.2-7.4 the process is the same as before just make sure you have a good backup of the database and osTicket files. There are many Enhancements, Improvements, and Security from 1.15.1 to 1.15.4.
The Upgrade process is very simple, I am doing 1.15.1 to 1.15.4
Make sure you have a good backup of the Database and files of osTicket
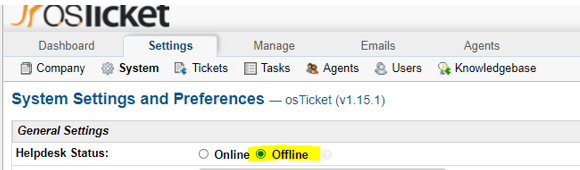
Then put the system in the offline mode: by going to the URL of your osTicket support ticket /scp/settings.php
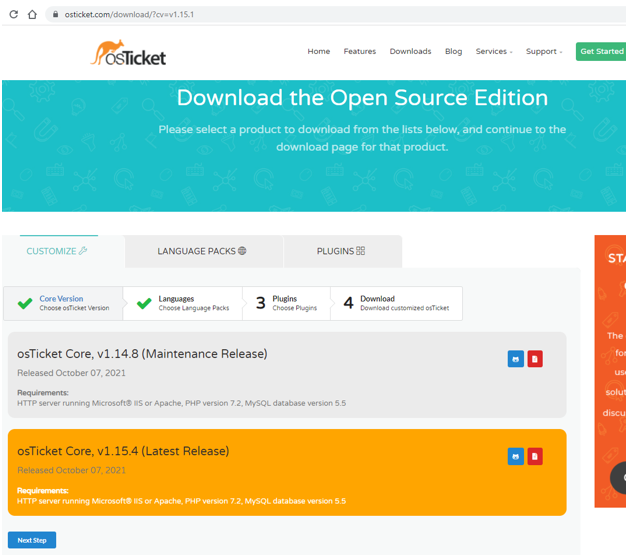
Download the new version from https://osticket.com/download/ and choose the osTicket Core, v1.15.4 (Latest Release) don’t download any Languages or plugins, you can add them after to void issues with the upgrade process.
Upload to your server v. 1.15.4 and replace current files/folders from the Upload folder from your downloaded, and exclude the script folder/files. Also, Maintain the directory hierarchy any changes could cause an issue with the upgrade process or something might not work well.
Optional: Script folder only needed if you are using remote piping, so if you are not using remote piping you don’t need to upload.
Make sure NOT to replace your \include\ost-config.php which does not include in the download.
official Plugins can be downloaded and installed after the upgrade
Select the osTicket Core, v1.15.4, then click Next Step
Click Next Step
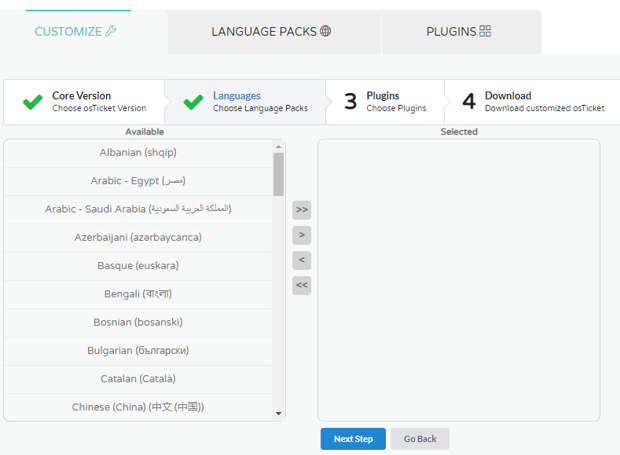
Language packs, don’t add any at this time, just click Next Step
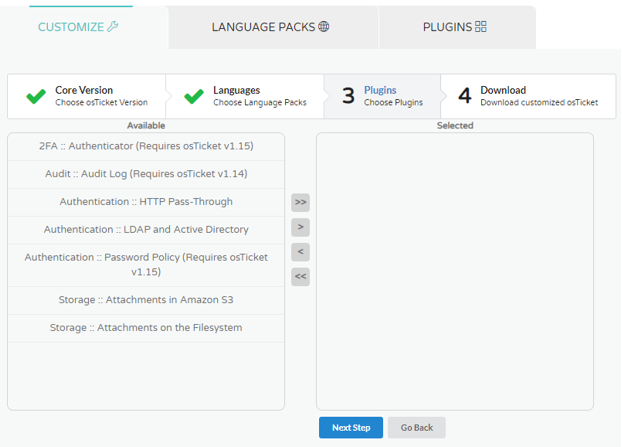
The Plugins, don’t add at this time, just click Next Step
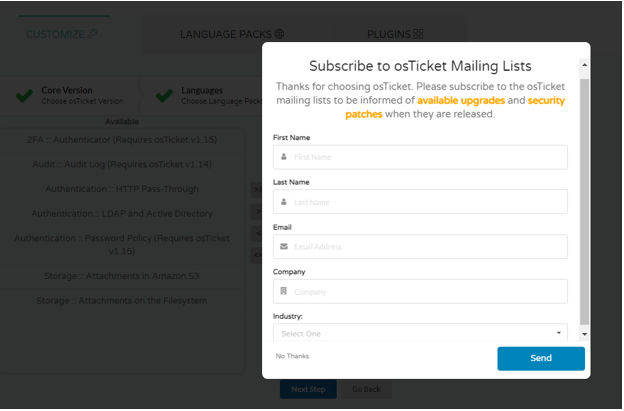
Then you should see Subscribe to osTicket Mailing Lists, if you already subscribed, you can click on No Thanks and it will start downloading. If you have not subscribed, do filling, so you will get notification of any upgrades and security patches.
Now that you have downloaded, you can upload the installation files the best way you know of and override those that are on the server. If everything goes well you will not see anything, since this version doesn’t have any database changes.
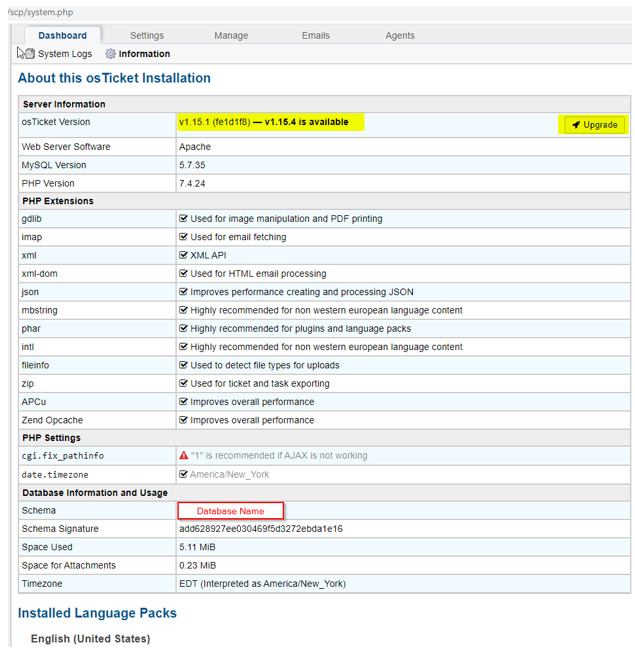
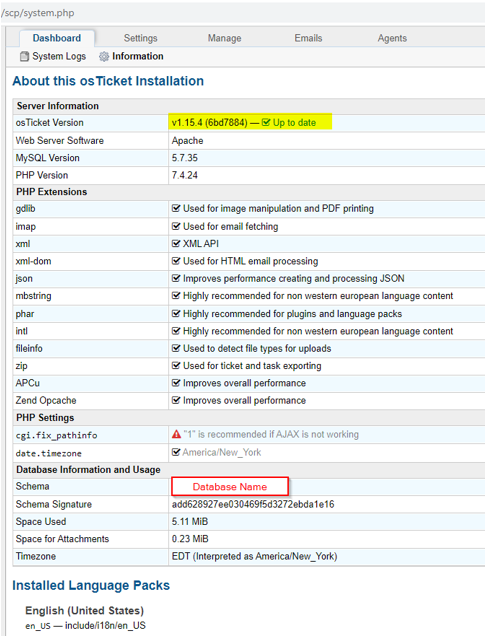
If you look at your Dashboard Information, it should show Up to date
You can look at the system logs to see if there are any errors reported or your web server or PHP logs. You will need to update any customization you may have, test it, then once all is good you can put the system back online. Also, remove the write permission to \include\ost-config.php to secure your config. If you have customized PHP core files, those need to be re-applied after the upgrade. Also, make sure your plugins are good, if a needed upgrade to do so, make sure it supported version. if you don’t see some functions, make sure to check the permissions under Agents>Roles>PermissionsGood luck
There are many ways to backup, upload an osTicket, here is one I used that may help you, otherwise, you are all good to go, enjoy your osTicket system, Thank you to osTIcket Team for making it open source and keeping up to date.
How to backup osTicket files on Ubuntu:
Login to your server and run the following command use -r (copy recursively), and specify a current location and backup location. Note: this command is just doing backup of current osTicket files and dumping to another directory within the same server.
When you hit Enter, it will ask to enter a password, once done if you do ls command, you will see backupNameOfosTicket10.11.2021.sql or whatever you named your backup file
How to upload osTicket installation files to the server from Windows 10 via PowerShell:
This is the quickest way to upload and replace files. Please make sure the path is correct, before running the command, when you hit enter, it will ask for a password for your server.
Windows 11 system requirements are much higher than Windows 10, which means it will not support older hardware. Here are some lists and links in this post to help you find out if your current system is able to upgrade to Windows 11.
List of all minimum system requirements for Windows 11
Processor: 1 gigahertz (GHz) or faster with 2 or more cores on a compatible 64-bit processor or System on a Chip (SoC). Memory: 4 GB RAM. Storage: 64 GB or larger storage device. System firmware: UEFI, Secure Boot capable. TPM: Trusted Platform Module (TPM) version 2.0. Graphics card: Compatible with DirectX 12 or later with WDDM 2.0 driver. Display Resolution: High definition (720p) display that is greater than 9” diagonally, 8 bits per color channel. Internet connection: Microsoft account and internet connectivity required for setup for Windows 11 Home.
Your device must be running Windows 10, version 2004 or later, to upgrade. Free updates are available through Windows Update in Settings>Update and Security.
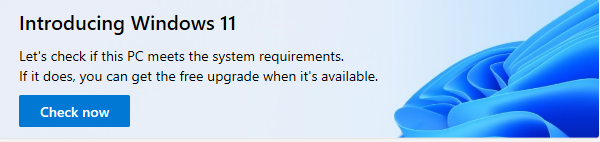
Once you have downloaded compatibility, open it and click on Check now
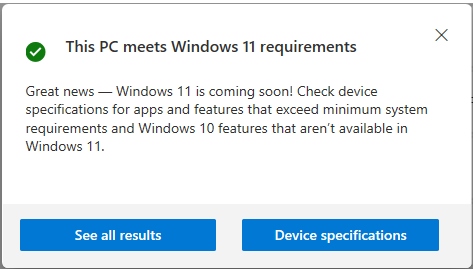
If your system hardware is newer you should see This PC meets Windows 11 requirements
If you want to see details click on See all results, something like this, your specs will be different
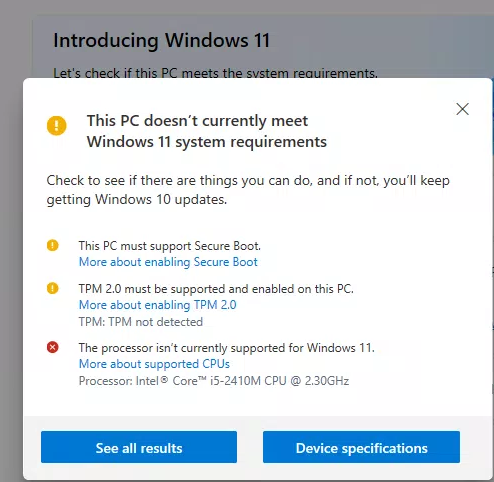
If you have older hardware, you will see something like this: example of this PC does not have Secure Boot enable and Processor does not meet the requirement, most important TPM 2.0, which this PC does not even have.
Here is how to free up space in the boot partition in Ubuntu, which may cause issues when trying to update or install a new application. Make sure you have a good backup and be careful running some commands, just double check typo before executing it.
To see If you are running out of boot partition space, run the following command:
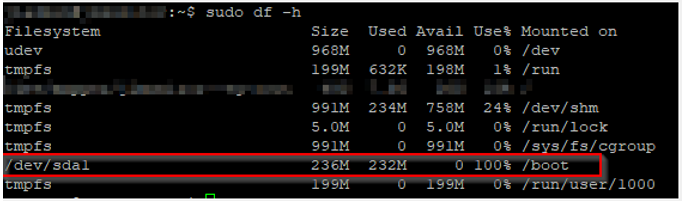
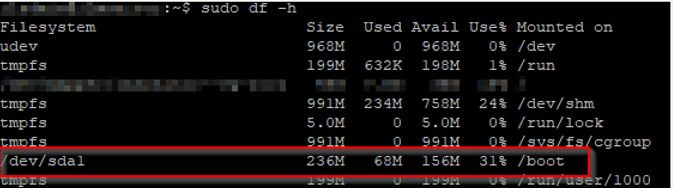
command: sudo df -h
You will see how much space is in use, in this screenshot, its /boot is 100% used
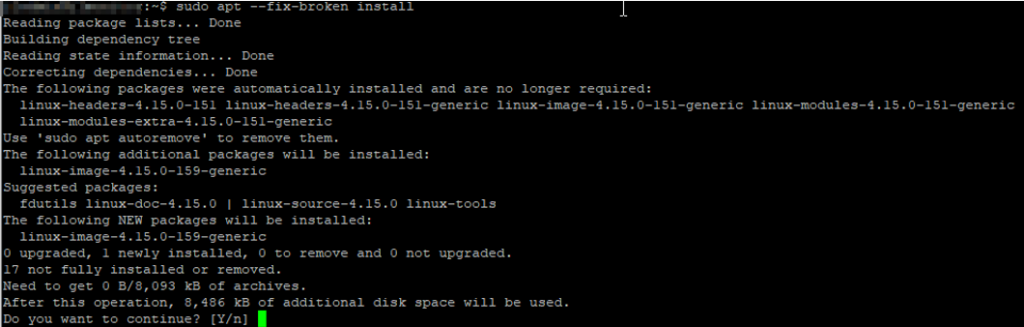
You can try the following command which may clean automatically for you some unused packages.
command: sudo apt autoremove
If the above command gives you an error, then continue do following steps
find your currently active boot image by running the following command:
Command: sudo uname -r
Output may look something like this: 4.15.0-143-generic