Exchange 2010 is very old and its extended supports ends in 2020, so you should have already migrated over to a newer version of Exchange or to cloud Microsoft office 365. In case you have not and wanting to do clean up, before your migration, there are cases that mailbox no longer needed but Windows login needed. Here is how to remove mailbox only, without removing Active Directory login for the user. You can see Microsft Lifecycle at https://support.microsoft.com/en-us/lifecycle
How to Disable Mailbox
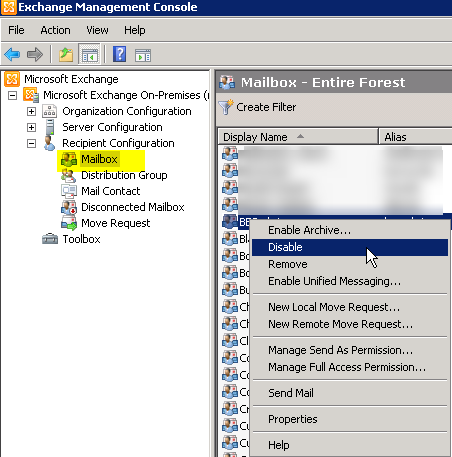
Open Exchange Management Console
Expand Recipient Configuration>Mailbox
On the right side select the user mailbox you want to remove
Right Click on the user and select Disable
You will get a message to confirm, that you want to Disable, which will remove the Exchange properties from the Windows user object and mark the mailbox in the database for removal. Select Yes
Then that mailbox goes in Disconnected Mailbox and will be kept based on setting set for settings under:
Organization Configuration>Database Management>
Look at properties of mailbox then click on Limits tab
You will see “Deletion settings“
Keep deleted items for (days): x
Keep deleted mailboxes for (days): x
Also, if you have checked the box “Don’t permanently delete items until the database has been backed up.” then it will not delete until it’s been backed up. This way if you deleted by mistake wrong user mailbox you can re-connected.
How to Disable Mailbox via Power shell
Open Exchange Management Shell: Disable-Mailbox –Identity “NameOfUser” Then it will give you message “Are you sure you want to perform this action?” once you are sure type y and press Enter
Or
If you don’t want to get confirmation: Disable-Mailbox –Identity “NameOfUser” -Confirm:$false
That’s it, if the name does not match it will give you error
As you can see Exchange 2010 Service Pack 3 is ending it’s extended support by 1/14/2020
If you are still running Ubuntu server 14.04, which will be End of Life this Aril 2019, so you should upgrade to 16.04 or 18.04. You can check out Ubuntu Release dates at https://wiki.ubuntu.com/Releases Even though Linux is more secure, that does not mean it should not be kept up to date, to keep your data safe. Longer you keep put out the updates harder it gets, due to many changes on each upgrade. You can check out my post on How to secure your Ubuntu server. Make sure you have a good backup and your backup is tested to be sure data you are backup are good. If you have an option you can do an upgrade on a test server and work out any issues, that way when you do upgrade on production system it goes smooth.
Check list before starting upgrade process
Data backed up and verified
Make sure your application supports newer packages versions
List of application/services so it can be tested after the upgrade
Direct access to the server, remote session will give you an error
Stopping application/services, not required but if dealing with a database it’s safer
Double check storage space for an upgrade to download/install
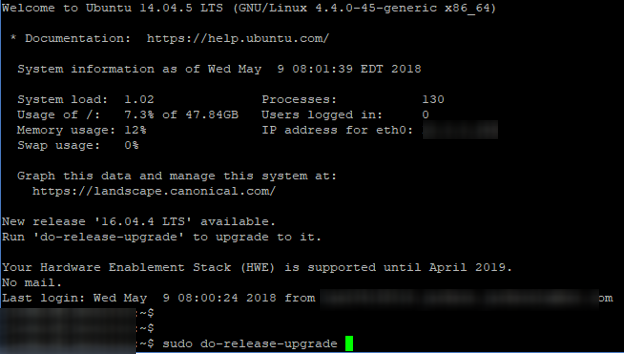
Login to server directly to do the upgrade Command: sudo do-release-upgrade
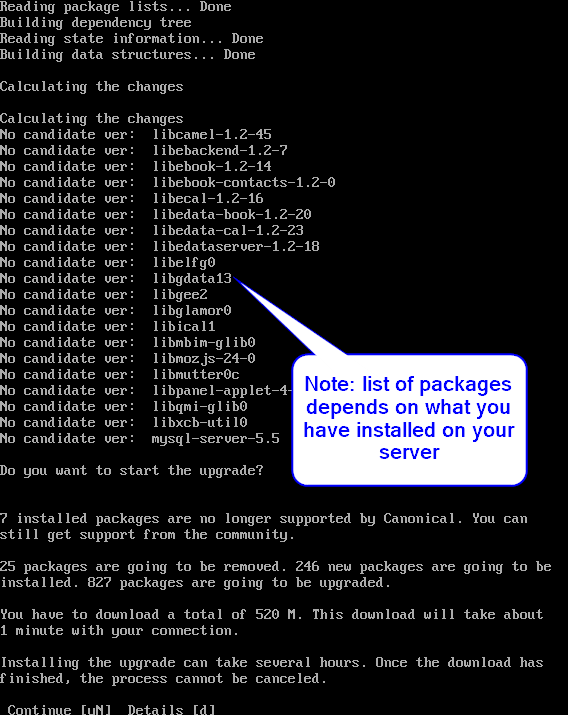
It will go through a list of currently installed packages and then let you choose if you want to go for the upgrade or not. If you need more details you should press d otherwise press y and ENTER
You may get a message like this select Yes, so if any services needed to be restarted it will automatically without asking you each time. It will start the process of removing obsolete packages, downloading, installing and setting up automatically, unless you have chosen No.
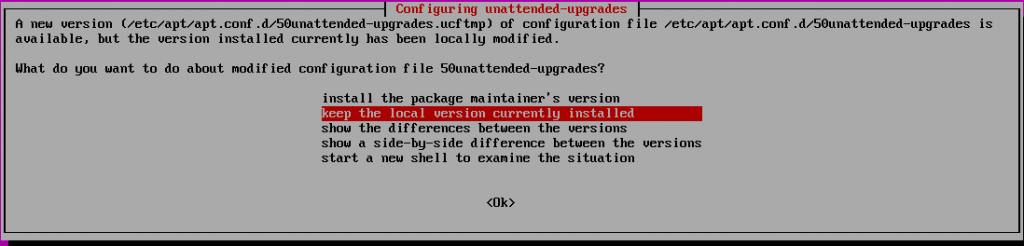
You may get this message and you can make your own choice to keep current version or install newer, you can select to show differences between the versions
It will go though upgrade process, then if everything goes well you should see message System upgrade is complete, then restart by pressing y and Enter key, so your server can restart to finish upgrading.
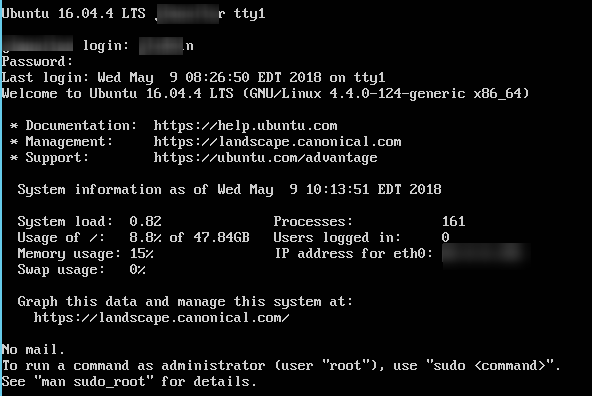
If everything went well you should see login screen
After an upgrade, you should do the following
This will check for any updates:
sudo apt-get update
This will install any updates that it found:
sudo apt upgrade
This will remove any packages no longer needed:
sudo apt-get autoremove
Then check your application/services to make sure they are running and if there any errors fix it.
That’s it, hope this helps out someone out there, good luck
Common issues and solutions:
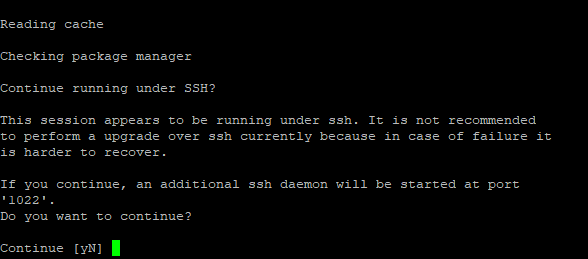
If you are remotely doing upgrade you will get this warning, if something goes wrong with your SSH connection while you are in the middle of an upgrade, then you would have issues getting into your server
You may have issues with PHP version, most likely you may have been running version 5.6, installing the PHP7.0 might fix your issues or newer version:
If you already have created VM on Hyper-V standalone and its running, but now you want to add to part of Hyper-V Cluster so its high availability, then the process is simple. Before taking this action make sure your storage is available on Cluster storage because your current VM will move its current local storage from standalone to Cluster storage. Also, it’s best to have a good backup in case something were to go wrong with the process. This was done on Microsoft Windows server 2012 R2, the process is similar to Windows 2016 server. When you move the VM from Windows 2012 or 2012 R2, you may get upgrade version option, don’t upgrade if you want to replicate or have option to run VM on Windows 2012 or 2012 R2.
Open up Failover Cluster Manger
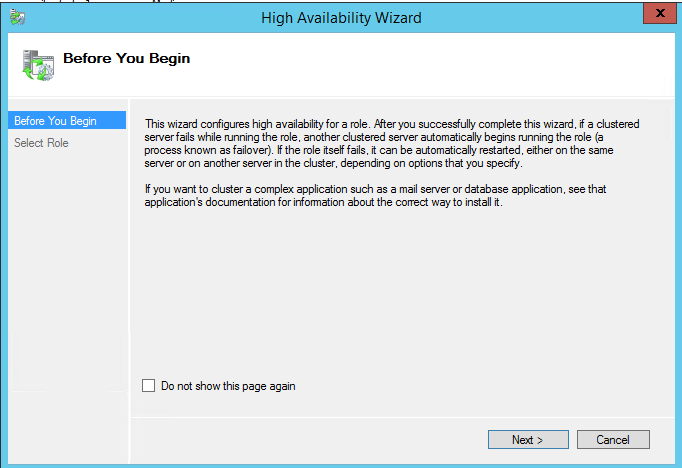
Expand tree and right click on Roles>Configure Role … You may or may not get Wizard screen if you had selected “Do not show this page again” before
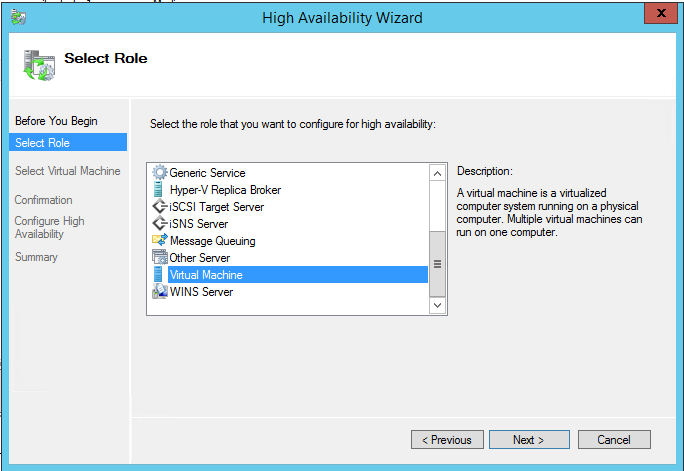
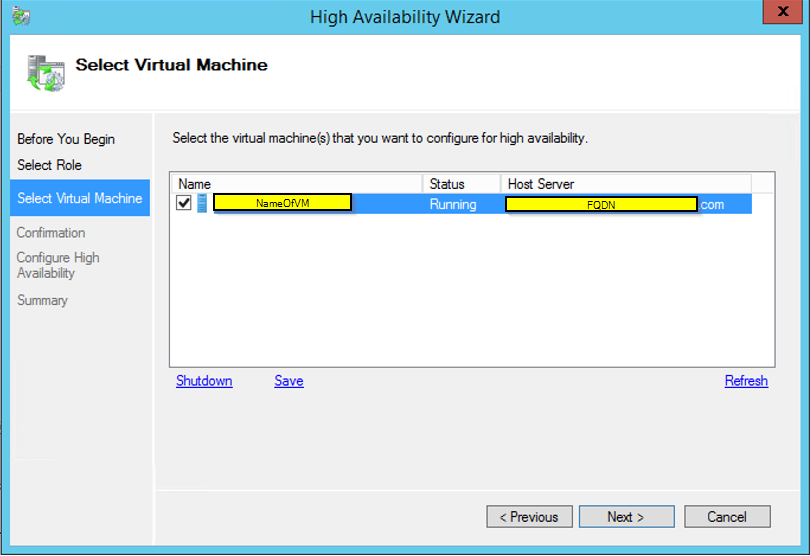
Select Virtual Machine from the list of Role
It’s going to find any VM that is not part of Cluster, you just need to select that VM then click Next
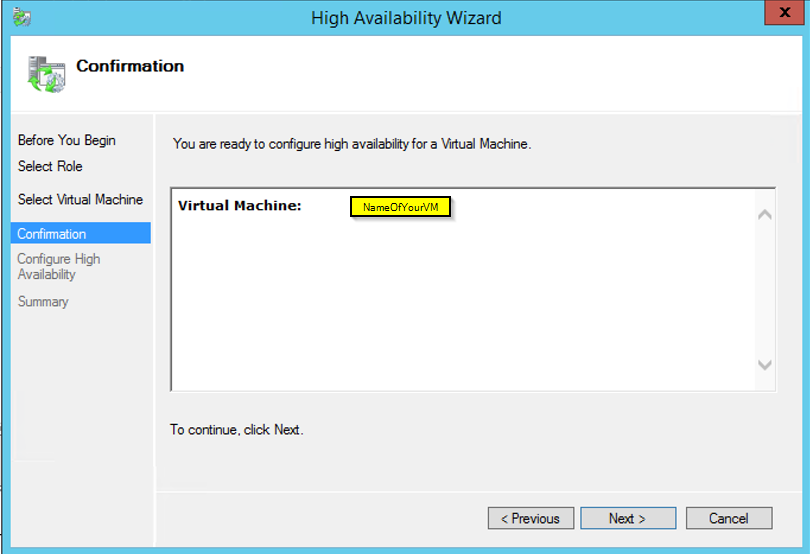
Confirm Virtual Machine, click Next
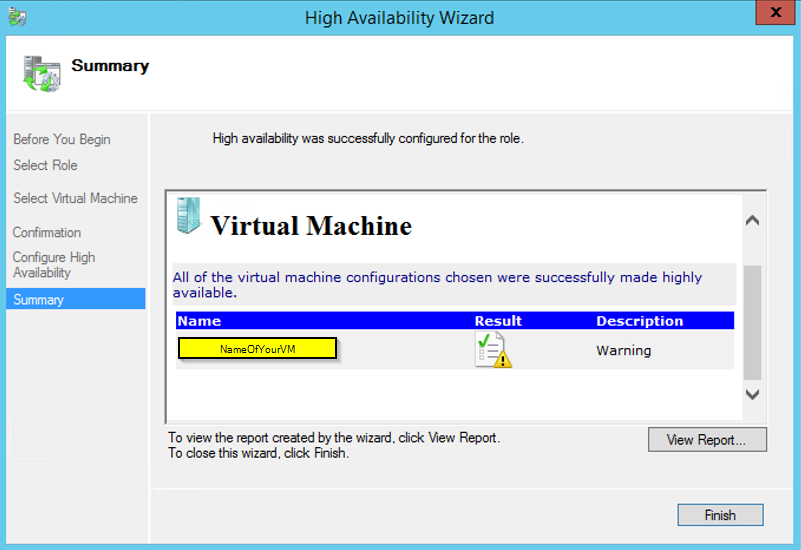
You will get Summary and will have option for report, double check everything well went, you may get some warning about storage or networking. like I had here, The path VMname.vhdx where the virtual hard disk is stored is not a path to storage in the cluster or to storage that can be added to the cluster. You must ensure this storage is avaiblale to every node in the cluster to make this virtual machine highly available
How to change the Storage of VM on Hypev-V Cluster:
While in the failover Cluster Manger
Right click on the VM that you want to move the Storage to cluster then Move>Virtual Machine Storage
Change the storage to new location of the Cluster storage and click Start to move the storage.
That’s is you should see your new VM now on the Hyper-V cluster
if you have any issues, check the logs, firewall, storage, version, etc.. and try again.
As you may know, already there are many ways to secure Ubuntu server based on your environment and version of OS. Double checking to be sure you are secure does not hurt at all, but don’t go overboard by locking your self from accessing own server. I have been working with Ubuntu server since Ubuntu 5.04 back in 2007, but have not done any post about it and was not using that much as I am now. Ubuntu Linux system has come a long way for sure, now even power users start using their desktop version. For the most part default security secures your server from any major attack to your server. There are many attacks are from within your own environments and some lazy admin or management who don’t want to pay for support or just keeps post ponding updates. Anyways here I have some list of tweaks I have been using and learning more from other Linux admins on internet.
Keep your server up to date:
sudo apt-get update This will search for an update of your current version and packages that in installed sudo apt-get upgrade This will install the updates and packages sudo apt-get dist-upgrade This will look for newer next LTS version
Enable built-in basic Uncomplicated Firewall (ufw): by allowing only need services name or ports
ufw allow ssh ufw allow 80 ufw allow ftp
Disabled telnet: very old but have seen people still using it apt-get remove telnet
Check for hidden open ports with:
netstat
Set a shorter timeout for root sessions
edit /etc/profiles [ $UID -eq 0 ] && TMOUT=600. The $UID -eq 0 part refers to the user with the ID of 0 — always root. The TMOUT=600 or 900 part sets the timeout limit to 10-15 minutes (600-900 seconds)
Change default SSH port from 22 to something else and disable Root user:
Port 22 > Port 90xx or whatever port you want (don’t forget to add a new port to your firewall) edit /etc/ssh/sshd_config: PermitRootLogin yes > PermitRootLogin no
Limiting allowed users to login via SSH:
edit /etc/ssh/sshd_config to have ssh login for specific users bottom of the file, add the line x=device you going to log in from IP or just type User1 User2, etc… AllowUsers YourUserName@192.xxx.xxx.x if you need to use a wildcard: to allow any username and from x=network: AllowUsers @192.xxx.xxx.*
You could also add a Group: Create group: groupadd -r SSHGroupName
Add allowed group to /etc/ssh/sshd_config AllowGroups SSHGroupName
Then add user to the group: usermod -a -G SSHGroupName user1
service ssh restart
edit /etc/ssh/sshd_config to have ssh login for specific users bottom of the file, add the line x=device you going to log in from IP AllowUsers YourUserName@192.xxx.xxx.x if you need to use a wildcard: to allow any username and from x=network: AllowUsers @192.xxx.xxx.*
service ssh restart
Add Login Banner which displays before user login:
edit /etc/issue.net add your own warning message whomever login can see
Then edit /etc/ssh/sshd_config and uncomment the line: Banner /etc/issue.net
some more options to disable server info by comment out:
network messages to allow or disable (like ICMP, redirects, SYN, etc..): edit /etc/sysctl.conf
Blocking IP spoofing:
edit /etc/host.conf change from “multi on” to “nospoof on”
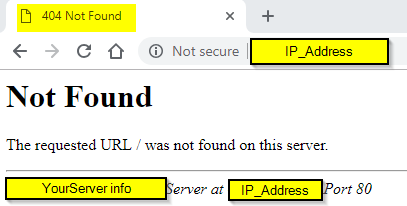
To Turn off Server Signature:
edit /etc/apache2/apache2.conf and add these 2 lines at the end of the config file. Most cases user types wrong URL or by IP address, it display’s your web server info by default. ServerSignature Off ServerTokens Prod
service apache2 restart
Hide PHP Version
edit (your version of PHP maybe different) /etc/php/7.0/apache2/php.ini expose_php = Off
You may have older version of PHP: /etc/php5/apache2/php.ini expose_php = Off
Also youcould add to your .htaccess file: # Disable server signature ServerSignature Off
Microsoft had announced Windows Admin Center (formerly Project Honolulu) back on April 12, 2018, and it’s been increasing use of Windows Admin Center to manage local and remote servers. It’s used by many IT admins since it’s very lightweight and it can be installed on Windows 10 client machine (need admin rights to manage servers). Microsoft has been adding many features on every new updates, it also have Extensions supports, so more products can be intergraded, at the moment more Preview. If you are using Microsoft Azure, this would be great tool going forward to use instead of using 3rd party systems. Once you have installed Windows Admin Center on your Windows 10 Client machine or on Windows server 2016 there are no agents need on target system. It uses Microsoft Edge (Windows 10, version 1709 or later) or Google Chrome browser. It can manage Windows server 2008 R2, 2012, 2012 R2, 2016, and manage hyper-converged clusters, only requirements are windows management framework 5.1
It’s similar
to Remote Server Administration Tools
(RSAT), Microsoft Management Console (MMC) and other tools. This does not replace but it give more options
in central modern management and it’s free.
1. Double click the setup to start the install, accept the terms and click Next
2. Click Next
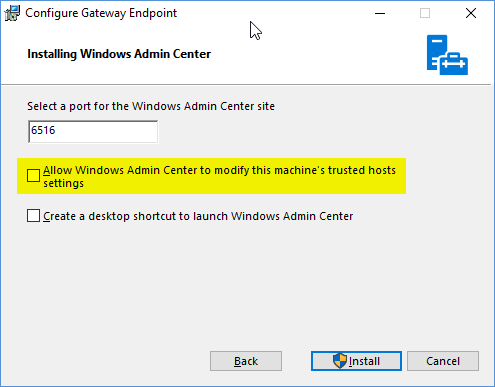
3. Click Install (if you want or need to change port you can and also if you want to create desktop shortcut select box)
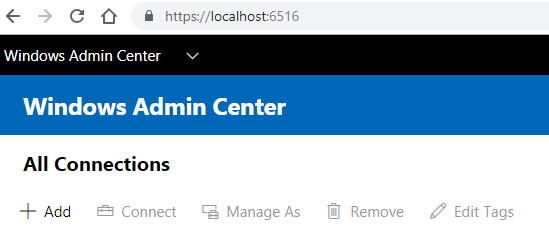
4. If everything goes well you should see following screen, and ready to be used.
Go to URL:6516 or whatever ports you had set on step 3 and start adding servers.
You will see Tools based on your server or PC hardware/software capabilities, here is compare tools between Windows server 2016 vs. Windows 10 Pro
That’s it, enjoy it
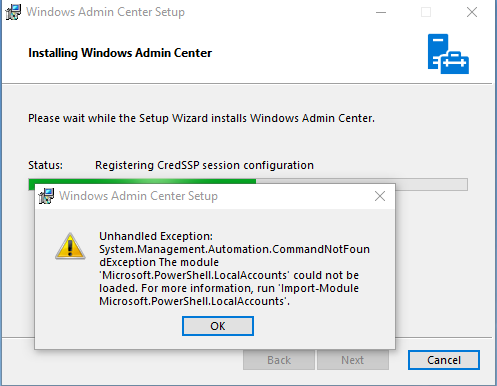
If you have issues as I did, here are some options to fix
If you get an error: Microsoft.PowerShell.LocalAccounts
Run this on powershell with admin rights: [Environment]::SetEnvironmentVariable(“PSModulePath”,”%SystemRoot%\system32\WindowsPowerShell\v1.0\Modules;” + ([Environment]::GetEnvironmentVariable(“PSModulePath”,”User”)),”User”)
Also, you may need to re-run the install again to uncheck the “Allow Windows Admin Center to modify this machine’s trusted hosts settings” Modifying TrustedHosts is required in a workgroup environment, or when using local administrator credentials in a domain. You need to configure TrustedHosts manually.