Moving your WordPress site to new server via All-in-one WP Migration

Here is another way of moving your new WordPress site to a new server.  I had written one post called How to move your WordPress site to a new server which was the manual way of doing, without the use of any plugin, like this one called All-in-One WP Migration.  It’s a very simple process to do move using this plugin, please make sure you have a good backup before doing anything.  I like said before, use whatever you feel comfortable.  As always I do recommend doing a full backup of your site file and database, just in case you need to go back to it.  In this post, will go through the whole process of moving your WordPress site, using third party plugin called All-in-One WP Migration. Remember, using this third-party plugin is easier, but have to be aware, it may have the restriction on function/size of database or type, which may change at any time.

I am assuming you already have a good working website, permission, and backup.  Will keep this simple and jump right onto moving site.

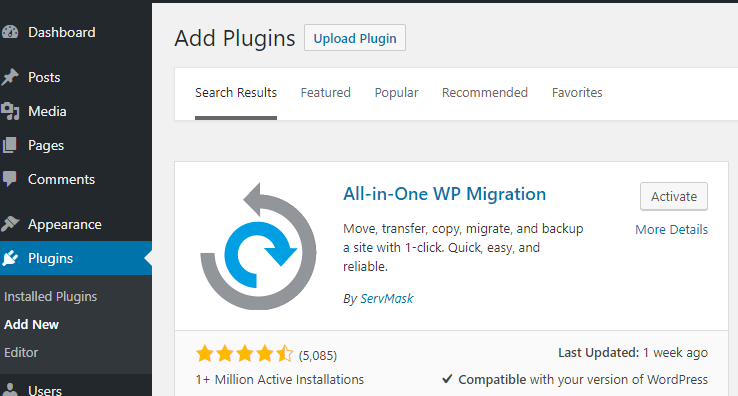
Install a plugin called All-in-One WP Migration by going to your WordPress admin panel and clicking on Plugins tab>Then Plugins Add New

Search: all in one WP, once you find it click Install, then Activate it.

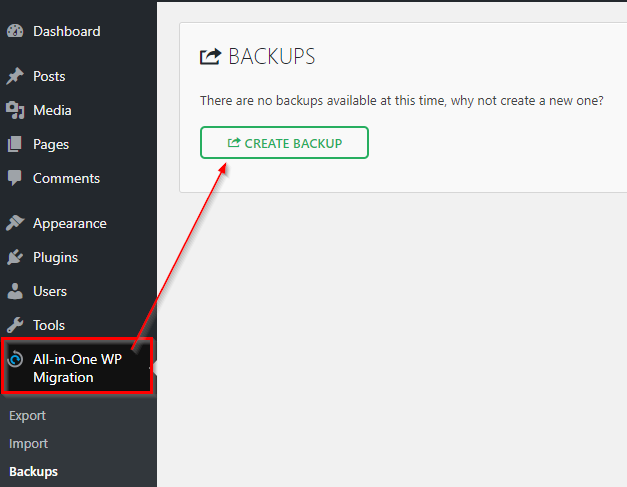
Then let’s create a backup using the new All-in-one WP Migration plugin, by clicking on Create Backup under All-in-one WP Migration plugin

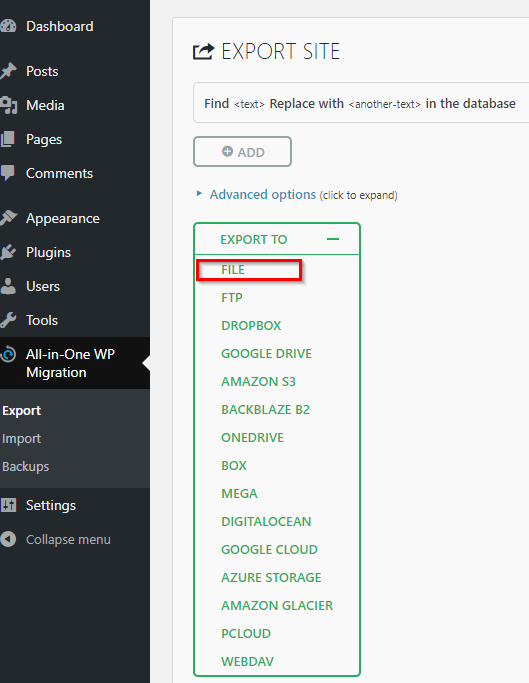
It will give you many options where you want to back up to, I am going to select the file

Once, it finishes back up it will give you the option to download it, click on it and save, then click close.

In case you want to download the backup via FTP/SFTP: \wp-content\ai1wm-backups

Then log in to the new WordPress site and install the same plugin installation

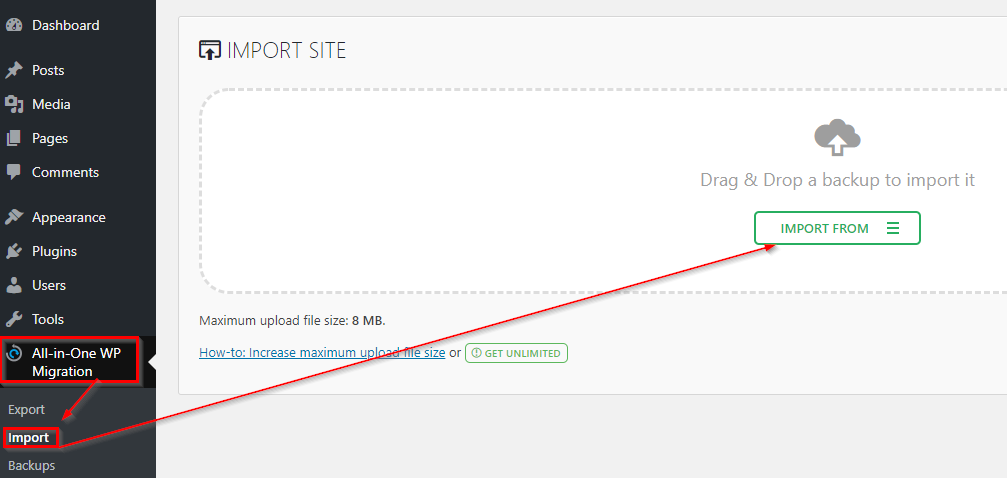
Now let’s import your data to the new site

Go to All-in-one WP Migration Plugin>Import>Then select the file and find your backup

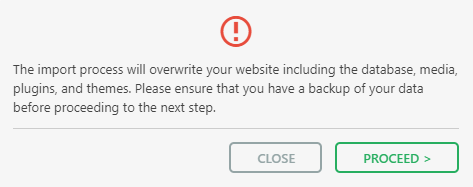
You will get this warning if you are ready to override, click Proceed

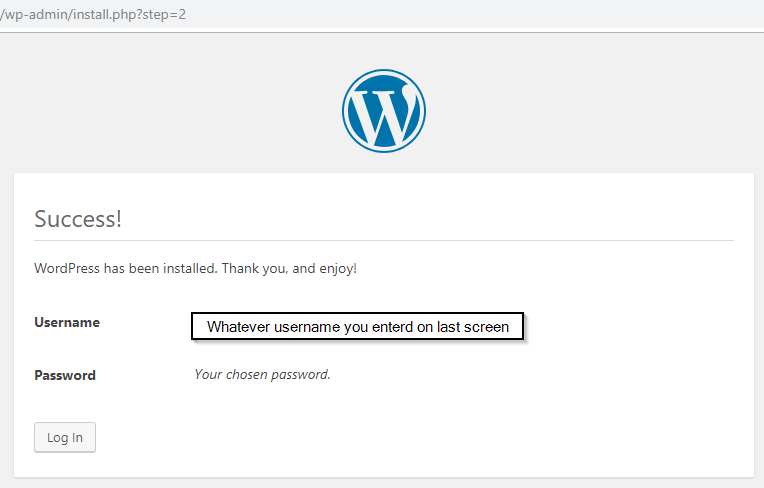
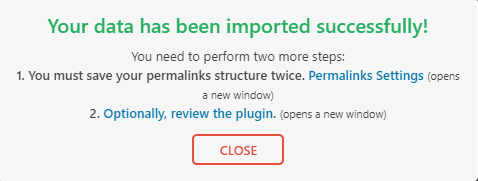
Once it’s done, you should see Successfully message

That’s it.


How to move your WordPress site to new server

There are many ways to move your WordPress site to a new server.  Whatever you feel comfortable use it, there is no right or wrong way of doing it.  I do recommend doing a full backup of your site file and database, just in case you need to go back to it.  It’s a good idea to have more than one version of backup and keep the backup in a different location.  We will go through the whole process of moving your WordPress site, without using third party tools. Using third-party tool is easier, but have to be aware, it may have the restriction on function/size of database or type.

What you will need:

  • Internet access to download WordPress, go to https://wordpress.org/download/
  • Web server I am using Apache
  • Access to web/database server (mostly its same server, but it can be two different servers)
  • Access to site file via (FTP, SFT, GUI, etc. …)
  • SSH access to MySQL/Web server

WordPress Requirements: “We recommend servers running version 7.2 or greater of PHP and MySQL version 5.6 OR MariaDB version 10.0 or greater”

Backup:

MySQL Database exporting:
command: mysqldump  -u UserName -p DatabaseName > databaseBackupName.sql

Setting up new WordPress:

Copy WordPress installation files to your web server (default location /var/www/Your_WordPress) that you have downloaded from WordPress.org

Give ownership to the web server system user www-data.
command: chown -R www-data:www-data /var/www/Your_WordPress/

Go to URL of your WordPress, if everything is correct you should see Installation screen.  Choose your Language then click Continue

If you have any error correct it, then click let’s go

Login to your Mysql server and create a database:

Command: create database wpdb_name;

Grant access to the new database:

Command: grant all privileges on wpdb_name.* to UserName@localhost;
Command: flush privileges;
Then you can exit

Go to URL of your WordPress and fill in the Database, username, password, and hostname, then click Submit

If all is good, you should be able to click “Run the installation”

Fill in the information then click Install WordPress

if everything went well you should see the Success screen, click Login

Login to your fresh installation of your WordPress to make sure it’s all is up to date

Now let’s import the database to your WordPress, so you get your data:

Login to your web server or SSH to it: Then run this command to import the database
mysql -u SQLuserName-p NameOfDataBase < /LocationOfBackUPDatabase/WordPressDataBase.sql

Then update the URL:

Otherwise you will get: HTTP ERROR 404

Then Login to your Mysql:
command:use NameOfWordPressDB;
WordPress Address (URL):
command: mysql> update wp_options set option_value = ”http://URLofYourSite/’ where option_id = 1;

Site Address (URL):
command: mysql> update wp_options set option_value = ”http://URLofYourSite/’ where option_id = 2;

Check to verify if changes were made:
command: mysql> select * from wp_options where option_value = ‘http://URLofYourSite/’;

Images URL update:
UPDATE wp_posts SET post_content=(REPLACE (post_content, ‘https://OldDomain’,’https://NewDomain’));

To exit type \q:
command: mysql> \q

Or

if you want to hard coded: inside: wp-config.php top of the file

define(‘WP_HOME’,’https://yourdomain.com’);
define(‘WP_SITEURL’,’https://yourdomain.com’);

Or via GUI admin panel:
/wp-admin/options-general.php

If you have custom themes, you need to copy it to the new site:

Default Location: \wp-content\themes

Don’t’ forget to copy the media (images/videos you may have):

Default location: \wp-content\uploads

Also, if you have hardcoded any URL within your site, you will have to update it, all the post and any internal URL should be updated automatically

You may have issues, links not redirecting
in your .htaccess you may have to change it to make it work
example: https://YourDomainName.com/public_html/
then you will need to put /public_html/ because by default it only has /

That should be it, hope you find this useful


How to Create Windows 10 USB media

Requirements:
  • USB flash drive with at least 8GB of space or more
  • Windows PC with Internet access (you could download just ISO and burn it on USB)
  • You will need Windows Key unless your computer has it built in, most new computers do or have a sticker on the bottom of the computer.
You can download it from Microsoft: https://www.microsoft.com/en-us/software-download/windows10 It will put the temporary download by default to C drive, so make sure you have some free space
Once you have downloaded the Tool, then double click it to run it Read the License terms and click Accept
Select the Create installation media, Then Click Next
Select Create installation media
Choose your Language, Architecture type: 64-bit, 32-bit or both and Edition
Then you will be given the option to choose media type: Select USB flash drive and click next
If you already have the USB plugged in, it will display make sure it’s the correct one then click Next Please make sure to your USB drive is blank and correct one, it will wipe out anything you have on that USB drive
Then it will start downloading the Windows 10, depending on your internet speed this may take a few minutes to hours. Once finish the download, you may need to click Next or it will just go to the next step automatically
You will see Creating Windows 10 media once finished downloading
If everything went well you should see Your USB flash drive is Ready
That’s it


How to change Clock style on Samsung S8

Here is how to change the way it displays Clock on the Lock screen of your Samsung S8 phone, it may apply other Samsung model phone too. Go to Settings>Lock Screen and Security Then Select: Clock and FaceWidgets
Select: Clock Style
Then select your Styles then click done
That’s it


How to restore Remote Server Administration Tools on Windows 10

When you get the Microsoft windows to update your Remote Server Administrations Tools (RSAT) gets removed, this happened to me 3 times already after windows 10 updates.  Many system admins use this to manage their server, so they don’t have to RDP to each server, even though now many tasks can be done via Powershell commands.  Some of the GUI is not available for server, you need to know Powershell to manage, add or remove features or services.  It does not happen for smaller updates, only major updates.  Also, you may see other settings get reset like Suggested notification, default app, printer and you may want to double check your settings to make sure it’s not reset.

I had server admin tools and after the windows 10 updates, it got removed, as you can see in this screenshot:

Remote Server Administration Tools (RSAT) for Windows 10

You can download it from Microsoft: https://www.microsoft.com/en-us/download/details.aspx?id=45520

Then just run the installer wizard

If everything went well you should see whatever you had pinned to your start menu shows up

I notice when I had Windows updates for 1709 and 1803 updates, hope this helps someone out there.  Learning Powershell command is a way to go for doing server manage for many repetitive tasks.  Knowing Powershell commands also helps for user device troubleshooting too.