There are many ways to move your WordPress site to a new server. Whatever you feel comfortable use it, there is no right or wrong way of doing it. I do recommend doing a full backup of your site file and database, just in case you need to go back to it. It’s a good idea to have more than one version of backup and keep the backup in a different location. We will go through the whole process of moving your WordPress site, without using third party tools. Using third-party tool is easier, but have to be aware, it may have the restriction on function/size of database or type.
What you will need:
- Internet access to download WordPress, go to https://wordpress.org/download/
- Web server I am using Apache
- Access to web/database server (mostly its same server, but it can be two different servers)
- Access to site file via (FTP, SFT, GUI, etc. …)
- SSH access to MySQL/Web server
WordPress Requirements: “We recommend servers running version 7.2 or greater of PHP and MySQL version 5.6 OR MariaDB version 10.0 or greater”
Backup:
MySQL Database exporting:
command: mysqldump -u UserName -p DatabaseName > databaseBackupName.sql
Setting up new WordPress:
Copy WordPress installation files to your web server (default location /var/www/Your_WordPress) that you have downloaded from WordPress.org
Give ownership to the web server system user www-data.
command: chown -R www-data:www-data /var/www/Your_WordPress/
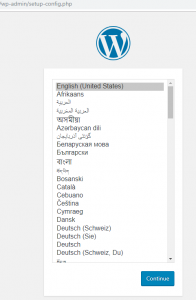
Go to URL of your WordPress, if everything is correct you should see Installation screen. Choose your Language then click Continue
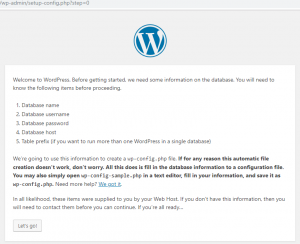
If you have any error correct it, then click let’s go
Login to your Mysql server and create a database:
Command: create database wpdb_name;
Grant access to the new database:
Command: grant all privileges on wpdb_name.* to UserName@localhost;
Command: flush privileges;
Then you can exit
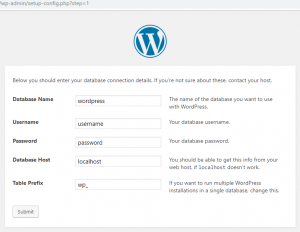
Go to URL of your WordPress and fill in the Database, username, password, and hostname, then click Submit
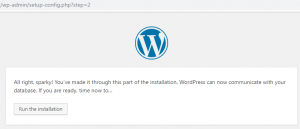
If all is good, you should be able to click “Run the installation”
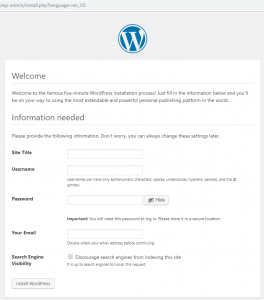
Fill in the information then click Install WordPress
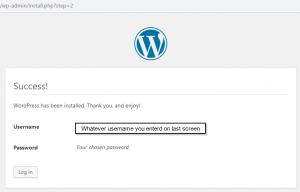
if everything went well you should see the Success screen, click Login
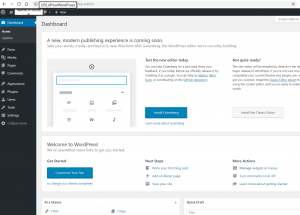
Login to your fresh installation of your WordPress to make sure it’s all is up to date
Now let’s import the database to your WordPress, so you get your data:
Login to your web server or SSH to it: Then run this command to import the database
mysql -u SQLuserName-p NameOfDataBase < /LocationOfBackUPDatabase/WordPressDataBase.sql
Then update the URL:
Otherwise you will get: HTTP ERROR 404
Then Login to your Mysql:
command:use NameOfWordPressDB;
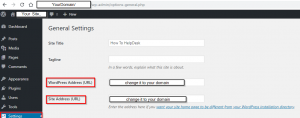
WordPress Address (URL):
command: mysql> update wp_options set option_value = ”http://URLofYourSite/’ where option_id = 1;
Site Address (URL):
command: mysql> update wp_options set option_value = ”http://URLofYourSite/’ where option_id = 2;
Check to verify if changes were made:
command: mysql> select * from wp_options where option_value = ‘http://URLofYourSite/’;
Images URL update:
UPDATE wp_posts SET post_content=(REPLACE (post_content, ‘https://OldDomain’,’https://NewDomain’));
To exit type \q:
command: mysql> \q
Or
if you want to hard coded: inside: wp-config.php top of the file
define(‘WP_HOME’,’https://yourdomain.com’);
define(‘WP_SITEURL’,’https://yourdomain.com’);
Or via GUI admin panel:
/wp-admin/options-general.php
If you have custom themes, you need to copy it to the new site:
Default Location: \wp-content\themes
Don’t’ forget to copy the media (images/videos you may have):
Default location: \wp-content\uploads
Also, if you have hardcoded any URL within your site, you will have to update it, all the post and any internal URL should be updated automatically
You may have issues, links not redirecting
in your .htaccess you may have to change it to make it work
example: https://YourDomainName.com/public_html/
then you will need to put /public_html/ because by default it only has /
That should be it, hope you find this useful
