Install XAMPP on Windows 10

XAMPP is very popular many people use for the building, testing the application on your local system. It includes MariaDB, PHP, Perl, and options for FileZilla, Tomcat, etc… It’s free opensource, very easy to set up and use. It can be installed on Windows, Linux, and OS X. I am using Windows 10 Pro, I will go through the install and list some issues/ how to fix issues. You can use Bitnami Application to install ready-to-use applications. It’s well trusted with over 1 million applications per month, which you can use to install from your local installers, single VMs, multi-tier VMs, container images, or Kubernetes Helm charts.

Installation of XAMPP

You can download: https://www.apachefriends.org/download.html
Once you have downloaded the XAMPP, open the installation to start installing, the default location is C:\xampp noted if you install inside of the Program File you might have an issue with permission

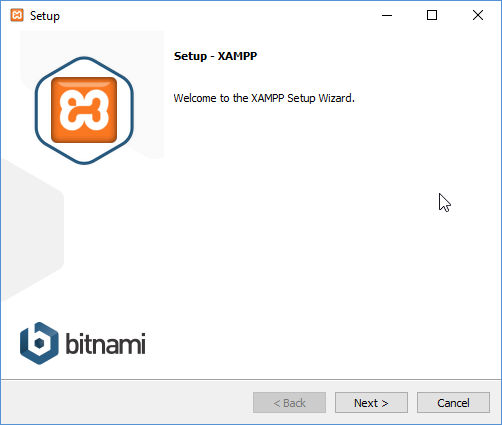
I am going to install on default location c:\xampp, click Next
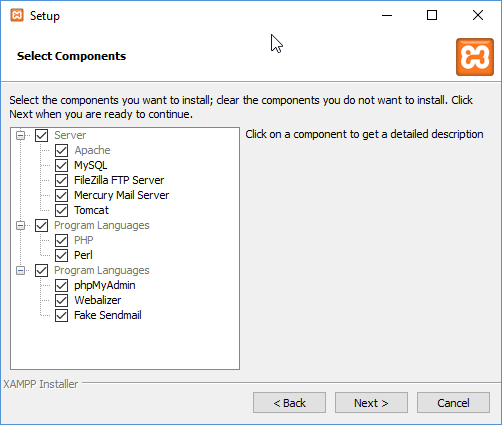
Then it will ask you which components you want to install, select one you like and then click Next
Then it will give you installation location choice, please choose and then click Next

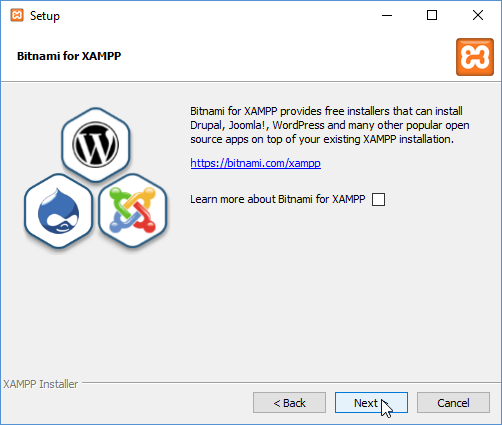
Then click Next (if you want to learn more about Bitnami, you can have it checked otherwise unchecked)
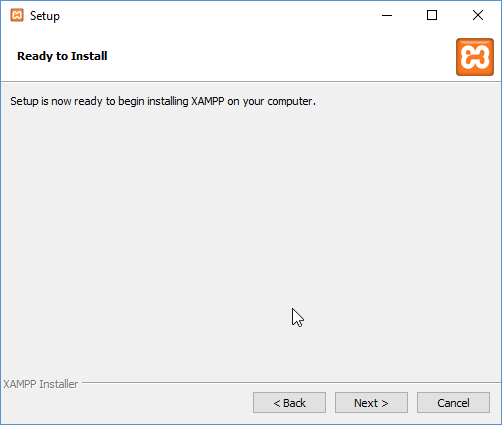
Ready to Install, click Next
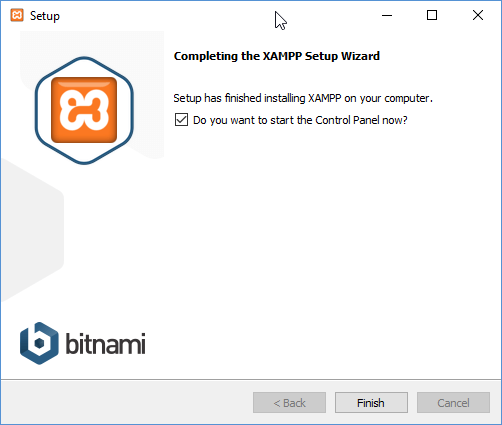
Now, it’s going to install whatever you have selected in above choices of the component, then you will see finished screen. That’s it you can start using it.
First time you will get option to select the Language, select it and click Save In case you need to change after you can go to XAMPP Control Panel>Config>Change Language

Then you should see the XAMPP Control Panel, here you can start using, default requirements web server and database, I am going to use Apache and MySQL. You might see error, ports in use, I will list below on fix.
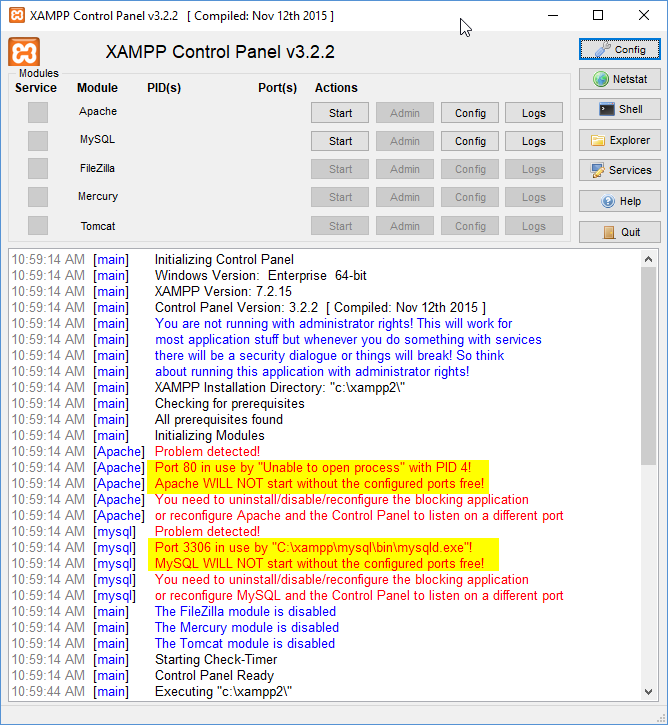
Common Issues/Fixes

Apache port in use: open Config>Service and Port Settings>Apache
Change ports that are not in use both Main and SSL port
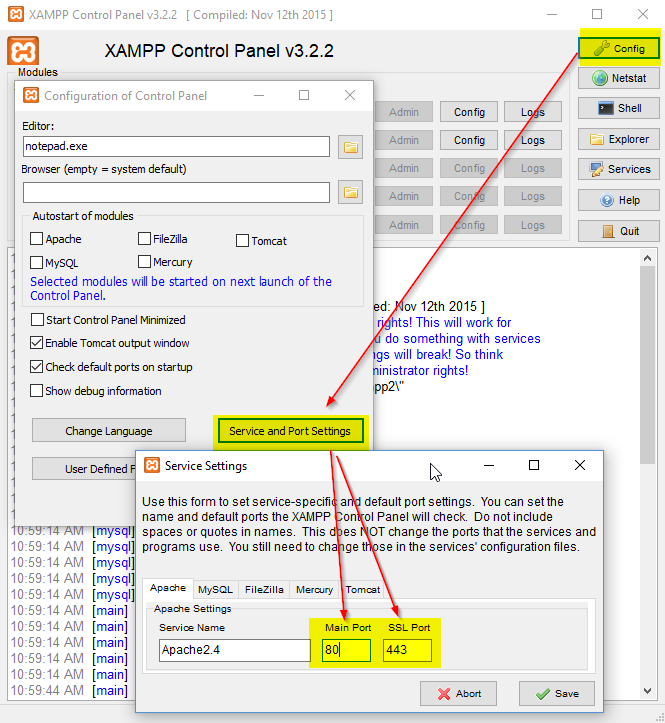
You might also need to change MySQL port, default is 3306

Once you have thing running and see any error, you can check out the logs for Apache and PHP, which will give you more details.


Clean up Windows 10 updates

Microsoft Windows 10 updates are trying it’s best to keep the user system protected, but user system drives are loosing about 5 GB-30 GB of their hard drive space. If you have a smaller drive and need to clean up Windows updates, you can by deleting old system files. You can also clean up old programs you no longer need and empty out recycle bin.

Here is example of about 100 GB drive and 35 GB taking up by Windows, it’s not all Windows update

How to clean up system files

Open Windows Explorer and right click on the system drive (normal default C drive), then select Properties (or you can search for “disk cleanup” or type in run command:cleanmgr.exe )

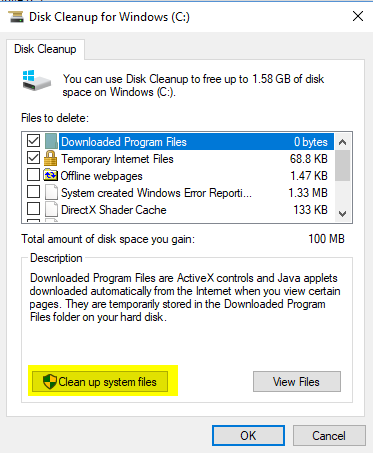
Then click on Disk clean up

Then click on Clean up system files

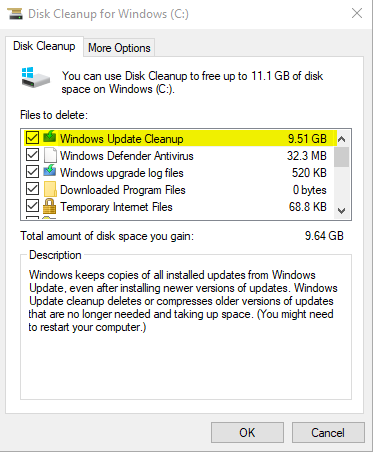
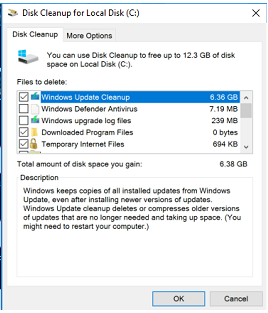
Then select the check box Windows update Cleanup then click on ok, that should give you back your hard disk space.

Here is couple different computer Windows 10 update clean up about 6 GB to 10 GB

That’s it, there are other check boxes you can check off to clean up more. You can click on each one it will give you more information about it, most if not all can be checked and clean out, unless you want for logs or recover your system.


System drivers updates tools from vendor

Most vendors have their own software to update their system drivers. Here I am going to list for Dell, HP and Lenovo. I am sure other vendor may have their own too.

Dell

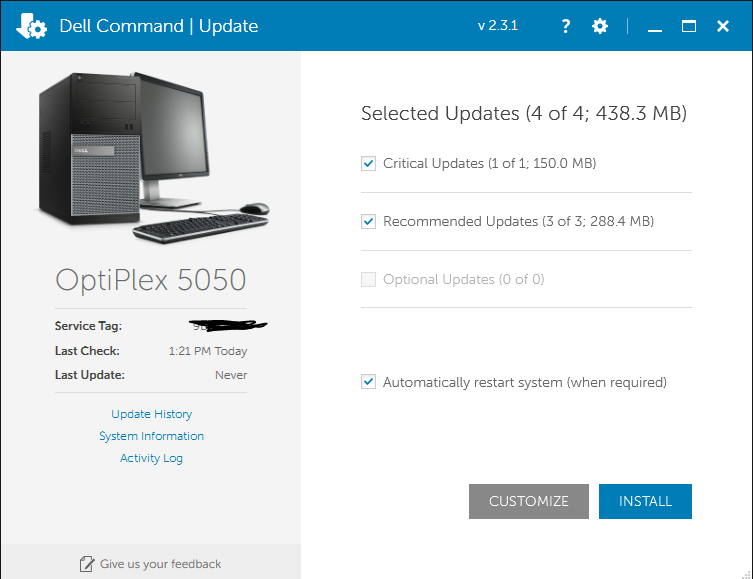
It’s called Dell Command Update you can download it from Dell website https://www.dell.com

or You can also do via the website: https://www.dell.com
You will need to know your system service tag, then go to drivers
Then let the “Let us analyze your system to find the latest updates.” For you

HP

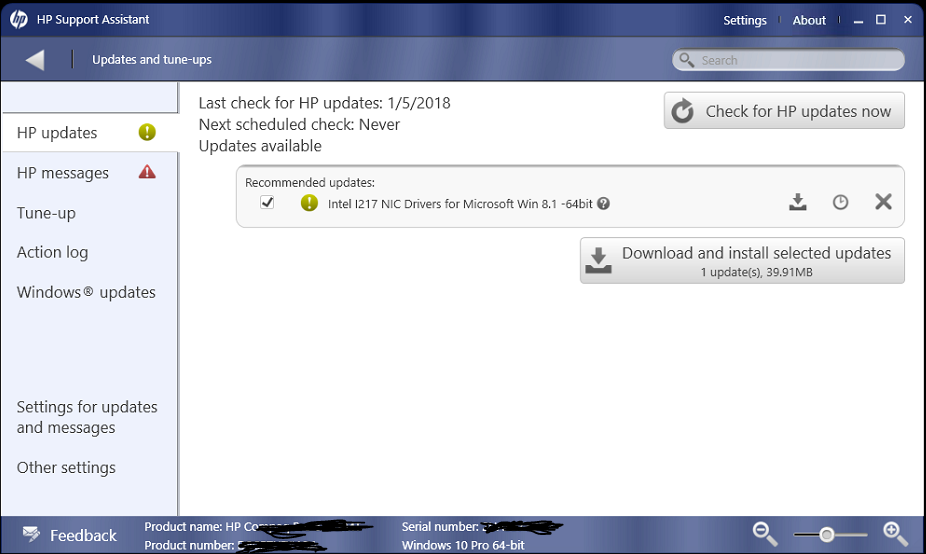
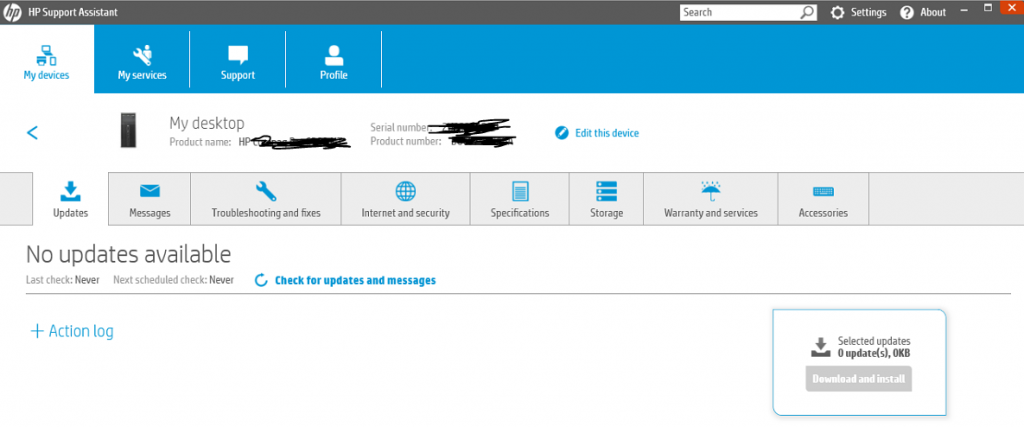
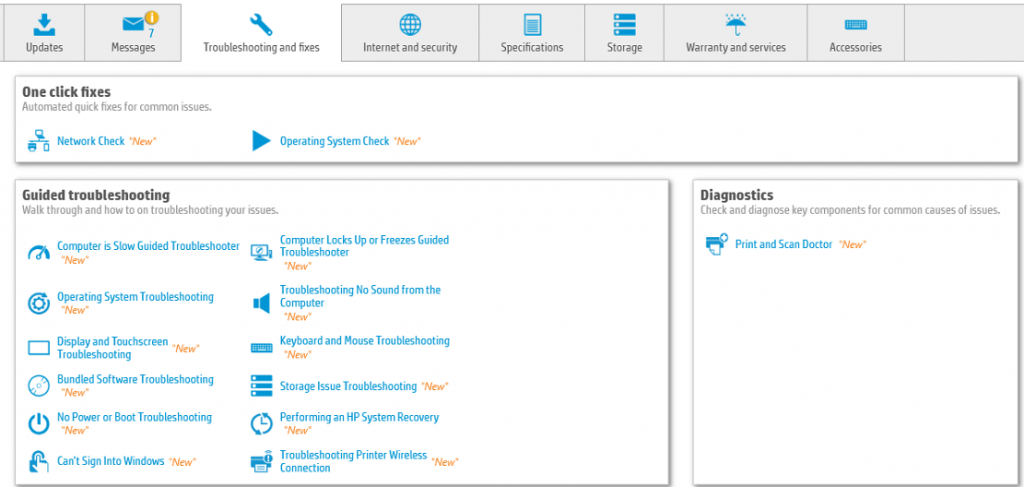
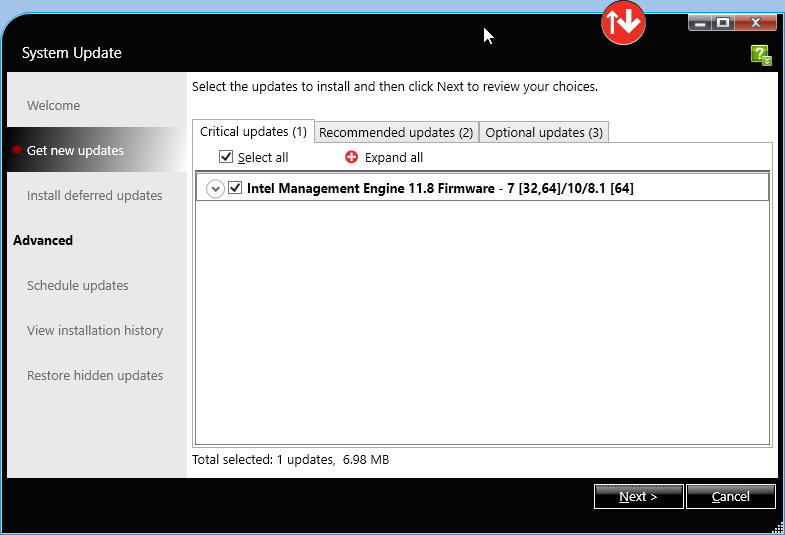
For HP it’s called: HP Support Assistant you can download from https://support.hp.com

Updated version

It may also have some other feature such as common troubleshooting

Lenovo

it’s called System updates: you can download it at https://support.lenovo.com

https://download.lenovo.com/pccbbs/thinkvantage_en/systemupdate5.07.0065.exe

There you have it, each vendor has it’s own tools to keep your system driver up to date.


How to update firmware on Windows 10 computer

Microsoft has been installing drivers for your device when your computer gets an update. A user can manually update the system firmware on newer computers too, by going to Computer management. I had written a post how to secure against meltdown and spectre vulnerabilities which requires computer bios be updated to protect your computer. Some manufacture or model of your computer may need to go to their support page and install manually. This process is very easier for end users.

Open Computer management:

  • Pressing Windows Key+X
  • Select Computer Management

Or

  • Pressing Windows Key+R
  • Typing: compmgmt.msc then hit Enter
  • or devmgmt.msc it will open device manager

Or

  • Right clicking Windows Icon
  • select Computer Management

Once you have Computer Manager open, select Device Manager
on the Right side you will see Firmware, if you don’t then your computer is old or manufacture of your computer don’t support it, so you will have to manually.

Then right click on System Firmware>select update driver
Then select Search automatically for updated driver software …

Windows will automatically search and download firmware for you, then to finish the install, you will need to restart your computer.
Note: Make sure your computer is plugged into power source and do NOT stop or turn off your computer, this could cause your computer to stop working.

After firmware update, you should see now model of your computer and firmware version.

That’s it

How to check firmware version via Powershell:

command: Get-WmiObject win32_bios

How to check computer model via powershell:

In case you need to download firmware update manually you will need to know your computer model

command: Get-wmiobject win32_computersystem


Benchmark solid state drive performance

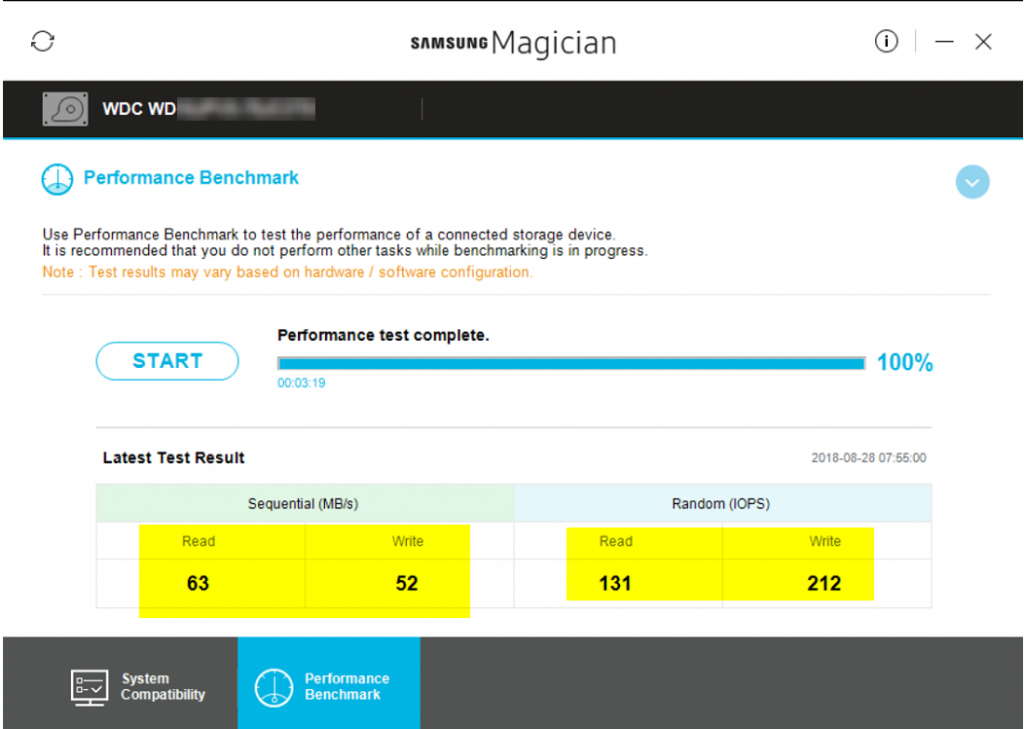
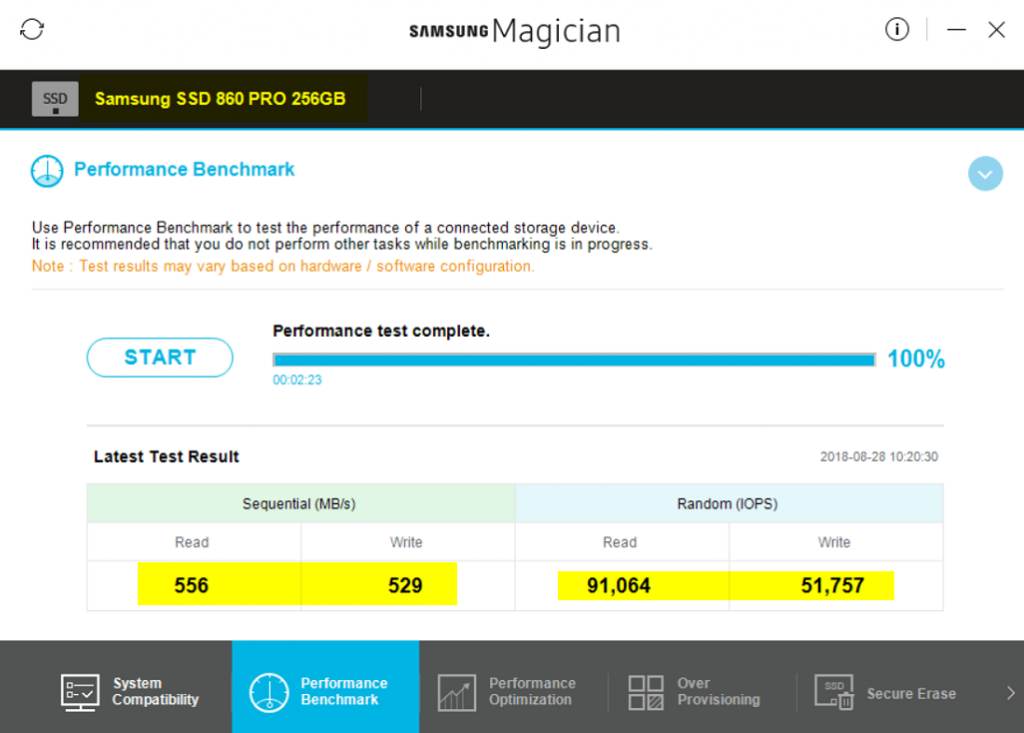
It’s worth replacing your old spinning drive with a solid-state drive, take a look at my post on how to clone old drive to Samsung solid state drive or San Disk. If your computer is just running slow, take a look at the performance to see which part of your computer is slowing down. Most likely it’s a hard drive, there are cases CPU, Memory and maybe network connection cause slowness. Here I have done a benchmark of spinning drive and solid state drive, so you can see the big difference between it.

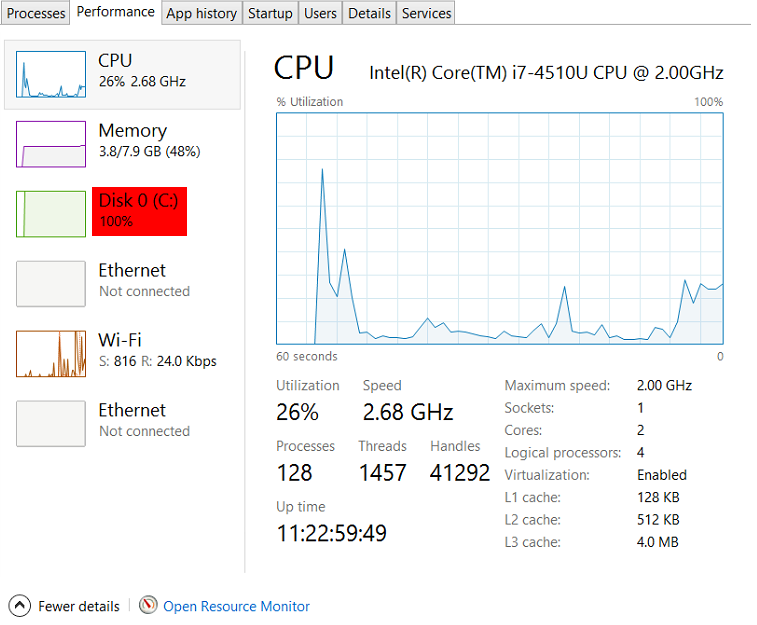
Looking at task manager while using old spinning drive, if you click on the Disk it will give you more details of which application using it.

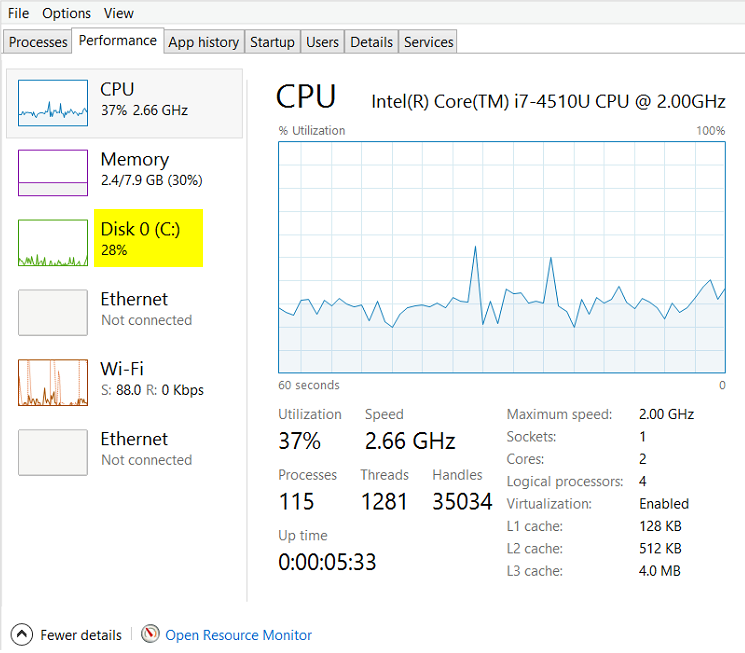
Looking at task manager while using the solid state drive, this is more like normal PC should be like on load usage of CPU, Memory, Disk etc…

Benchmark on old spinning drive:

Benchmark on solid state drive:

You can see big differences between spinning drive and solid state drive. This saves you time and frustration of waiting for your application to load. It also help you get things done faster, so now you will have more time to enjoy.