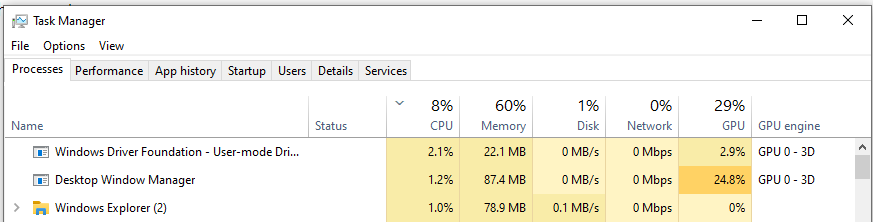
The task manager shows the system processes, performance, and many more details of your system, many users do not know how to open Task Manager, here are some ways to open it, you can use whichever you like. Each tab has more details about the system, like Performance, which has more details about CPU, Memory, Disk, etc.
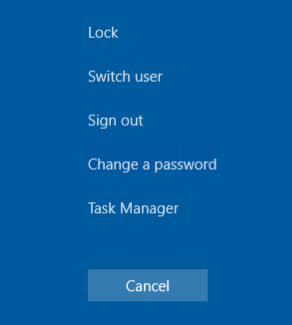
Keyboard keys: CTR+ALT+Delete, then choose Task manager
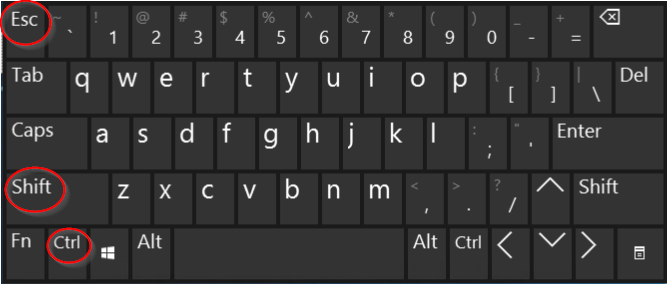
Keyboard keys: CTR+Shift+esc
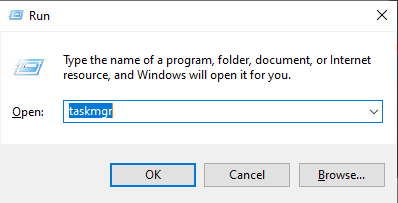
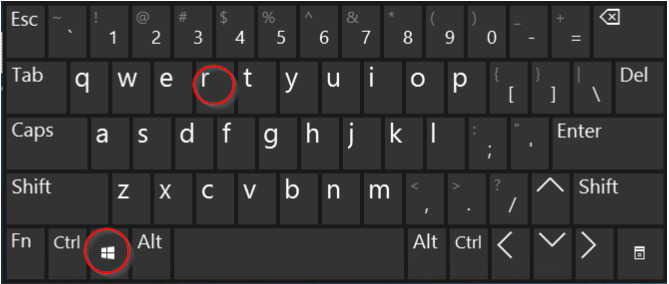
Keyboard keys: Windows+R
Then type in: taskmgr
Then click ok or Enter
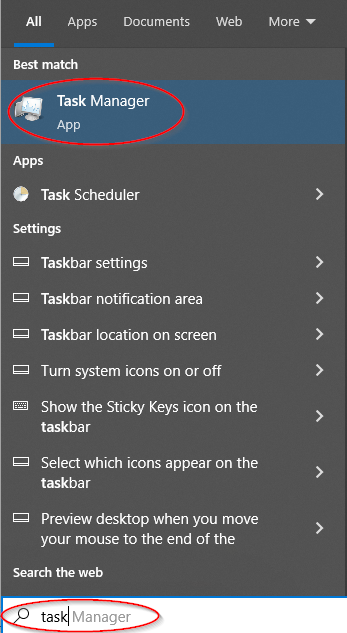
Star Menu: start typing Task Manager, then click on Task Manager to open
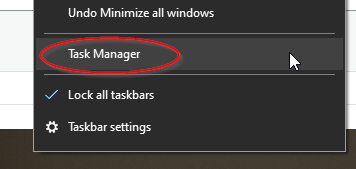
Using Mouse right-click on the bottom taskbar, then click Task Manager
Hope this helped you to open task manager in Windows 7/10/11
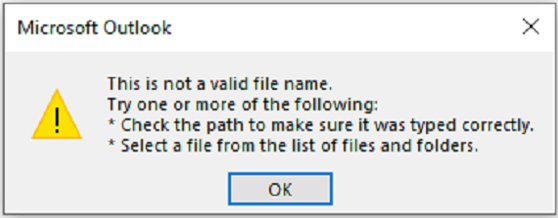
Outlook client giving error when replying or forwarding email chain, with or without attachment and getting an error: “This is not a valid file name”. The issue could be local outlook setting, plugin as well links, or images broken. The best way to check via Web outlook is to test your issue, if the web works then look at the settings of outlook. Here are some options that may help fix your issues.
Error messages:
Look at the body of the email:
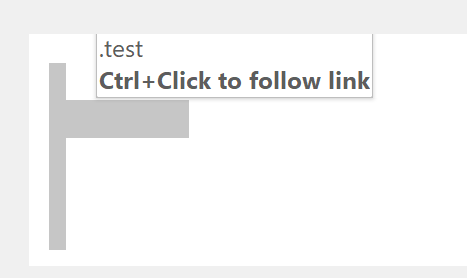
Look at all links and empty areas of the body to see if there are any hidden links, Like the example below
Once removed any broken links, your issue should be fixed
Also, you can try converting the HTML to Plain Text, which will remove all formatting and links
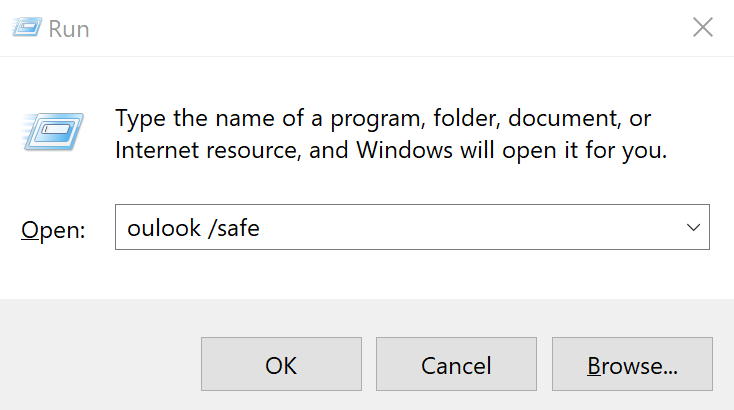
Check outlook in Safe mode:
Click Start > Run.
Type Outlook /safe, and choose OK
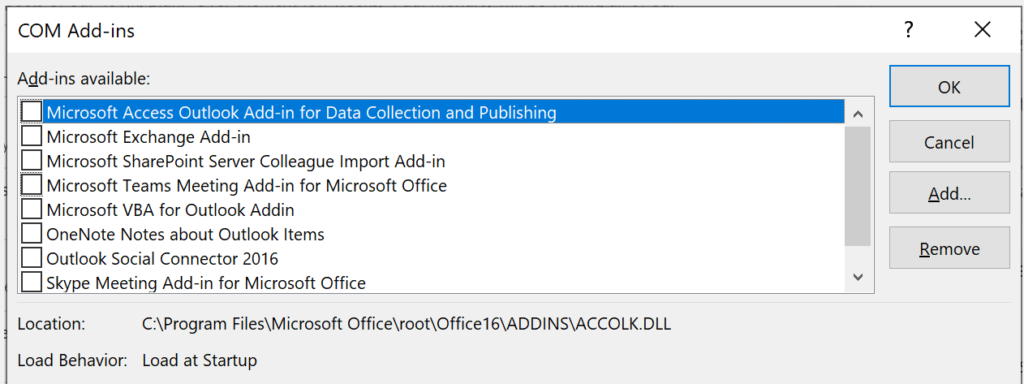
Take a look at the Plugin of outlook:
You can get to it by going to File>Options>Add-ins
Just uncheck to disable whichever you don’t use or causing the issue
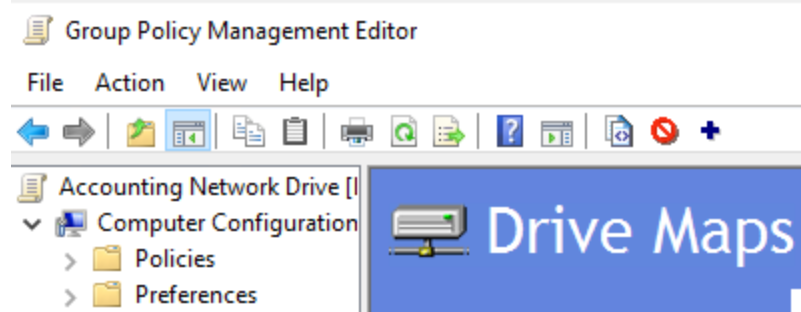
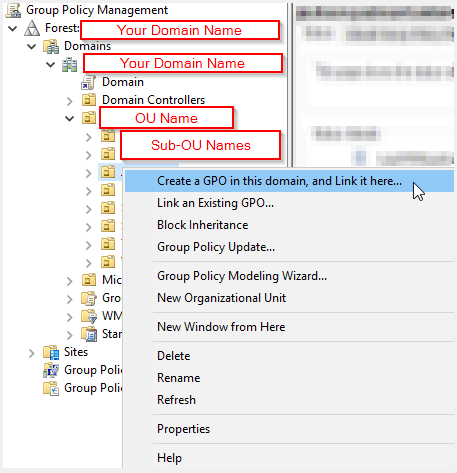
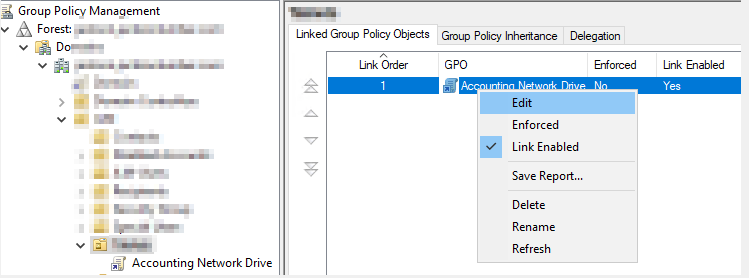
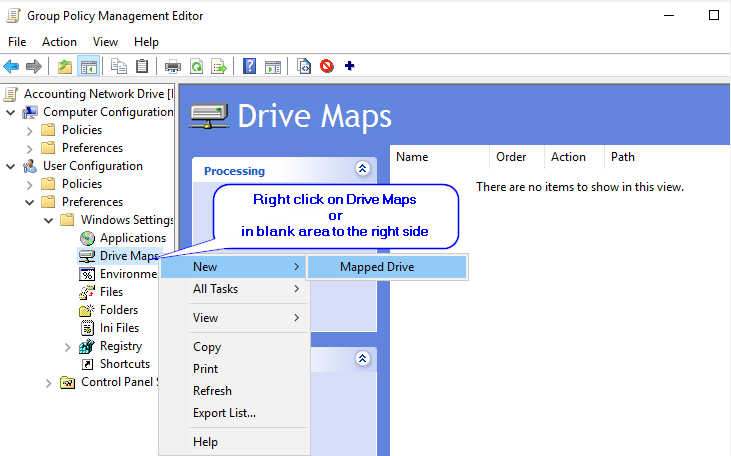
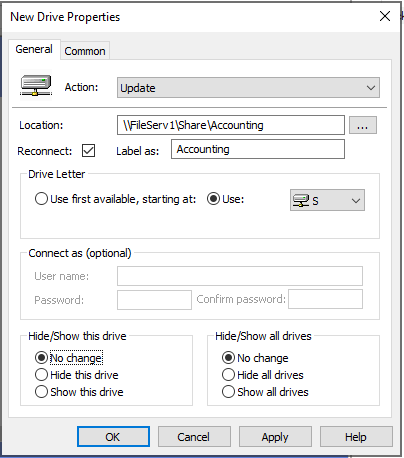
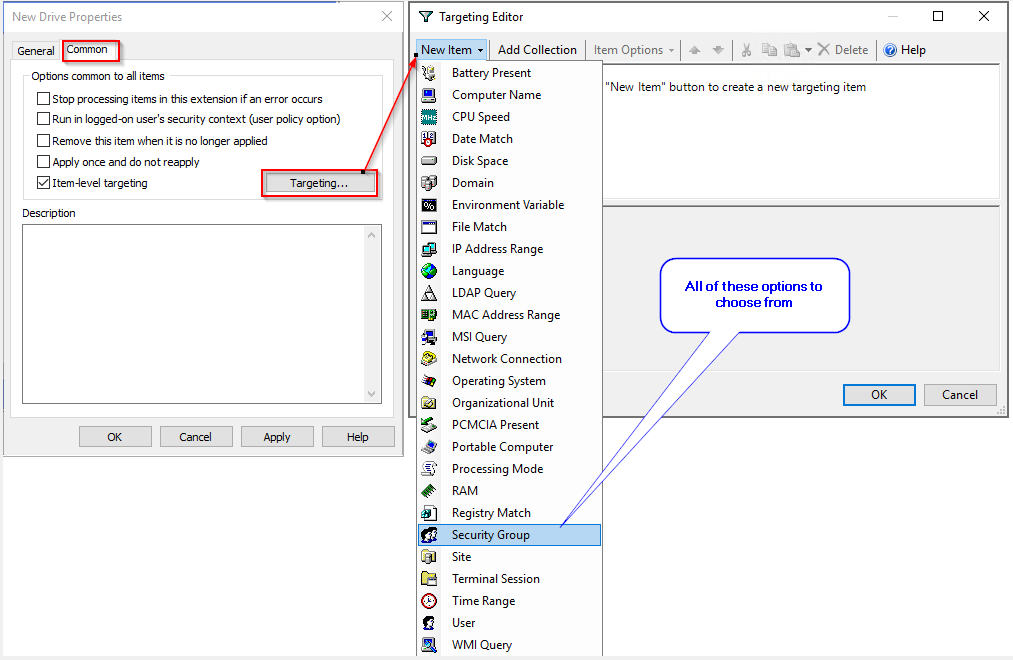
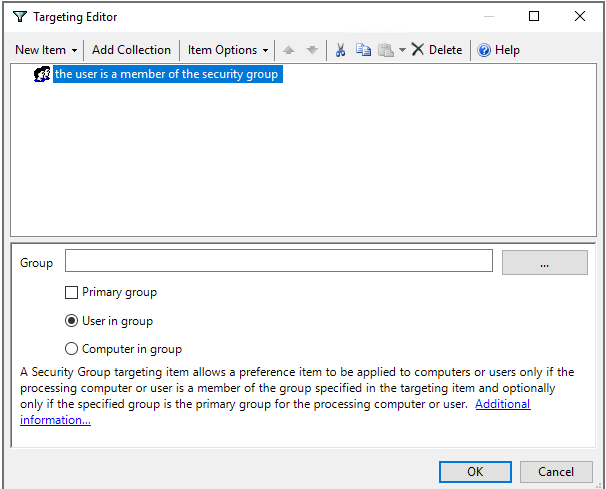
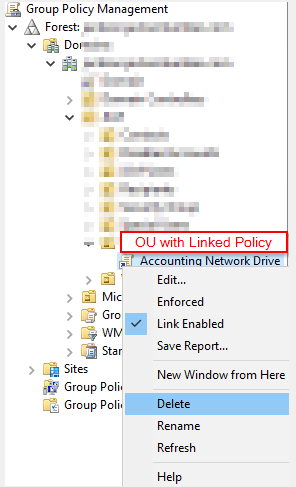
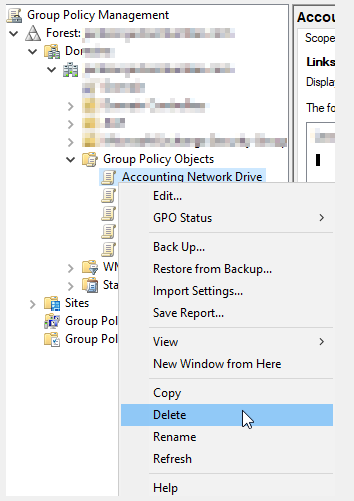
Map a network drive via group policy is a much easier and faster process than manually or logon scripts. user does not have to wait for the logon script to load or if the network path changes it automatically updates. It makes admin and user’s life much better and makes changes to the network without having to update each user. It should plan out the process, users, or groups it’s going to apply this network drive.
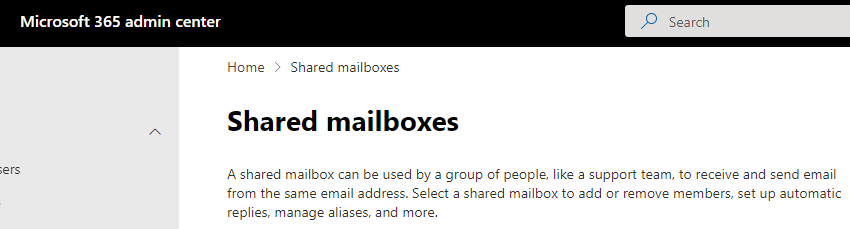
There are many cases you can use the shared mailbox on office 365 and save money on license costs. You will still need a license for those who are accessing the shared mailbox. At the time of converting a user mailbox, will need a license assigned to it before you convert it to a shared mailbox. Also, shared mailboxes have limited to 50 GB of data without a license assigned to them. Besides that, it’s like a normal mailbox. Here is how to convert steps
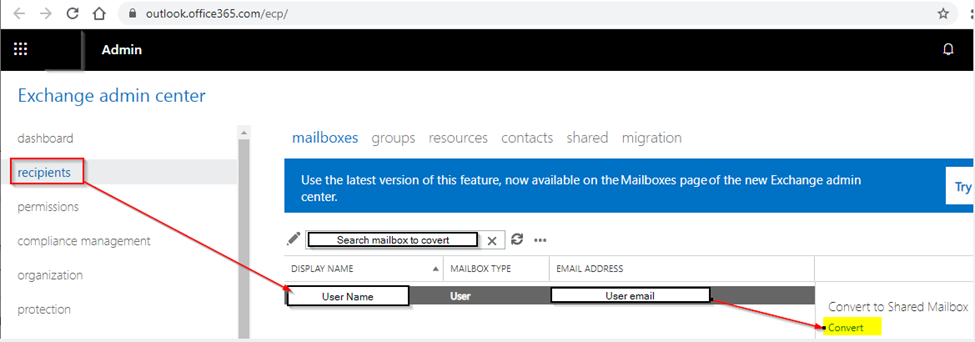
Once you are logged into the admin center, click on recipients>mailboxes>search for user mailbox to be converted
Once selected the mailbox to be converted, on the right side you will see an option “Convert to Shared Mailbox”, click Convert
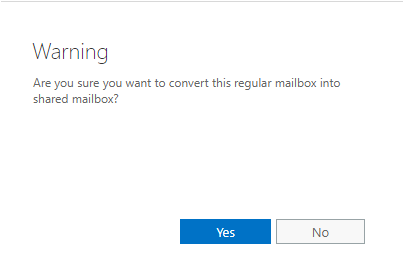
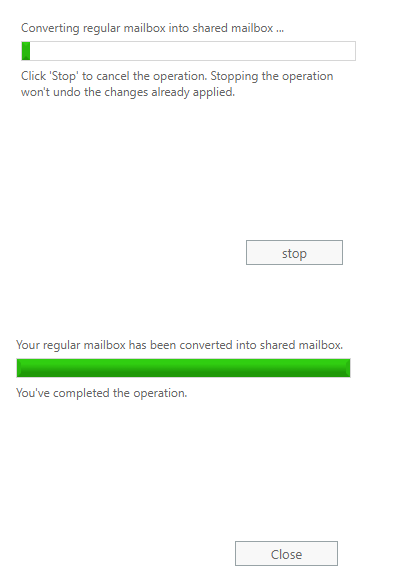
Once clicked Convert you will see a message, Warning are you sure you want to convert this regular mailbox into the shared mailbox? if you are ready click Yes
You will see Converting process bar, once done it will show Completed, it’s very quick, but it might take a while if you have a lot of emails
That’s it, now you can remove the license from this account, but make sure to keep the account, if you delete it, it will delete the shared mailbox
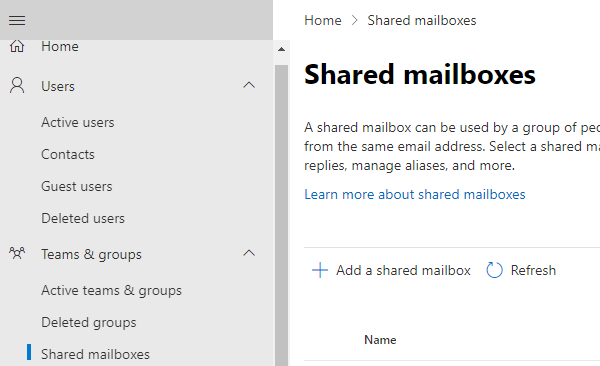
You will be able to see under Teams & groups>Shared mailbox
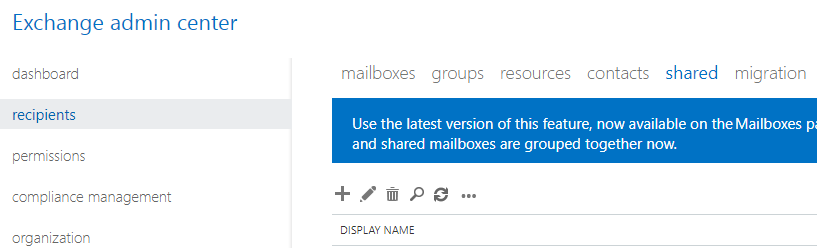
For classic admin center, you will see under: recipients>shared
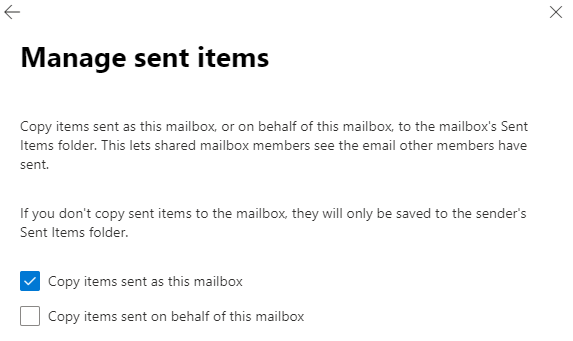
In some cases, you may want to save a Copy of sent Items to a shared mailbox or on behalf of this mailbox, by default it’s not saved on the shared mailbox. It’s saved on whoever has access to it, in their sent items folder.
Bonus point to note, you can do the same in reverse, to convert from shared mailbox to Convert to Regular Mailbox
One of the very common communication is via emails, they do fill up our Inboxes and some of us don’t have time to clean up, which you can do it automatically or manually. Just carefully when setting automatically to delete, because we as human beings forget and take automation as a privilege, and sometimes it deletes some things we want to keep as history. Here is how to clean up your old email manually or automatically.
First, Sign-in to your Office 365 by going to https://outlook.office.com Once you have signed in go to Gear Icon at the top left then go all the way to the bottom, select View all Outlook settings
You will see another pop-up window
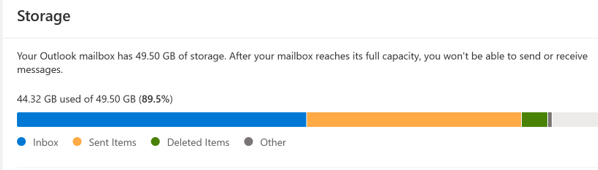
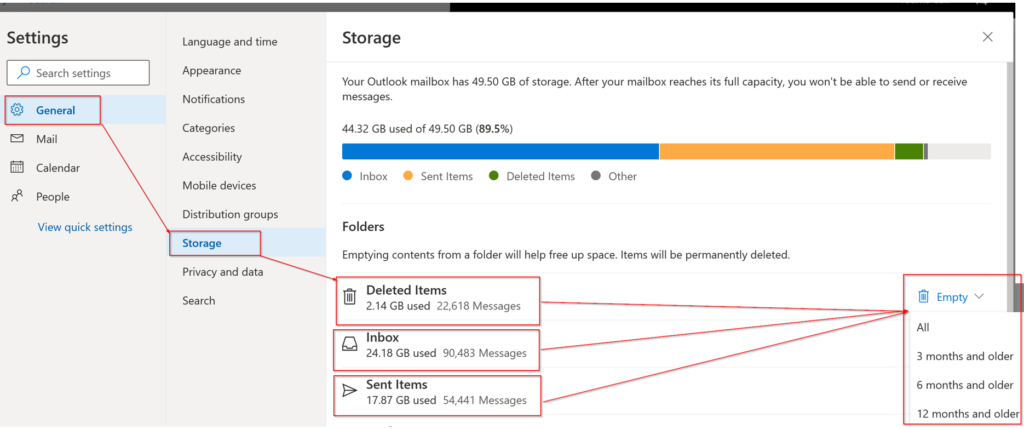
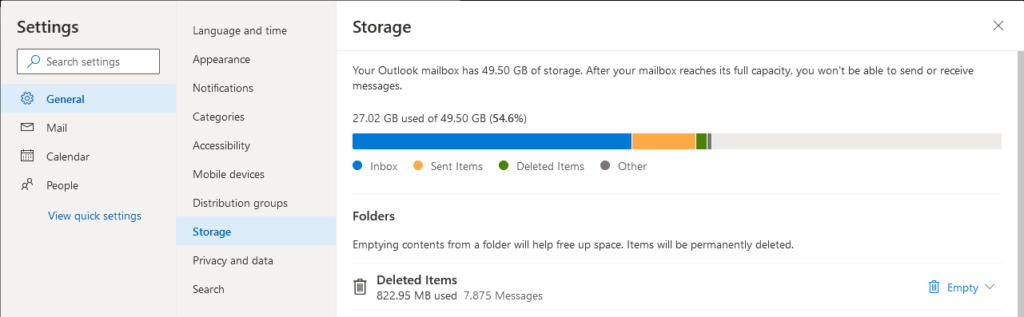
Go to Settings>General>Storage>Then select the folder you want to clean up old emails
Then on the right side, you will have an option to choose from, All, 3 months and older, or 6months and older, or 12 months and older
As, soon as you select the option, it will start deleting your old emails
Note: Items will be permanently deleted
After you delete your old email, you will see, the overall size will decrease, in this example, I have deleted Sent Items
That’s it, if you want to set up an automatic rule to delete, you can follow the steps below
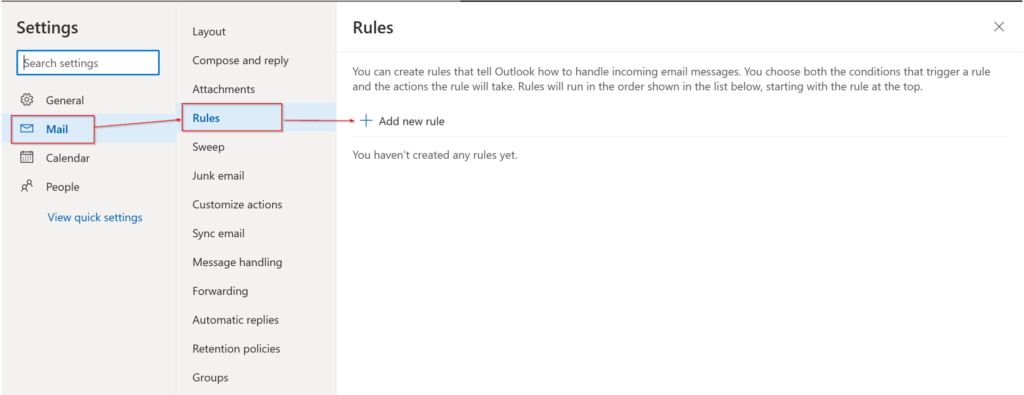
Automatically via a set of rule
Once you have signed in go to Gear Icon at the top left then go all the way to the bottom, select View all Outlook settings
You will see another pop-up window
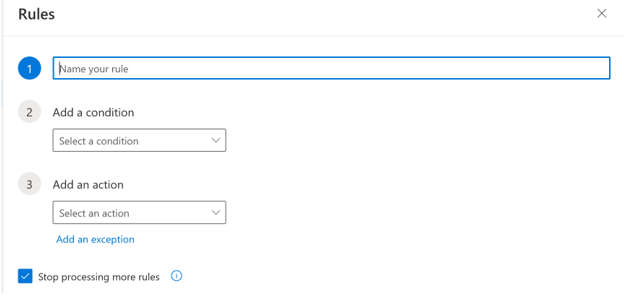
Go to Settings>Mail>Rules>Then click Add New Rule
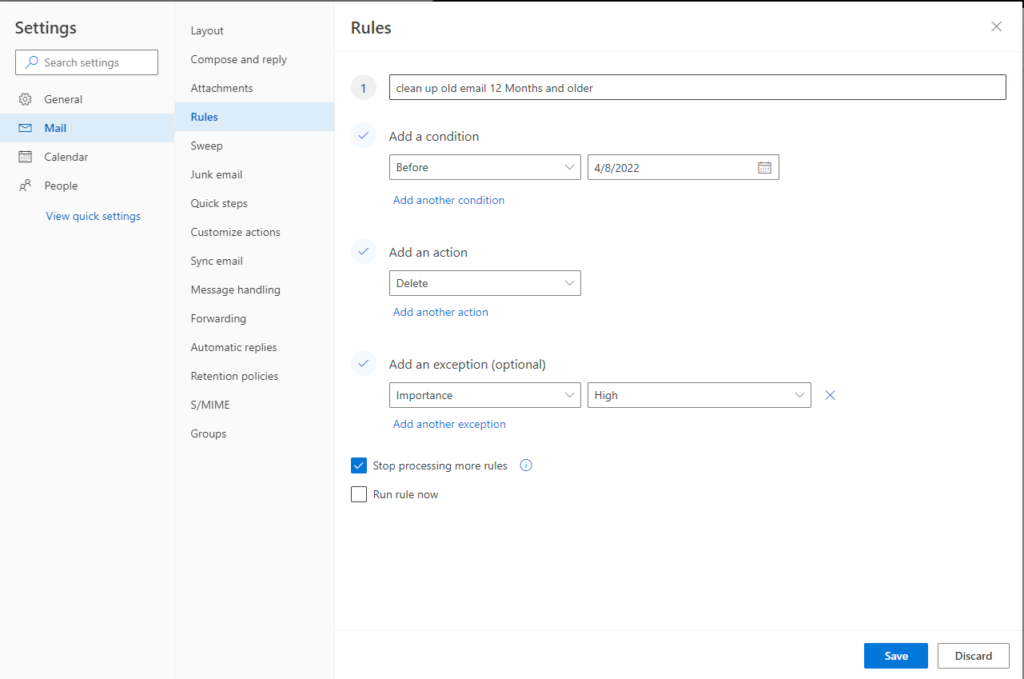
Name your rule, something like “clean up old email 12 Monthsand older” or something that makes sense to you.
Now add a condition
There are so many options, select whatever you like, I am selecting “Before 4/8/2022”
Note: you will need to just update the date in the rule later on.
Then select the Action, you want to do, I am selecting “Delete“
You can get your emails back from Deleted Items unless the default email deleted policy will clean up have permanently deleted, which most cases 30, 60, or 90 days from the date it was deleted
Also, added an exception so I can keep Importance with “High” or whatever you like.
Once you are happy with everything click Save
That’s it, don’t forget, if you set to delete or whatever condition you have selected, it will automatically do just that, in case later in time you might be wondering what’s happening to my old emails
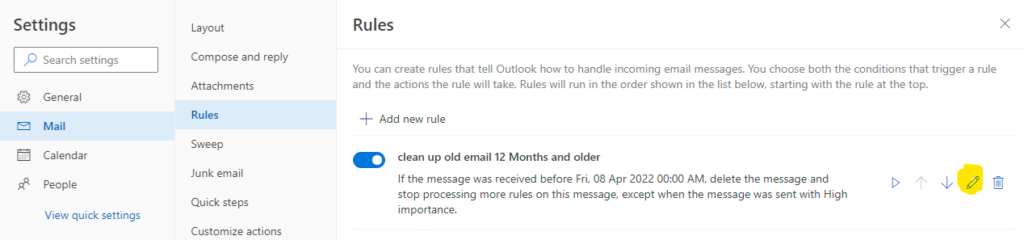
To change the Date or Turn off the rule, just go to Mail>Rules and click on the pencil icon to change or the Toggle button to turn off.
Double-check all selections before running, because there are no ways to stop, once it started the action you have selected in the rule. If you are unsurely tested on some test account(s).